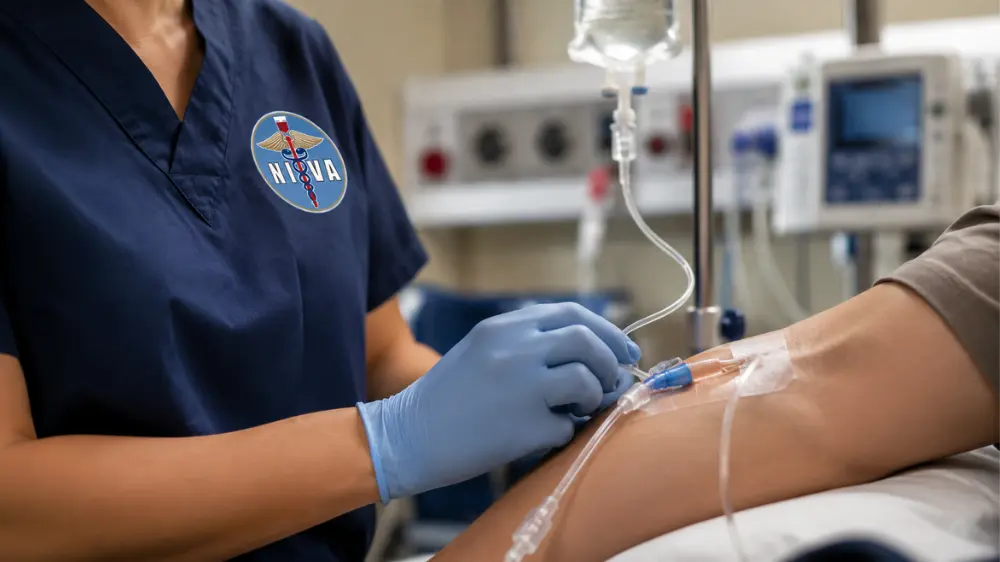
Intravenous (IV) therapy and blood transfusion are cornerstone interventions across acute care, ambulatory care, perioperative settings, oncology clinics, veterinary practices, and dental surgeries. Whether you’re preparing for the National IV Exam or expanding your clinical knowledge, this guide provides a detailed, evidence-informed reference covering IV insertion, vascular access, infusion therapy, blood transfusion procedures, sterile technique, infusion physiology, transfusion reactions, documentation, and patient-centered teaching strategies. As a clinician-educator, I write specifically for student nurses, nurses, anesthesia techs, veterinary techs, dentists, and phlebotomy students to support safe IV practice and professional development.
In this guide, you’ll learn:
- When IV therapy and blood transfusions are indicated
- How to select veins, catheter gauges, and IV fluids for different clinical situations
- Best practices for peripheral IV insertion, sterile technique, and medication safety
- How to recognize and respond to transfusion reactions and infusion-related complications
- Proper documentation, patient monitoring, and blood collection techniques
- Scope-of-practice responsibilities and patient safety best practices
When is IV Therapy and Blood Collection Needed?
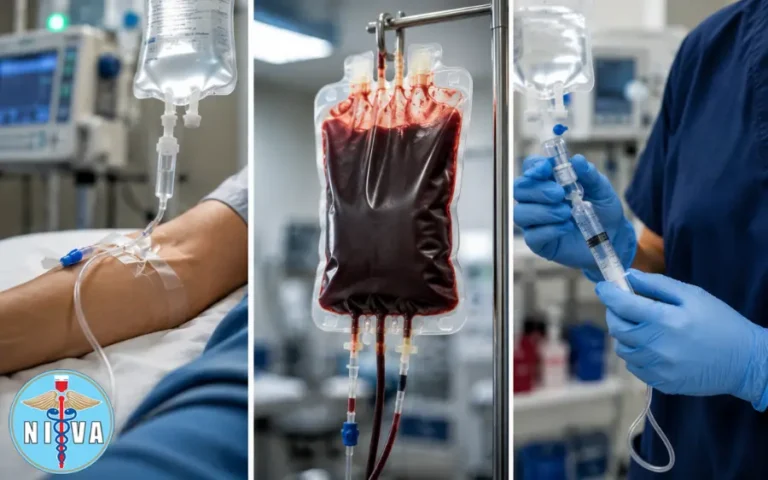
IV therapy is not limited to fluid rehydration. Common clinical indications include:
- Intravenous fluid replacement and electrolyte correction, including isotonic (e.g., normal saline), hypotonic, and hypertonic solutions.
- Blood and blood component transfusion (packed red blood cells, platelets, plasma, cryoprecipitate).
- Medication delivery—antibiotics, chemotherapeutic agents, immunosuppressants, analgesics, vasoactive infusions, and emergency drugs (e.g., atropine, epinephrine).
- Chemotherapy and biologic therapies that require controlled infusion rates and central venous access in some cases.
- Vitamin therapy and parenteral nutrition when enteral routes are inadequate.
- Phlebotomy for diagnostic testing and therapeutic blood collection.
Critical point: IV therapy and blood product administration require physician (or authorized prescriber) authorization. Before performing IV therapy independently, all personnel—including student nurses, nurses, anesthesia techs, veterinary techs, and dentists—should understand their scope of practice, facility policies, and professional responsibilities. For more information, see the NIVA Code of Ethics and Scope of Practice.
Vascular Anatomy for Safe IV Insertion
- Epidermis — skin barrier; primary site for antisepsis.
- Dermis — contains sensory nerves and capillary plexuses; potential for pain and bleeding.
- Hypodermis/Subcutaneous tissue — fatty layer; provides mobility but can obscure veins.
- Venous wall (tunica) — internal endothelial lining is fragile and must be handled with aseptic technique to prevent thrombosis and phlebitis.
Sterile Technique for Safe IV Insertion
IV therapy carries systemic risks because infused fluids and medications bypass cutaneous defenses and rapidly enter the circulation. Errors can cause systemic infections, extravasation leading to tissue necrosis, and even air embolism. Therefore:
- Use strict aseptic technique for catheter insertion and blood product handling. (Proper sterile technique is one of the most effective ways to reduce catheter-related infections and other IV complications.)
- Prepare the skin using chlorhexidine when available. A full 30-second to 1-minute friction scrub is recommended by many protocols for central and peripheral access sites—ensure the one-minute cleanse for optimal antisepsis when indicated.
- Don appropriate personal protective equipment and use sterile gloves for catheter insertion per facility policy.
- Label IV lines and tubing immediately after setup. Confirm medication names and concentrations by reading the labels aloud with a second clinician when available.
How to Choose the Best Vein for IV Insertion
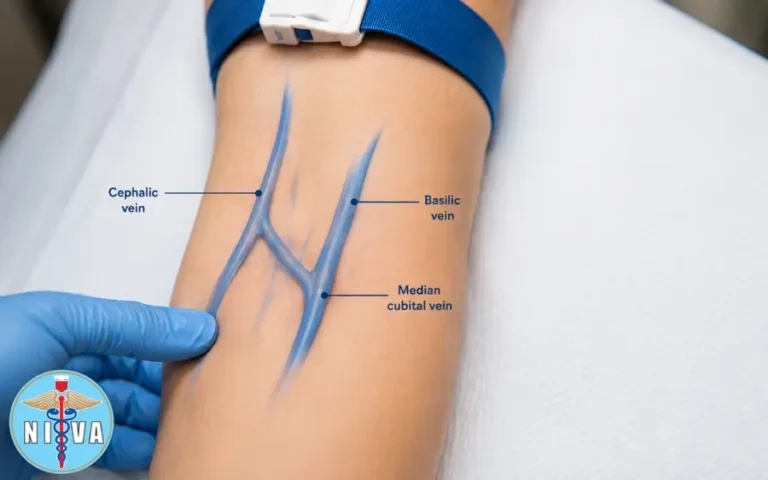
The antecubital fossa remains the most accessible site for many phlebotomies and peripheral IVs. The primary superficial veins are the cephalic, basilic, and median cubital veins.
Key practical tips:
- Trace the vein for at least one inch (2–3 cm) proximally and distally to ensure straight, patent vein length for catheter advancement.
- Avoid hand veins and lower extremity veins unless clinically necessary—this is especially important in patients with diabetes mellitus where perfusion and healing can be compromised.
- Consider the patient’s comfort and mobility; avoid placing IVs over joints when possible.
How to Insert a Peripheral IV Catheter
The mechanical steps of venipuncture are deceptively simple but require practice to master. For a complete walkthrough of the procedure, see our step-by-step guide to peripheral IV insertion.
- Insertion angle: 15–28 degrees relative to the skin surface is the commonly accepted range for peripheral venous cannulation. For tighter, superficial veins, use the lower end of the angle range (15–20°); for deeper or more mobile veins, a slightly steeper angle up to 28° may be needed.
- Bevel orientation: keep the bevel up to facilitate smooth entry and enable clear flashback visualization.
- Flashback: observe a flash of blood in the catheter hub as confirmation of venous entry. Once the flashback is visualized, lower the angle slightly and advance only the catheter—not the needle—into the lumen.
- Do not push too hard. Forceful advancement risks transfixing the vein and causing through-and-through puncture, hematoma, or infiltration.
- Resistance on flush: if you encounter resistance when flushing the catheter, assume you are not optimally positioned in the vein or that there is a clot/occlusion. Stop and reassess—do not force the flush.
IV Catheter Gauges and Flow Rates Explained
Choosing an appropriate catheter gauge depends on the infusion needs (blood transfusion vs maintenance fluids vs viscous medications) and the patient’s vein size. The table below outlines common peripheral IV catheter sizes and typical uses.
| Gauge (G) | Internal Diameter & Flow | Common Clinical Uses |
|---|---|---|
| 14 G | Very large, high-flow | Trauma, massive transfusion, rapid fluid resuscitation |
| 16 G | High-flow | Major surgery, large-volume transfusion |
| 18 G | Moderate-high flow | Blood transfusion, contrast administration, many IV medications |
| 20 G | Moderate flow | General IV fluids, blood draws in adults |
| 22–24 G | Small bore | Pediatric patients, fragile elderly veins, slow infusions |
Clinicians must balance the need for higher flow (e.g., for transfusion) against the risks of inserting large-bore catheters in fragile veins (common in elderly patients). When transfusing blood, an 18–20G peripheral IV is typically preferred for adults to minimize hemolysis and permit appropriate flow rates.
Types of IV Fluids: Isotonic, Hypotonic, and Hypertonic
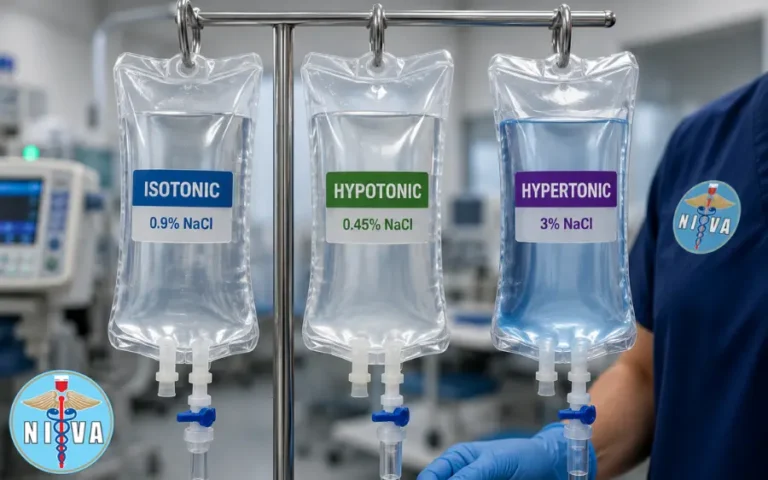
Understanding the osmolarity and physiologic targets of IV fluids is essential for safe therapy. For a more detailed discussion of fluid selection and tonicity, see our guide to Types of IV Fluids: Isotonic, Hypotonic, and Hypertonic Solutions Explained.
- Normal saline (0.9% NaCl) is isotonic. It closely matches extracellular osmolarity and is pH neutral relative to blood (blood pH 7.35–7.45). It remains within the vascular and interstitial compartments without significant osmotic shifts. Many resuscitation and blood administration protocols use normal saline as the carrier fluid.
- Hypertonic solutions (e.g., 3% NaCl, hypertonic saline) pull water from the intracellular compartment into the vascular space and can reduce cellular edema. They are useful in specific scenarios (e.g., cerebral edema) but can precipitate volume overload and osmolar shifts—use cautiously in patients with heart failure.
- Hypotonic solutions (e.g., 0.45% NaCl) promote movement of water into cells and interstitial space. They can treat dehydration due to hyperosmolar states but risk cellular swelling; avoid in patients at risk for increased intracranial pressure or with unstable hemodynamics.
IV Infusion Rates, Monitoring, and Patient Safety
Drip rates and infusion speed directly impact patient safety. Rapid infusion in fragile patients may precipitate cardiovascular overload and decompensation.
Key signs of infusion-related overload include:
- Increased heart rate (tachycardia)
- Elevated blood pressure
- Acute shortness of breath and tachypnea
- Decreased oxygen saturation (SpO2)
- Jugular venous distension and pulmonary crackles on auscultation
Two critical transfusion-related overload syndromes:
- TACO (Transfusion-Associated Circulatory Overload): due to rapid or excessive transfusion resulting in volume overload. Treat by stopping the infusion, providing oxygen, administering diuretics as indicated, and contacting the prescriber.
- TRALI (Transfusion-Related Acute Lung Injury): immune-mediated lung injury associated with transfusion; presents with acute hypoxemia and bilateral pulmonary infiltrates. It requires immediate cessation of the transfusion and advanced respiratory support.
Clinicians should also be familiar with the early signs of IV complications, including phlebitis, infiltration, extravasation, catheter-related infections, and air embolism. Our guide to Recognizing and Managing IV Complications explores these complications in greater detail.
Common Blood Transfusion Reactions and How to Respond
Blood transfusions can provoke a spectrum of reactions. Prompt recognition and action are essential to minimize morbidity and mortality. The table below summarizes common transfusion reactions, their typical onset, and immediate management steps.
| Reaction | Typical Presentation | Immediate Management |
|---|---|---|
| Acute Hemolytic Transfusion Reaction (AHTR) | Fever, chills, flank pain, hemoglobinuria, hypotension, oliguria/anuria; occurs minutes to hours after transfusion begins. | Stop transfusion, maintain IV line with normal saline, notify the blood bank and prescriber, obtain labs (bilirubin, hemoglobin, haptoglobin, direct antiglobulin test), and send the remaining blood and tubing to the blood bank. |
| Febrile Non-Hemolytic Reaction | Fever and chills during or within hours of transfusion, often in patients with previous transfusions. | Stop or slow the transfusion depending on severity, administer antipyretics, notify the blood bank, and consider leukoreduced products for future transfusions if reactions recur. |
| Allergic Reaction | Urticaria, itching, flushing; severe cases may progress to bronchospasm or anaphylaxis. | Stop the transfusion for anything beyond mild urticaria. Administer antihistamines for mild reactions. For anaphylaxis, give IM/IV epinephrine, provide airway support, and follow ACLS/anaphylaxis protocols. |
| Bacterial Contamination/Sepsis | High fever, rigors, hypotension, and septic shock occurring minutes to hours after transfusion. | Stop the transfusion, obtain blood cultures from the patient and blood bag, start broad-spectrum antibiotics, provide aggressive fluid resuscitation, and notify the blood bank and infection control. |
| TRALI | Acute hypoxemia within 6 hours, bilateral pulmonary infiltrates, and no evidence of circulatory overload. | Stop the transfusion, provide respiratory support (oxygen or ventilation), notify the blood bank, and provide supportive critical care. |
| TACO | Dyspnea, hypoxemia, hypertension, and pulmonary edema, typically within 6 hours of transfusion. | Stop the transfusion, sit the patient upright, administer oxygen and prescribed diuretics, monitor vital signs, and consider slower infusion rates or split units for future transfusions. |
| Air Embolism | Sudden dyspnea, chest pain, hypotension, or neurologic changes during or immediately after IV line manipulation. | Clamp the tubing, place the patient in the left lateral Trendelenburg position if possible, administer oxygen, activate the emergency response team, and ensure all IV connections remain secure to prevent recurrence. |
IV Medication Safety and Label Verification
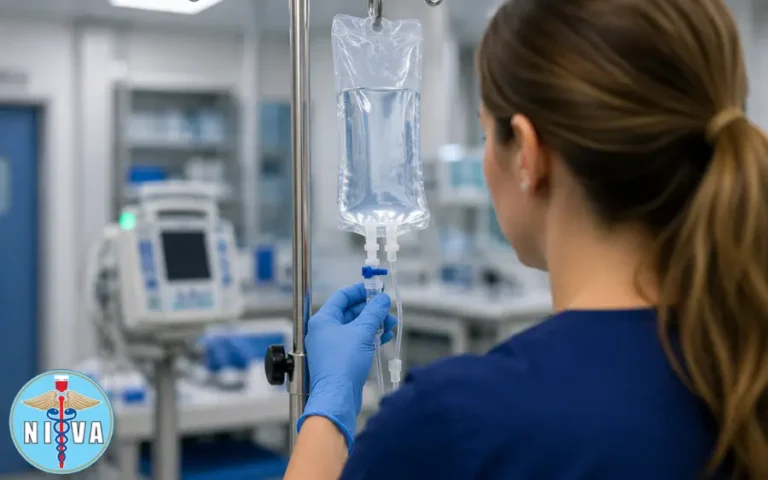
Medication errors involving IV lines can have systemic consequences because the drug enters circulation directly. Always:
- Read labels carefully—distinguish saline from medications such as atropine, lidocaine, dopamine, or chemotherapeutic agents. Verbalize the drug and dose when preparing to administer (two-person verification when required).
- Confirm drug compatibility before adding medications to IV lines or piggybacks. Use compatibility charts and pharmacy consultation for central lines and continuous infusions.
- Wait the appropriate dwell or clearance time before drawing blood from a line that has been used for medication infusion. Facility policies vary, but many require flushing the line with saline and waiting 2–5 minutes (or a specified volume/time) to avoid sample contamination—always follow your institution’s drawn-sample protocol.
- Do not use tourniquets on arms with active IV lines or blood transfusions—tourniquets can alter local pressure, encourage infiltration, and compromise collection quality.
How to Draw Blood from Patients with an IV
Phlebotomy in the presence of IV infusions requires extra attention:
- Whenever possible, draw blood from a site opposite the active IV. If the contralateral arm is not available, consider distal sites below the IV after stopping the infusion and flushing according to policy.
- Document the time the infusion was stopped, the volume of saline flush used, and the interval before blood sampling. This detail is part of quality control and helps the laboratory interpret results.
- For students and MAs, if you are outside your scope of practice, consult or defer to a supervisor. MAs must consult supervisory staff per facility policy before drawing from lines or altering infusions.
IV Therapy Documentation and Legal Responsibilities
Thorough charting is essential for patient safety and legal protection. Record:
- Time and date of IV insertion or blood transfusion start and stop.
- Gauge and type of catheter, exact insertion site (e.g., left antecubital, cephalic vein), number of attempts, and patient response to procedure.
- Medication names, doses, infusion rates, and any flush volumes used.
- Any adverse events, transfusion reactions, and actions taken including notifications, lab draws, and blood bank communications.
If you lack knowledge or experience to perform a task safely, admit that limitation and seek assistance. This is not only ethical but protects patients and your professional license. Student nurses, MAs, and allied personnel should always operate within their defined scope of practice and institutional policy. Learn more in the NIVA Code of Ethics and Scope of Practice.
Blood Transfusion Protocols and Laboratory Coordination

Blood product administration requires coordinated steps between the clinical team and the blood bank:
- Pre-transfusion checks: patient identification (two identifiers), product check (unit number, blood type, expiration), and baseline vital signs within the required window (often within 30 minutes) prior to starting transfusion.
- Initial transfusion rate: many facilities begin transfusions at a slower rate for the first 15 minutes (e.g., 1–2 mL/kg/hr, or a specified mL/hr per protocol) while closely monitoring for reactions. If no reaction, escalate to the ordered rate.
- Monitoring: document vitals at baseline, 15 minutes, 30 minutes, 1 hour, and at completion—or per facility policy and clinical status.
- Post-reaction laboratory steps: if a reaction is suspected, obtain required labs (urine for hemoglobin, direct antiglobulin test, post-transfusion CBC, blood cultures) and send them to the lab per the transfusion service protocol.
Special Considerations for Geriatric Patients
Older adults present unique vascular and physiologic challenges. The National Center for Aging and Development (NCAD) and the NIA provide guidance emphasizing:
- Fragile, tortuous veins with decreased subcutaneous tissue require smaller gauges (22–24 G) in many cases and careful stabilization of the catheter.
- transfusion strategies and slower infusion rates may be appropriate.
- Polypharmacy and altered pharmacokinetics alter responses to IV medications; consult medication reconciliation and pharmacy for dosing adjustments.
- Always consider comorbidities (e.g., CHF, renal impairment) when planning fluid and transfusion therapy; involve interdisciplinary geriatrics or palliative services if appropriate.
For evidence-based guidance on caring for older adults, medication safety, and patient communication, clinicians can refer to the National Institute on Aging (NIA), which provides resources for healthcare professionals and patient education.
How to Manage Blood Transfusion Reactions
If a transfusion reaction is suspected, act immediately:
- Stop the transfusion immediately, but maintain IV access with normal saline using a new tubing set to preserve venous access for medications and emergency treatment.
- Assess the patient using the ABC approach (Airway, Breathing, Circulation) and provide oxygen or airway support as required.
- Notify the appropriate personnel, including the prescriber, blood bank, and transfusion service without delay.
- Follow facility protocols for post-reaction investigations, including collection of appropriate laboratory specimens (e.g., post-reaction CBC, DAT, repeat crossmatch, blood cultures) and return the implicated blood product and tubing to the blood bank.
- Document thoroughly, including:
- Time of reaction
- Signs and symptoms
- Vital signs
- Interventions performed
- Communication with the prescriber, blood bank, and senior clinicians
Preventing IV Therapy and Blood Transfusion Complications
Preventing IV and transfusion-related complications requires a combination of standardized processes, clinical vigilance, and ongoing education.
Best practices include:
- Standardize patient identification procedures and two-person verification for blood products and high-risk medications.
- Use barcode scanning for patient identification and blood products whenever available.
- Follow evidence-based line care, dressing changes, and infection prevention bundles.
- Provide regular competency training and simulation exercises covering transfusion reactions, IV complications, and emergency response.
IV Therapy Scope of Practice and Professional Responsibilities

Every healthcare professional has a responsibility to practice safely within their education, training, and legal scope of practice.
Student nurses should always work under appropriate supervision, while medical assistants and other allied health professionals must consult a supervisor before performing procedures outside their approved competencies.
As a healthcare professional, you should always:
- Know your institution’s policies and your legal scope of practice.
- Recognize your limitations and seek supervision whenever necessary.
- Document accurately and completely, including:
- Time of procedure
- Catheter gauge
- Insertion site
- Patient response
- Education provided
- Participate in multidisciplinary communication and escalation pathways when infusion or transfusion complications occur.
Quality Improvement, Reporting, and Continuing Education
Maintaining competency in IV therapy and blood transfusion requires ongoing education and continuous quality improvement.
Healthcare professionals should:
- Report adverse events according to institutional and national reporting requirements.
- Participate in regular competency assessments and simulation training.
- Stay current with guidance published by the CDC, NIH, NLM, and other recognised professional organisations.
- Consider joining professional organizations such as the National Association of Phlebotomy and Transfusion Professionals (NAPTP) to support continuing education, professional development, and networking.
Practical Checklists for Bedside Clinicians and Students
Before the procedure:
- Verify the order and clinical indication.
- Obtain consent where required.
- Assemble equipment and check expiration dates.
- Perform hand hygiene and prepare the insertion site appropriately.
- Select the correct vein and catheter gauge.
During the procedure:
- Insert the catheter using the appropriate angle and technique.
- Confirm flashback before advancing the catheter.
- Secure and label all tubing and dressings.
- Monitor the patient closely throughout the infusion or transfusion.
If a transfusion reaction occurs:
- Stop the transfusion immediately.
- Keep the IV line open with new saline tubing.
- Notify the blood bank and prescriber.
- Collect required laboratory specimens.
- Document all findings and interventions.
Clinical Resources and Further Reading
Continue building your knowledge with evidence-based guidance and professional training from trusted organisations.
Clinical Guidance
- CDC: Infection prevention, surveillance, and patient safety.
- NIH: Clinical research and evidence-based healthcare resources.
- NLM: Medical literature and research databases.
- NIA: Older adult care, medication safety, and patient education.
Professional Education
- National IV Association — IV certification, instructor certification, and continuing education.
- PCT Institute of Healthcare — Phlebotomy and clinical support education.
- Phlebotomy Career Training — Hands-on phlebotomy and certification preparation.
- NAPTP — Professional standards, certification, and networking.
Key Takeaways for Practitioners and Learners
Safe IV therapy and blood transfusion practice depends on a combination of technical proficiency, clinical judgement, and effective communication.
Healthcare professionals should always:
- Follow aseptic technique and infection prevention protocols.
- Select the appropriate catheter gauge and infusion rate.
- Verify medications and blood products before administration.
- Recognise and respond rapidly to transfusion reactions.
- Document procedures thoroughly.
- Practice within their legal scope while seeking supervision whenever necessary.
- Prioritise patient safety, teamwork, and continuous professional development.
Continue Your IV Education
Whether you’re beginning your healthcare career, preparing for certification, or expanding your teaching credentials, ongoing education is essential to safe, evidence-based patient care.
Explore additional training and professional development through the National IV Association, or build your clinical skills with PCT Institute of Healthcare and Phlebotomy Career Training, offering certification-focused courses, hands-on education, and curriculum resources for aspiring and experienced healthcare professionals alike.
