Categories
IV Certification

The Ultimate Guide to IV Therapy Certification

IV Certification Guide

The Ultimate Guide to IV Therapy Certification

By Nancy Kimmel July 8, 2026

IV therapy certification guide: Learn how structured education, supervised skills practice, infection prevention, scope-of-practice awareness, and competency assessment support responsible vascular-access practice.

By Nancy Kimmel, MSN, FNP, RN, PhD CHMM, MSN-FNP-BC

Educational scope: This article supports professional learning and does not replace supervised skills training, current clinical orders, employer policy, manufacturer instructions, professional judgment, or applicable scope-of-practice requirements.

Why IV Therapy Certification Matters

IV therapy certification helps eligible healthcare professionals build the knowledge, supervised technical skills, and safety habits needed for vascular-access responsibilities within their role. Requirements vary by profession, jurisdiction, employer, and procedure, so completing a course does not by itself expand a clinician's legal scope of practice.

This guide reviews core concepts including anatomy, infection prevention, complications, documentation, competency assessment, and continuing education while emphasizing current orders, facility policy, manufacturer instructions, and appropriate clinical supervision.

What This IV Therapy Certification Guide Covers

This IV therapy certification guide is an educational overview for clinicians, learners, and instructors. It covers indications, anatomy and vein selection, supervised catheter-insertion skills, aseptic practice, fluid and medication principles, complication recognition, documentation, scope-of-practice considerations, special populations, teaching strategies, and competency maintenance.

Always use current institutional policies and authoritative clinical guidance for patient-specific decisions.

Core Indications for IV Therapy

Common indications for IV therapy include:

  • Blood collection and laboratory sampling
  • Administration of chemotherapy and immunosuppressants, with required authorization and strict protocols
  • Rapid and controlled fluid resuscitation for dehydration or hypotension
  • Continuous infusion of medications such as antibiotics, analgesics, antiemetics, and vasoactive agents
  • Vitamin therapy and parenteral nutrition

Physician authorization is required for many IV treatments, particularly chemotherapy and immunosuppressants, because of dosing complexity and risk. Always confirm orders, verify allergies and indications, and follow facility policy and scope of practice before initiating IV therapy.

Anatomy for IV Therapy Certification

Understanding the skin and vascular anatomy is essential for safe IV insertion. The needle and catheter traverse several layers:

Epidermis — the outermost barrier
Dermis — contains capillary loops and sensory fibers
Hypodermis — subcutaneous adipose and connective tissue
Venous tunica — intima, media, and adventitia

Practical mastery of anatomical landmarks and superficial veins supports appropriate selection of catheter length, gauge, and insertion angle and helps reduce complications.

Vein Selection for IV Certification

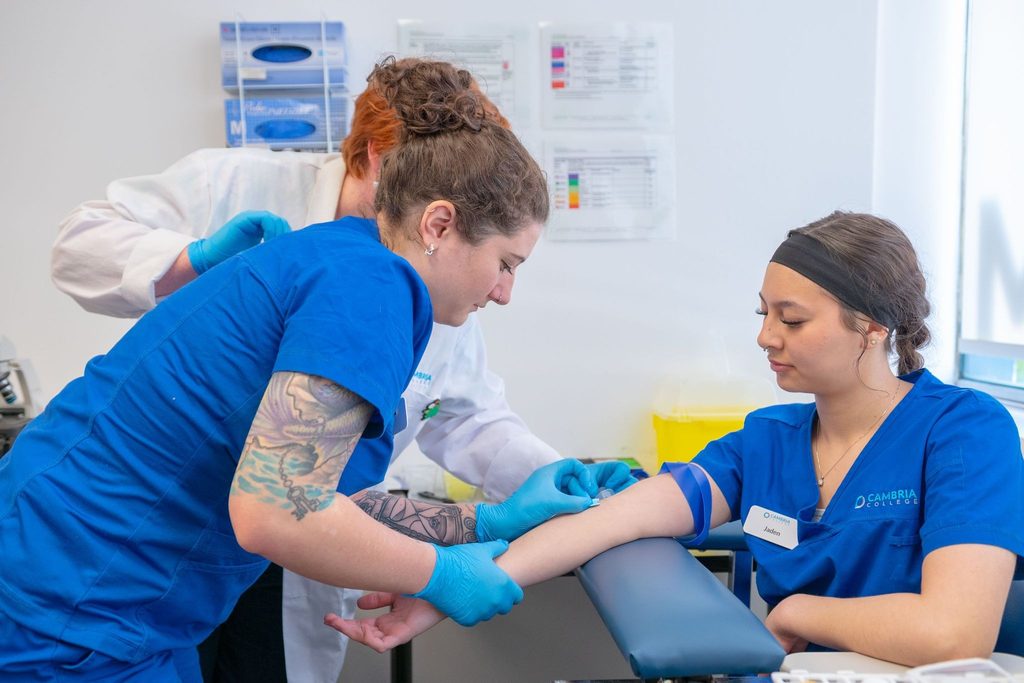
Vein selection is an essential skill. The antecubital fossa veins, including the cephalic, basilic, and median cubital veins, are often large and stable and are therefore commonly used for initial IV access or blood draws. Trace the vein for at least one inch to confirm direction and stability before puncture.

Avoid selecting veins on the dorsum of the hand or lower extremities unless clinically necessary. These sites can be less comfortable and more prone to complications, and some patient populations require additional caution.

Specific Considerations

  • Prefer the nondominant arm when feasible to preserve function.
  • Avoid arms with existing AV fistulas, dialysis grafts, or lymphedema.
  • In elderly patients, veins are fragile; select supported veins and use smaller-gauge catheters when appropriate.

Tracing and Assessing the Vein

Vein assessment should be performed using the technique taught in supervised training and required by the organization. Site selection should account for the intended therapy, vessel condition, patient factors, device characteristics, and local policy.

IV Therapy Certification Skills: Insertion Technique and Clinical Principles

A standardized approach supports consistency and reduces complications. The following reflects the existing educational content of this article and should be applied only within supervised training, current orders, facility policy, and professional scope.

Preparation

  • Confirm the physician order and indications; verify patient identity and allergies.
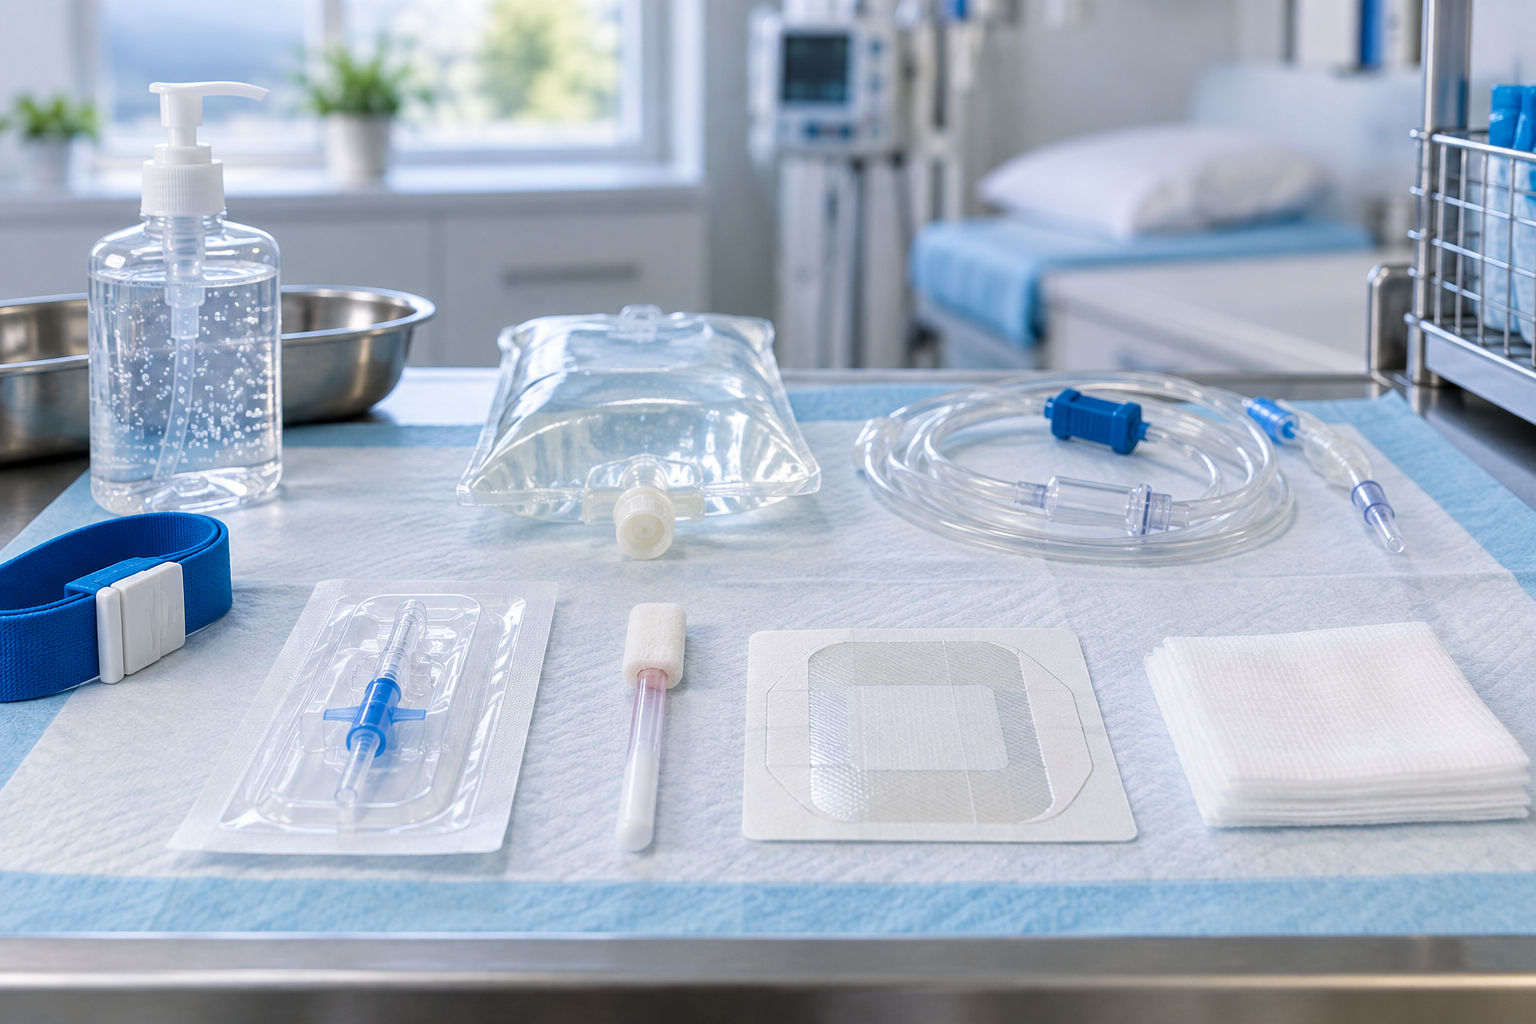
  • Gather supplies and check expiration dates, including the cannula, tourniquet, antiseptic prep, gloves, dressing, gauze, flushing solution, and securement device.
  • Explain the procedure to the patient and obtain informed consent when required.

Skin Antisepsis

Aseptic technique and proper skin preparation are essential. The CDC's intravascular-catheter recommendations advise preparing clean skin with an appropriate antiseptic before peripheral venous catheter insertion and allowing the antiseptic to dry according to the manufacturer's recommendation. Product choice, application method, allergy considerations, and special population precautions should follow current policy and product labeling.

Insertion Angle and Needle Orientation

Peripheral cannulation is generally performed using a shallow, controlled approach, but the exact angle and advancement technique depend on the device, patient anatomy, operator training, and local protocol. The NCBI Bookshelf review on peripheral line placement describes landmark-guided insertion at a shallow angle and emphasizes controlled advancement rather than force.

Verification and Securing

  • After catheter advancement and needle removal, follow the prescribed flushing protocol to confirm patency. If resistance is encountered, stop and reassess according to current policy.
  • Secure the catheter with an appropriate dressing. Transparent semipermeable dressings allow visualization of the insertion site.

Equipment: Gauges, Catheters, and Choosing the Right Device

Selection of gauge and catheter depends on the clinical need, including transfusion, blood sampling, infusion characteristics, and expected duration of therapy.

GaugeTypical Uses
14–16GTrauma, rapid blood transfusion, major surgery
18GLarge-bore fluids, blood transfusions
20GGeneral IV therapy, most adult infusions
22GPediatric, elderly, fragile veins
24GNeonates, very fragile veins, prolonged infusion with low flow rates

IV Therapy Certification and Infection Prevention

Infection prevention is central to professional practice. The existing article emphasizes skin antisepsis, full drying, aseptic non-touch technique for catheter and hub manipulations, dressing changes according to facility protocols, and patient education on signs of infection.

National IV Exam

Ready to move from learning to testing?

If you are ready to take the National IV Exam, continue directly to NIVA's dedicated exam registration page.

Complications: Recognition, Immediate Actions, and Prevention

The article identifies major IV-therapy complications including extravasation or infiltration, phlebitis, catheter-related bloodstream infection, thrombosis, tissue injury with certain medications, and other device-related complications. Recognition and escalation should follow the relevant clinical protocol rather than a generic web article.

Air Embolism

Air can enter the venous system during catheter insertion, line changes, or improper connection. The current article describes sudden dyspnea, chest pain, hypotension, and cardiovascular collapse as concerning signs. If an air embolism is suspected, stop the infusion, prevent further air entry when safe, activate the organization's emergency response process, and follow the applicable protocol and authorized clinician direction.

Extravasation and Tissue Injury

Certain vesicant medications can cause serious tissue injury if they leak outside the vein. Suspected extravasation requires a medication-specific, organization-approved response pathway. For antineoplastic agents, the current ONS/ASCO guideline on antineoplastic extravasation provides an evidence-based specialty reference for management considerations.

Infiltration vs. Phlebitis

Infiltration

Leakage of non-vesicant fluid into surrounding tissue. Signs described in the article include swelling, pallor, coolness, and decreased or absent IV flow.

Phlebitis

Inflammation of the vein. Signs described include erythema, warmth, tenderness, and a palpable cord.

For both, follow current policy for stopping the infusion, catheter management, site care, escalation, and documentation.

Fluid Principles in IV Therapy Certification

IV fluids affect intravascular and interstitial volumes based on tonicity. Understanding these effects is part of safe clinical decision-making.

Fluid TypeOsmolar / EffectClinical Uses Listed in the Article
Isotonic (e.g., 0.9% NaCl / Normal Saline) Maintains vascular volume; osmolarity approximates plasma Resuscitation, fluid maintenance when electrolytes are stable
Hypertonic (e.g., 3% NaCl) Pulls water into vascular space from cells Cerebral edema and hyponatremia, with caution
Hypotonic (e.g., 0.45% NaCl) Shifts water into cells and interstitial space Cellular dehydration and hypernatremia, with care

The article notes that 0.9% sodium chloride is commonly classified as an isotonic crystalloid, while also cautioning that osmolarity, tonicity, electrolyte composition, acid-base effects, and patient-specific risks should not be oversimplified. Fluid choice should match the clinical problem and current orders, with appropriate monitoring.

Drip Rates, Infusion Pumps, and Medication Safety

Infusion rates should be prescribed and verified. The article emphasizes close monitoring for signs of volume overload and the use of infusion pumps for critical infusions where accurate flow rates and alarms are important.

Medication Safety Points from the Existing Article

  • Read labels carefully and verify medication name, concentration, and expiration date.
  • Double-check high-risk medications with a second clinician when required by policy.
  • Follow recommended administration timing and flushing protocols for IV medications.
  • Follow approved timing and sampling procedures when drawing blood after medication administration.
  • Do not apply a tourniquet proximal to an active IV line when this would conflict with safe practice or facility policy.

Drawing Blood Near an Active IV or Infusion

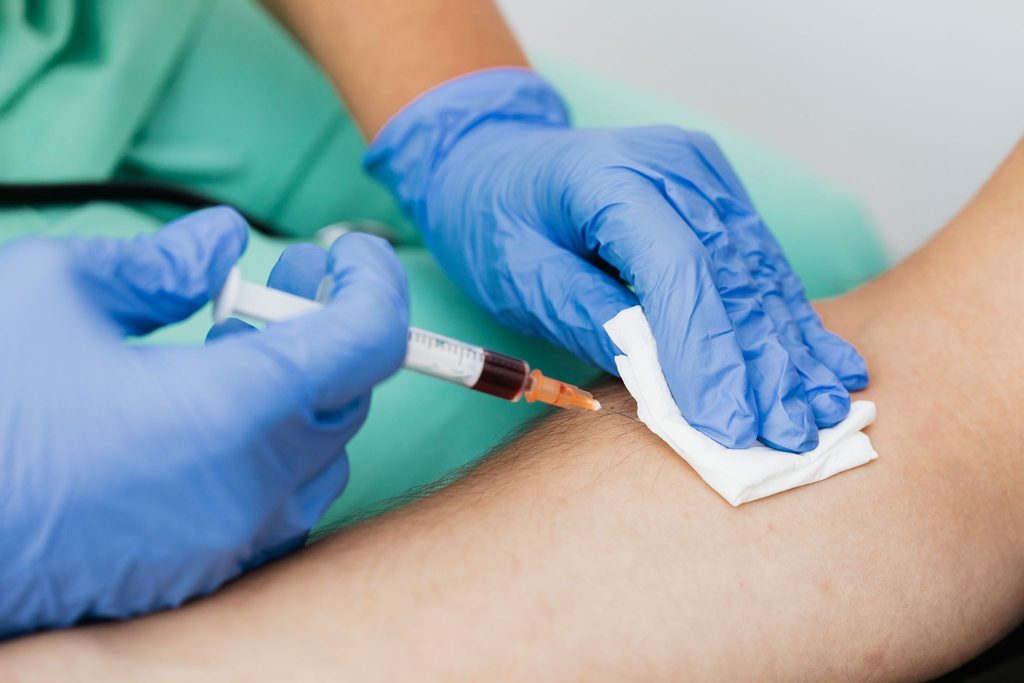
Blood collection near an active infusion can alter specimen results through dilution or contamination. The WHO Guidelines on Drawing Blood advise against collecting blood from an existing peripheral venous access site in hospitalized patients because IV fluid and medication can affect results. When a standard venipuncture site is not available, follow the organization's laboratory-approved procedure for site selection, infusion management, timing, discard requirements, and documentation.

Charting and Professional Responsibilities

Complete and timely documentation is a legal and professional responsibility. The article identifies documentation elements such as insertion or discontinuation time, catheter gauge and length, anatomical location, number of attempts, patient tolerance, medications infused, patient response, complications, interventions, and escalation of care.

Photography should only be used through an approved clinical workflow that protects patient privacy and complies with consent and recordkeeping requirements.

Medical assistants, pharmacy technicians, students, and other personnel must know the limits of their role and seek supervision or licensed-practitioner guidance when needed.

Scope of Practice and Legal Considerations

Scope of practice varies by profession, jurisdiction, licensure status, employer policy, delegation rules, education, and demonstrated competence. NIVA certification should not be treated as independently creating legal authority to perform an IV procedure.

Other professions should use the current regulator or licensing authority that applies to their role and jurisdiction. Employer privileges and facility policy may be more restrictive than a professional license or certification.

Geriatric Considerations: Skin Fragility and Older Adults

Older adults can experience age-related skin and vascular changes that may affect assessment, securement, bruising risk, and device selection. The National Institute on Aging's Skin Care and Aging resource notes that aging skin becomes thinner and that blood vessels become more fragile.

  • Select the device and site based on the patient's vessel condition, therapy, and current policy.
  • Use gentle stabilization and approved securement methods for fragile skin.
  • Avoid unnecessary heat or adhesive trauma to fragile skin.
  • Monitor fluid status carefully when age-related comorbidities increase overload risk.
  • Document baseline skin condition and reassess the site according to policy.
Older-adult reference

Teaching IV Therapy Certification: Preparation, Passion, and Patience

The article describes effective instruction as a combination of evidence-based technique, psychomotor skill development, clinical reasoning, risk management, and supportive teaching behaviors.

Preparation

Create detailed lesson plans, prepare supplies, and use standardized checklists and competency rubrics.

Passion

Model calm confidence, professionalism, and a visible commitment to safe practice.

Patience

Allow repeated practice, debriefing, reflective learning, and immediate feedback.

Psychological Safety

Build learning environments where students can acknowledge uncertainty, ask questions, and discuss errors constructively.

Managing Classroom and Clinical Dynamics

Classroom management can include staged skill stations, simulation with task trainers, progressive complexity, mentorship, and structured review of performance.

Continuous Learning and Faculty Development

IV therapy practice evolves as devices, infection-prevention strategies, and medications change. Faculty and learners should continue reviewing current guidance from public health organizations and professional associations.

Integrating Erikson's Psychosocial Theory into Teaching and Patient Care

Erikson's stages of psychosocial development are presented in the article as a framework for adapting communication and patient education to developmental needs.

Applying Erikson's Stages to Clinical Interactions

  • Trust vs. Mistrust: for infants, use parental presence and age-appropriate soothing strategies.
  • Autonomy vs. Shame: offer safe, limited choices to toddlers where appropriate.
  • Initiative vs. Guilt: use simple explanations and play-based approaches for preschoolers.
  • Industry vs. Inferiority: help school-age children understand equipment and participate safely.
  • Identity vs. Role Confusion: respect privacy and involve adolescents in appropriate decision-making.
  • Intimacy / Generativity: consider social roles and responsibilities for adults.
  • Ego Integrity vs. Despair: acknowledge life experience and patient values when caring for older adults.

IV Therapy Certification Pathways and Exam Preparation

IV therapy certification and competency requirements vary by profession, state, employer, accrediting body, and clinical activity. Programs may combine didactic learning, simulation, supervised practice, and demonstrated competency.

  • Master basic anatomy and vein-selection concepts.
  • Build insertion skill through supervised simulated practice.
  • Understand fluid physiology, infection control, medication compatibility, and emergency-response concepts.
  • Practice thorough charting and legal documentation.
  • Prepare for written knowledge testing and skills-based competency assessment where required.

Third-party training and certification programs may supplement employer-based competency verification. Learners should verify that any program aligns with their professional role, employer requirements, and applicable regulations.

Special Considerations for Veterinary and Dental Clinicians

Veterinary technicians and dental clinicians can face distinct IV-therapy requirements. Veterinary patients involve species-specific anatomy and dosing considerations, while dental clinicians who administer IV sedation may be subject to specific sedation, airway-management, emergency-preparedness, and licensure requirements.

Practical Tips: Troubleshooting Common Problems

  • No flashback? Reassess angle and depth rather than forcing advancement.
  • Resistance on flush? Stop and reassess; do not force fluid under pressure.
  • Frequent dislodgement? Review securement and dressing technique and use approved protective measures where appropriate.
  • Bleeding at the insertion site? Apply appropriate pressure, reassess risk factors, and follow local policy.

Documentation Template

The article recommends a standardized documentation template for continuity of care. Suggested fields include:

Patient identifiers and consent
Date and time of insertion
Site and laterality
Catheter gauge and length
Number of attempts
Skin-preparation agent and duration
Flush solution and volume
Patient response and immediate complications
Monitoring and dressing-change plan

Evidence-Based Clinical Resources

Strong outbound links should take the reader to the exact guideline, review, or regulatory resource that supports the surrounding topic—not merely to an organization's home page. The following links are used as clinical, regulatory, or evidence references in this guide.

Clinical Scenarios and Case-Based Learning

The original article uses case-based learning to help trainees consolidate knowledge. These examples are educational and should be interpreted through current protocols, supervision, and facility policy.

Case 1: Rapid Fluid Resuscitation in an Elderly Patient

An older adult receiving IV fluid develops increasing respiratory distress, crackles, and reduced oxygen saturation. The article's teaching points include stopping the infusion, escalating care, obtaining immediate authorized clinical assessment, and documenting the event and interventions.

Case 2: Vesicant Chemotherapy in a Peripheral IV

A patient receiving chemotherapy develops burning, pain, blanching, and localized swelling at the IV site. The article emphasizes stopping the infusion, following the organization's extravasation protocol, notifying the oncology team, and documenting the event. Catheter management may depend on the specific protocol and medication.

Maintaining IV Therapy Competency: Continuing Education and Recertification

Maintaining competency can involve periodic re-evaluation, supervised practice, simulation, knowledge testing, review of updated policies and guidance, and documented remediation where performance gaps are identified.

Employer and certifying-body requirements vary. Learners should verify the specific renewal and competency requirements that apply to their role rather than assuming one universal schedule.

Final Practical Tips for Student Nurses, Nurses, Anesthesia Techs, Veterinary Techs, and Dentists

  • Verify orders and indications rather than assuming.
  • Use a safety-first mindset, including sterile technique, correct labeling, and appropriate double-checks.
  • Know when to ask for help and disclose knowledge gaps.
  • Maintain clear, precise documentation.
  • Use simulation, supervised practice, and mentorship to build technical and clinical judgment.
  • Stay current with authoritative guidance and relevant professional resources.

Throughout the certification journey, patient-centered communication and appropriate developmental and geriatric considerations can help support respectful, individualized care.

Frequently Asked Questions About IV Therapy Certification

What is IV therapy certification?

IV therapy certification is structured education and competency assessment related to vascular-access knowledge and skills. The exact meaning and legal effect depend on the profession, jurisdiction, employer, and certifying organization.

Does an IV therapy certification course expand scope of practice?

No course alone automatically expands a professional's legal scope. Learners must verify applicable law, licensure rules, employer privileges, delegation requirements, and procedure-specific policies before performing IV therapy.

What should a strong IV therapy certification program include?

Look for current evidence-based instruction, qualified faculty, supervised simulation or skills practice, objective competency assessment, infection-prevention content, complication recognition, documentation, and clear alignment with the learner's role.

How is IV therapy competency maintained?

Maintenance commonly includes continuing education, supervised practice, periodic skills validation, review of updated policies and guidelines, and documented remediation when a performance gap is identified.

Where can I register for the National IV Exam?

If you are ready to take the exam, continue to NIVA's National IV Exam registration page .

References and Additional Reading

These links point to the specific guideline, review, regulatory framework, or evidence page relevant to the topic cited in this article.

Related Training and Certification Resources

Related-provider links are included for navigation only and are not used as independent clinical evidence for the statements in this guide.

Appendix: Quick Reference — Do's and Don'ts

DoDon't
Use an approved skin antiseptic and allow it to dry according to manufacturer instructions.Skip sterile preparation because of time pressure.
Use the technique taught in supervised competency training and required by facility policy.Push forcefully if resistance is felt on flush.
Trace the vein before puncture as taught in supervised training.Use a vein you cannot adequately assess or stabilize.
Document time, gauge, location, and patient response.Leave a partial or incomplete record undocumented.
Stop and escalate at the first sign of extravasation or systemic compromise according to protocol.Continue infusing despite significant burning, swelling, severe pain, or respiratory distress.

Resources for Clinical Instructors

Instructors developing IV therapy curricula should consider integrating:

  • Structured learning objectives with cognitive, psychomotor, and affective components
  • Competency checklists aligned with facility policy
  • Simulation scenarios that include emergency and complication recognition
  • Assessment tools that include reflective practice and quality improvement
  • Interprofessional learning opportunities with relevant clinical disciplines

The article also emphasizes preparation, passion, patience, and supervised learning opportunities that help learners build competence safely.

Further Reading and Continuing Education

Maintain a curated reading list built from direct sources such as the CDC's intravascular-catheter guidance, PubMed-indexed reviews, NCBI Bookshelf clinical references, NCSBN regulatory resources, WHO phlebotomy guidance, the NIA's aging resources, and specialty guidelines relevant to the learner's clinical area. When citing evidence, link to the exact guideline or article rather than an organization's general home page.

National IV Exam

Ready to Take the National IV Exam?

Continue directly to NIVA's dedicated exam registration page. If you want structured preparation first, the IV Technician Review Course is available separately.


Categories
Blog

Types of IV Fluids: Isotonic, Hypotonic, and Hypertonic Solutions Explained

IV fluids are commonly categorized as isotonic, hypotonic, or hypertonic according to how they influence water movement between fluid compartments.

By Nancy Kimmel, MSN, FNP, RN, PhD CHMM, MSN-FNP-BC — National IV Association

Overview: How IV Fluids Support Clinical Care

Intravenous (IV) therapy is one of the most powerful and commonly used clinical interventions across healthcare settings. IV access enables blood collection, rapid administration of fluids, infusion of chemotherapy agents and immunosuppressants, delivery of vitamins and parenteral nutrition, and administration of emergent medications. Because IV fluids and medications circulate rapidly through the vascular system, errors or lapses in technique can produce systemic, sometimes catastrophic, outcomes: bloodstream infections, tissue necrosis from extravasation, micro- and macro-emboli, and volume-related cardiopulmonary decompensation.

This article is written for student nurses, nurses, anesthesia techs, veterinary techs, and dentists who perform or supervise IV therapy. It explains isotonic, hypotonic, and hypertonic solutions in clinical terms, integrates procedural best practices, explores complications and prevention, and discusses educational and geriatric considerations for teaching and caring for patients.

Types of IV fluids represented by three IV fluid bags in a clinical setting
A visual overview of isotonic, hypotonic, and hypertonic IV-fluid categories.

Types of IV Fluids at a Glance

  • Isotonic: similar tonicity to plasma, with limited net cellular water shift.
  • Hypotonic: lower tonicity than plasma, encouraging water movement toward cells.
  • Hypertonic: higher tonicity than plasma, drawing water toward the extracellular and intravascular space.

Why Tonicity Matters in IV Fluids

Tonicity refers to the effective osmotic pressure gradient between two solutions separated by a semipermeable membrane (such as the capillary and cell membrane). In IV therapy, tonicity determines the movement of water between the intravascular compartment and intracellular/interstitial compartments:

  • Isotonic solutions: similar osmolarity to plasma — minimal net water movement into or out of cells.
  • Hypotonic solutions: lower osmolarity than plasma — water moves from the vascular space into cells and the interstitium.
  • Hypertonic solutions: higher osmolarity than plasma — water moves from cells/interstitium into the vascular space.

Understanding these movements guides fluid selection for clinical conditions such as hypovolemia, cellular dehydration, cerebral edema, and volume overload risks in patients with heart failure.

Clinical Profiles of Major IV Fluids

Solution Tonicity Common Composition / Examples Indications Risks / Notes
Normal Saline (0.9% NaCl) Isotonic Sodium 154 mEq/L, Chloride 154 mEq/L Volume resuscitation, fluid replacement, medication carrier Large volumes can cause hyperchloremic metabolic acidosis; monitor electrolytes and volume status. Frequently used as an isotonic baseline in many clinical settings.
Lactated Ringer’s (LR) Isotonic Sodium 130 mEq/L, Chloride 109 mEq/L, Lactate 28 mEq/L, K+, Ca2+ Resuscitation, surgical fluids, burns Contains potassium and calcium; use caution with hyperkalemia and compatibility with blood products (calcium containing). Lactate metabolized to bicarbonate.
0.45% NaCl (Half-normal) Hypotonic Lower sodium content than plasma Cellular dehydration, hypernatremia correction (careful) Can cause intravascular depletion and cellular swelling if administered to hypovolemic patients; monitor closely.
5% Dextrose in Water (D5W) Initially isotonic — then hypotonic after metabolism of dextrose Dextrose 5% in water Maintenance fluid, free water source After dextrose is metabolized, free water distributes into intracellular space — can worsen cerebral edema if used in head injury.
3% or 5% NaCl Hypertonic High sodium concentration Treatment of acute symptomatic hyponatremia, reduction of cerebral edema in selected cases Powerful intravascular shift of water — risk of osmotic demyelination if corrected too rapidly and volume overload in cardiac/renal patients.

Clinicians should always consult facility policies, pharmacist recommendations, and the patient’s comorbidities before selecting fluid therapy. Normal saline (0.9% NaCl) is often described as isotonic with plasma and is a mainstay in resuscitation; modern clinical practice recognizes pH and chloride content differences among fluids and emphasizes matching the fluid to the clinical issue.

How IV Fluids Move and Why That Matters: Physiologic Mechanics

When a solution is infused intravascularly:

  • Isotonic solutions expand the vascular compartment; they are useful for restoring circulating volume without significantly altering cellular hydration.
  • Hypotonic solutions reduce vascular osmolarity, promoting movement of water from the intravascular compartment into the interstitium and cells — useful for treating cellular dehydration but potentially harmful if the vascular volume is already low.
  • Hypertonic solutions raise plasma osmolarity and pull water from the interstitial and intracellular spaces into the vascular space — this can reduce tissue edema but can precipitate or worsen congestive heart failure by increasing intravascular volume and preload.

Always consider the clinical context: in a hypovolemic patient, a hypotonic infusion may worsen hemodynamics; in a patient with cerebral edema, hypertonic saline may be lifesaving but requires cerebroprotective monitoring and careful correction rates.

Layers Traversed During Peripheral IV Insertion

Understanding anatomy is critical for proper placement and troubleshooting. A peripheral IV catheter passes through these layers in sequence:

  • Epidermis — superficial barrier, subject to colonization; proper antisepsis reduces infection risk.
  • Dermis — contains capillaries, nerve endings and connective tissue; discomfort or pain during insertion often comes from dermal penetration.
  • Hypodermis (subcutaneous tissue) — adipose tissue; deeper tissues can attenuate catheter advancement and complicate securement.
  • Venous tunica — the vein wall (intima, media, adventitia); careful advancement of catheter into the lumen without transfixation is required.

Peripheral IV Insertion: Step-by-Step Best Practices

The following procedural elements are adapted from clinical lecture material and represent safe practice for student nurses, nurses, anesthesia techs, veterinary techs, and dentists who place or assist with peripheral IVs:

  1. Verify physician or authorized healthcare professional order for IV therapy. IV therapy, including blood collection, chemotherapy, immunosuppressants, and vitamin therapy, must be ordered and documented.
  2. Perform hand hygiene and assemble equipment; use personal protective equipment as indicated.
  3. Choose an appropriate vein. The antecubital fossa provides the cephalic, basilic and median cubital veins that are commonly used. Palpate and “trace” a vein for about an inch to ensure continuity and direction. Avoid hands and legs unless necessary; avoid leg veins especially in diabetic patients due to risk of poor healing and thrombosis.
  4. Apply the tourniquet proximal to the planned site (avoid placing a tourniquet over an existing IV catheter). Note: do not apply a tourniquet to an arm with an active IV line.
  5. Cleanse the skin with chlorhexidine gluconate (as recommended) using a back-and-forth friction for at least 30 seconds and allow to dry for 1 minute to maximize antisepsis before insertion.
  6. Position the bevel upward and insert the catheter through the epidermis at a 15–28 degree angle to the skin. A shallow angle reduces the risk of transfixing the vessel. Watch for flashback (blood in the catheter hub) which indicates lumen entry.
  7. Advance the catheter until it is appropriately seated in the lumen; if you encounter resistance when flushing or if there is no flashback, assume the catheter is not intravascular and consider withdraw-and-reassess rather than forceful advancement. Do not push too hard; you can easily pass through and create extravasation or hematoma.
  8. Secure the catheter, apply an appropriate dressing, and label with date/time/gauge. Document per facility policy (see charting section).
  9. Flush per protocol: gentle flush to verify patency. If you encounter resistance while flushing, stop—resistance suggests that the catheter tip is not in the lumen or that a valve is obstructed.

Key Technical Pearls

  • Bevel up during insertion; this optimizes penetration and minimizes vein wall trauma.
  • Do not “force” the catheter through a vessel wall—if you feel tissue give or the flashback then disappears after advancement, reassess for transfixation.
  • Use the smallest gauge appropriate for the therapy to minimize vessel trauma—match gauge to indication (e.g., large bore for rapid transfusion, smaller for routine maintenance or fragile veins).
  • Label the dressing with time and date for timely replacement.

IV Fluids and Catheter Complications: Recognition and Response

Because IV therapies act systemically, early recognition of complications is essential. Common complications, recognition signs, and immediate actions include:

  • Infiltration: cool, pale, swollen tissue around the site, decreasing or absent blood return. Stop infusion, remove catheter, elevate limb, apply warm compress if indicated, and document.
  • Extravasation: infiltration of vesicant drug causing tissue injury (pain, blistering). Stop infusion, aspirate residual drug from catheter, leave catheter in place for potential antidote administration, notify provider immediately, follow facility extravasation protocol.
  • Phlebitis: erythema, warmth, tenderness along the vein. Stop infusion, remove catheter, apply warm compress, document. Consider switching to an alternative site.
  • Air embolism: sudden respiratory distress, hypotension, altered mental status. Place patient in left lateral decubitus and Trendelenburg if tolerated, administer high-flow oxygen, call a code, and notify provider immediately.
  • Catheter embolism: abrupt loss of catheter tip during removal or manipulation. Clamp proximal tubing, notify provider and risk-management per protocol.
  • Speed shock: systemic reaction to rapid medication delivery — hypotension, syncope, arrhythmia. Stop infusion immediately and resuscitate as needed.
  • Fluid overload / pulmonary edema: dyspnea, tachycardia, elevated BP, decreased oxygen saturation, crackles on auscultation. Stop or slow infusion, raise head of bed, oxygenate, notify provider; in severe cases this can progress to code blue.
  • Bacteremia/Line-associated infection: fever, chills, erythema at site. Remove catheter if infection suspected, obtain blood cultures per protocol and begin treatment per guidance.

IV Fluids, Rapid Infusion, Drip Rates, and Drug Compatibility

Infusion rates must be set according to the patient’s age, size, cardiac status, and the fluid/medication prescription. Rapid infusion in fragile patients can precipitate cardiovascular decompensation—clinical signs include tachycardia, hypertension (or hypotension in shock), dyspnea, low oxygen saturation, and signs of pulmonary edema. In severe cases, these signs may herald cardiopulmonary collapse (a “code blue”).

When calculating drip rates and selecting delivery mechanisms:

  • Use infusion pumps for precise delivery of vasoactive medications, chemotherapy, and when small rates or critical timing are necessary.
  • Calculate gravity drip rates using the formula: (Volume in mL × drop factor) / minutes = drops per minute; however, pumps are preferred where accuracy is essential.
  • Be aware of medication compatibility: always read labels carefully. Saline bags, atropine, lidocaine, and many other medications may have different concentrations and carriers. Do not assume that a bag labeled “saline” is the same as one that includes medications; check the label and the patient’s order.
  • Some medications are vesicants or irritants and must not be administered via peripheral lines if alternatives exist. Confirm the medication’s properties and recommended administration route before infusing.

Example: Atropine vs Lidocaine — Read the Label

Atropine and lidocaine are frequently used in emergency settings and may be administered through IV access. Each carries different indication, dose, and compatibility concerns. Before giving any medication through an IV, verify:

  • Right patient, medication, dose, route, time.
  • Drug compatibility with the carrier fluid and with concurrently infusing medications.
  • Label of the bag for inadvertent admixtures; confirm that the bag contains the ordered solution and not another drug or concentration.

IV Fluids and Blood Sampling: Timing and Technique

Drawing blood through an existing IV line is generally discouraged. If unavoidable and permitted by facility policy, adhere to strict protocols to avoid contamination and inaccurate results:

  • Stop the infusion and flush the line; discard an initial volume (waste volume) of blood equal to at least the catheter and extension set volume before collecting the specimen.
  • Wait per facility protocol and medication-specific guidance before drawing blood for therapeutic drug monitoring; some drugs require specific time windows relative to dosing.
  • When drawing blood through an IV that has had recent medication (e.g., after an atropine or lidocaine bolus), allow appropriate time per medication characteristics and institutional guidelines to avoid contamination of the specimen or misinterpretation of therapeutic levels.

Always follow institutional policy. If unsure, stop and consult a supervisor—scope-of-practice adherence is essential. Medical assistants (MAs) and other non-licensed personnel must consult supervising clinicians when procedures approach their scope limits.

Documenting IV Fluids and IV Therapy

Complete and accurate documentation is both a clinical and legal necessity. Chart entries provide continuity of care and protect clinicians and facilities from litigation. Essential elements when charting IV therapy include:

  • Time and date of insertion or removal.
  • Site and laterality (e.g., right dorsal hand, left antecubital fossa — cephalic vein).
  • Gauge and catheter type.
  • Number of attempts and who performed the procedure.
  • Patient response: pain, syncope, allergic reaction, comfort level.
  • Type and volume of fluid infused, medication names and doses, sequence, and compatibility notes.
  • Assessment of site: erythema, drainage, swelling, heat, tenderness, bruit or thrill if central lines (if applicable).
  • Education provided to the patient and family, including follow-up instructions.

Charting with precision demonstrates that you met standards of care; failure to document can be interpreted as failure to perform care. If you lack knowledge or are unsure about an action, involve your supervisor and document that consultation.

IV Fluids for Special Patient Populations: Pediatrics, Adults, and Geriatrics

Assessment and fluid selection must be individualized. Geriatric patients deserve special attention because physiological changes with aging alter skin integrity, venous elasticity, renal function, and cardiovascular reserve. The National Center for Aging and Development (NCAD) and the National Institute on Aging (NIA) provide valuable resources on older adult physiology and individualized care considerations. Links: NIA (see geriatric resources).

In older adults:

  • Veins are more fragile; use smaller gauge catheters and gentle technique.
  • Skin is thinner; antiseptic and dressing application should avoid undue tension that can tear skin.
  • Volume tolerance is lower—monitor closely for fluid overload and pulmonary edema.
  • Comorbidities and polypharmacy increase the risk for electrolyte disturbances and drug interactions.
  • Assess cognitive status and use communication strategies tailored to the patient’s Eriksonian psychosocial stage (see below).

Erikson’s Psychosocial Development Integrated into IV Care and Education

Erikson’s eight stages of psychosocial development provide a framework to tailor patient and learner education across the lifespan. Applying Erikson to IV therapy and teaching helps clinicians and educators communicate effectively and support autonomy, trust, and dignity:

  • Infancy (Trust vs. Mistrust): For infants requiring IV access, build trust with caregivers, maintain consistency, and use comforting measures during procedures.
  • Toddler (Autonomy vs. Shame): Offer limited choices (e.g., choosing which limb is comforted) and allow expression to preserve autonomy.
  • Preschool (Initiative vs. Guilt): Use simple explanations and encourage initiative (e.g., holding a favorite toy during insertion).
  • School Age (Industry vs. Inferiority): Provide age-appropriate explanation about the procedure, allow participation in small tasks like counting breaths, and reinforce competence after completion.
  • Adolescence (Identity vs. Role Confusion): Respect privacy, give clear rationales for procedures, and involve adolescents in decision-making where appropriate.
  • Young Adult (Intimacy vs. Isolation): Discuss concerns about body image and social impact of IVs; respect preferences and foster rapport.
  • Middle Adulthood (Generativity vs. Stagnation): Emphasize function and role responsibilities, and involve patients in care planning that supports their roles.
  • Older Adulthood (Integrity vs. Despair): Attend to life review, clarify goals of care, explain how IV therapy aligns with or deviates from overall goals, and support dignity in decision-making.

Instructors and bedside educators should use Erikson’s model when teaching student nurses, nurses, anesthesia techs, veterinary techs, and dentists how to communicate with patients at different life stages. This improves consent processes, cooperation during procedures, and satisfaction with care.

Teaching IV Fluids and IV Skills: Instructor Principles

Teaching IV therapy requires more than technical demonstration. Instructors must exhibit:

  • Preparation — know the equipment, common complications, and policies.
  • Passion — enthusiasm improves learner engagement and retention.
  • Patience — learners progress at different paces; create low-stress environments for practice.
  • Classroom and clinical dynamics management — handle learners’ differing skill levels, maintain safety, and ensure supervised practice on live patients is appropriate under institutional policies.
  • Continuous learning — integrate evidence-based updates, new devices, and evolving infection-prevention practices into curricula.

Integrate simulation, structured feedback, and competency checklists. Point learners to accredited programs and resources such as PCT Institute of Healthcare and Phlebotomy Career Training for supplemental phlebotomy and IV training. For professional organizations and standards, check resources such as the CDC, NIH, and NLM.

Geriatric Considerations and National Aging Guidance

When caring for older adults, incorporate guidance from the National Center for Aging and Development (NCAD) and the NIA. Practical clinical steps include:

  • Assess vascular access options early—peripheral IVs may be more difficult; evaluate for midline or central access when long-term IV therapy is anticipated.
  • Minimize repetitive cannulation by choosing the most durable site and using ultrasound guidance when available for difficult access.
  • Monitor fluid management conservatively—older adults are at high risk for heart failure and renal dysfunction.
  • Coordinate medication reviews to avoid polypharmacy issues and inadvertent duplication during IV-to-oral transitions.

IV Fluids, Compatibility, Additives, and Reading Labels

Drug–fluid compatibility and additive compatibility is a core safety expectation. Examples of key safety checks:

  • Confirm that the solution container is the intended carrier fluid. A bag labeled “saline” may look similar to a medication-labeled bag; visually inspect all labels and confirm drug names and concentrations.
  • Check compatibility charts before adding medication to an IV bag; some drugs cannot be mixed due to precipitation or chemical inactivation.
  • Be especially vigilant with electrolytes and high-concentration medications; hypertonic saline and concentrated potassium require central access or strict monitoring per protocol.

Infiltration vs Extravasation: Detailed Differences

Understanding the difference is vital because management differs:

  • Infiltration — non-vesicant fluid enters the tissue. Symptoms: coolness, pallor, swelling, pain or discomfort. Management: stop infusion, remove catheter, elevate limb, warm or cold compress per policy, monitor and document.
  • Extravasation — vesicant (tissue-damaging) drug enters tissues. Symptoms: intense pain, blistering, necrosis. Management: stop infusion, leave catheter in place for possible aspiration of drug, initiate antidote therapy if available (e.g., hyaluronidase for some agents), notify prescriber, and follow institutional extravasation protocol.

Infusion Devices and Pumps: When to Use What

Infusion technology ranges from gravity sets to electronic infusion pumps and pressure bag systems. Consider these:

  • Use an infusion pump for vasoactive medications, chemotherapy, and fluids requiring precise volumetric or rate control.
  • For large-volume resuscitation (e.g., trauma), large-bore peripheral cannulae or central access and rapid infusers may be required.
  • Gravity systems are acceptable for routine maintenance fluids when pump availability is limited, but documented monitoring is required to ensure rate accuracy.

Teaching Specific Audiences: Tailoring Education to Roles

Different clinical roles apply IV therapy differently. Training content should be tailored to each audience:

  • Student nurses — rigorous simulation and supervised clinical practice; emphasis on anatomy, aseptic technique, and documentation.
  • Nurses — advanced assessment skills, complication management, medication administration, and leadership in IV therapy decisions.
  • Anesthesia techs — focus on rapid access techniques, airway and hemodynamic implications of fluids, and equipment readiness for emergent infusions.
  • Veterinary techs — adapt human principles to animal anatomy and pharmacology; species-specific fluid types and calculation methods are required.
  • Dentists — generally limited to local and intravenous sedation contexts; training should emphasize safe IV sedation practices, recognizing systemic effects, and recovery monitoring.

For ancillary training programs and certificate courses, refer students to resources such as PCT Institute of Healthcare and Phlebotomy Career Training for foundational phlebotomy skills which complement IV therapy competencies.

IV Fluids: Regulatory and Professional Resources

Keep institutional policies aligned with national guidance. Useful external resources include:

IV Fluids: Practical Checklists and Quick Reference

Pre-Insertion Checklist

  • Confirm order and indication for IV therapy.
  • Gather equipment and ensure sterility.
  • Identify optimal vein (antecubital cephalic/basilic/median cubital when appropriate; avoid hands/legs if possible).
  • Explain procedure to the patient and obtain consent where applicable.
  • Perform chlorhexidine skin prep and let dry for recommended time (1 minute recommended in many protocols).

Insertion and Post-Insertion Checklist

  • Insert at 15–28 degree angle with bevel up; watch for flashback.
  • Advance catheter gently; do not force. If resistance on flush, stop and reassess.
  • Secure catheter and apply dressing; label with time/date/gauge.
  • Flush and confirm patency; document insertion details.
  • Educate patient to report any pain, swelling, or breathing difficulty immediately.

Documentation Template (Suggested Fields)

Field Notes
Time/Date Document insertion, changes, and removal times.
Site/Vein Include side (R/L) and specific vein (e.g., R antecubital, cephalic).
Gauge/Device Record catheter size and type.
Number Attempts Note attempts and personnel performing.
Patient Response Pain level, syncope, allergic reaction.
Fluid/Medication Type and volumes infused; medication names and doses.
Assessment Site condition, patency, complications.

Scope of Practice and Professional Responsibility

Clinicians must practice within their authorized scope. Medical assistants and other allied personnel need to consult and defer to supervising licensed practitioners when a task exceeds local training or scope. Always be honest about your competence; admitting lack of knowledge and seeking supervision protects patient safety and your professional standing.

Quality Improvement and Continuous Learning

IV therapy is a dynamic area of practice with ongoing advances in antisepsis, catheter materials, ultrasound-guided access, and infusion safety technologies. Instructors and clinical leaders should foster a culture of continuous learning through competency assessments, root-cause analysis of complications, and adoption of evidence-based updates. Encourage student nurses, nurses, anesthesia techs, veterinary techs, and dentists to engage in continuing education and formal training programs to maintain skills and knowledge.

Selected References and Learning Resources

Appendix: Quick Reference—Which Fluid for Which Clinical Scenario?

Clinical Scenario Recommended Fluid Type Rationale / Cautions
Acute hypovolemia (trauma, hemorrhage) Isotonic crystalloid (NS or LR); blood products as indicated Restore intravascular volume rapidly; monitor for coagulopathy and dilutional effects.
Maintenance fluid with normal electrolytes Isotonic or isotonic with dextrose per physician order Prevent hyponatremia; avoid hypotonic solutions that may cause vascular depletion.
Severe hyponatremia with neurologic symptoms Hypertonic saline (3%) under strict monitoring Correct sodium slowly to avoid osmotic demyelination; monitor sodium frequently.
Cellular dehydration due to hypernatremia Hypotonic solutions (e.g., 0.45% NaCl or D5W) cautiously Correct slowly; avoid sudden shifts that can cause cerebral edema.
Cerebral edema (selected cases) Hypertonic saline or mannitol (per specialist order) Use centrally or with close monitoring for fluid overload and electrolyte shifts.

Practical Scenarios and Troubleshooting Tips

Scenario 1: No Flashback on Insertion

If you do not see flashback, remove the needle slightly and reattempt with adjusted angle or site selection. Do not force catheter advancement. If repeated attempts fail, seek assistance or consider ultrasound guidance for difficult access.

Scenario 2: Resistance on Flush After Placement

Stop immediately. Resistance indicates the catheter tip may be against the vein wall, kinked, or not intraluminal. Do not exert force. Consider repositioning or removal and re-site as necessary.

Scenario 3: Sudden Respiratory Distress After Rapid Infusion

Suspect fluid overload or pulmonary edema. Stop infusion, raise head of bed, administer oxygen, and notify provider. In severe cases, prepare for diuretics per orders and advanced cardiac life support as indicated.

For Instructors: Fostering Professional Judgment in Learners

Teaching IV therapy should emphasize critical thinking as much as technique. Encourage learners to:

  • Pause and verify: “What is the indication? Is this the right fluid for this patient?”
  • Think ahead about monitoring: “What will I watch for in the next 30–60 minutes?”
  • Practice verbalizing uncertainty and asking for help when beyond competence.
  • Reflect after each insertion attempt—what went well, what could have been improved?

Using case-based discussion and simulation of complications (e.g., extravasation, air embolism) builds readiness and confidence. Remember: preparation, passion, and patience are essential teaching dispositions.

Frequently Asked Questions About Types of IV Fluids

What are the three main types of IV fluids?

IV fluids are commonly grouped by tonicity as isotonic, hypotonic, or hypertonic. These terms describe how a solution can affect water movement between body-fluid compartments.

What is an isotonic IV fluid?

An isotonic fluid has a tonicity similar to plasma and generally expands the extracellular fluid compartment without causing a large shift of water into or out of cells.

How do hypotonic and hypertonic IV fluids differ?

Hypotonic fluids promote movement of water toward cells, while hypertonic fluids draw water toward the intravascular and extracellular space. Their effects and risks depend on the patient, formulation, dose, rate, and clinical context.

Who should determine which IV fluid a patient receives?

IV fluid selection, volume, and rate require an individualized clinical assessment and an authorized prescription. Qualified clinicians should follow current evidence, product information, facility protocols, and applicable scope-of-practice requirements.

Authoritative Clinical Resources

Clinical notice: This article is for professional education and general information. It does not replace patient-specific assessment, prescribing information, facility policy, supervision, or the judgment of a licensed clinician. Clinical details should be reviewed by a qualified subject-matter expert before being used in practice.

Ready to Earn Your National IV Certification?

The National IV Association (NIVA) offers nationally recognized certification programs for nurses, EMTs, paramedics, and other licensed healthcare professionals. Train online, test when ready, and earn credentials that employers trust.

For foundational training in healthcare careers, visit the PCT Institute of Healthcare or explore certification options at Phlebotomy Career Training.

Enroll Now →

Categories
Blog

Mastering IV Drip Rate Calculations: Formulas, Examples, and Practice Problems

By Nancy Kimmel, MSN, FNP, RN, PhD CHMM, MSN-FNP-BC — an authoritative, clinically focused guide for student nurses, nurses, anesthesia techs, veterinary techs, and dentists. This comprehensive resource blends physiology, clinical technique, pharmacology, geriatrics, teaching strategies, and hands-on practice problems to help you master IV drip rate calculations and safe IV therapy.

IV drip rate calculation setup with a fluid bag, drip chamber, worksheet, and calculator
A clinical IV gravity-drip setup used to calculate and verify infusion rates.

IV Drip Rate Calculations at a Glance

  • Pump rate: mL/hr = total volume (mL) ÷ total time (hours).
  • Gravity rate: gtt/min = volume (mL) × drop factor (gtt/mL) ÷ time (minutes).
  • Safety check: confirm the order, units, tubing drop factor, patient factors, and institutional rounding policy.

Why Accurate IV Drip Rate Calculations Matter

Intravenous (IV) therapy is a cornerstone of contemporary clinical care used for blood collection, chemotherapy, immunosuppressants, vitamin therapy, hydration, and medication delivery. Because the vascular compartment distributes infusions rapidly, even small errors in rate or concentration can produce systemic complications including infections, tissue necrosis, extravasation injuries, air embolism, fluid overload, and life‑threatening cardiopulmonary instability. This article presents core formulas, step‑by‑step examples, safety checkpoints, and practice problems to ensure proficiency.

Fundamentals of IV Fluids and Osmolarity

Before calculating drip rates, clinicians must understand the type of fluid being administered and physiologic effects.

  • Normal Saline (0.9% NaCl): Isotonic to plasma and appropriate for most fluid boluses and wide use. Normal blood pH is 7.35–7.45; isotonic fluids aim to maintain intravascular volume without shifting water across membranes.
  • Hypertonic Solutions: Draw fluid into the vascular space from the interstitium (e.g., 3% NaCl). Used in cerebral edema or severe hyponatremia but risky for congestive heart failure (CHF) and elderly patients—can precipitate cardiovascular overload.
  • Hypotonic Solutions: Push fluid into cells and interstitium (e.g., 0.45% NaCl). Useful in cellular dehydration but can cause edema if used inappropriately.

Always read labels carefully—saline is different from solutions that contain medications (e.g., atropine, lidocaine admixtures). Mistaking fluid type or drug can be catastrophic. When medications are dosed via IV, remember the need to wait an appropriate dwell time or flush interval before drawing blood from the same line or sampling through the limb; protocol depends on institutional policy and medication kinetics.

Clinical Anatomy and Venipuncture Technique

Safe IV therapy begins with proper site selection and insertion technique.

  • Vein selection: The antecubital fossa is a frequent choice—cephalic, basilic, and median cubital veins are commonly used. Trace veins for an inch proximally to ensure length for catheter securement.
  • Hands and lower extremities: Avoid when possible, particularly in diabetic patients, peripheral vascular disease, or when lymph node dissection has occurred. These sites have higher rates of phlebitis and infiltration.
  • Insertion angle and bevel: Insert at 15–28 degrees with the bevel up. A shallow approach reduces risk of puncturing through the vein wall.
  • Flashback: Watch for a flash of blood in the chamber; this verifies intraluminal entry. If you do not see flashback and saline flush resistance occurs, reposition—resistance on flush often means the catheter is not intravascular (or kinked/occluded).
  • Don’t “push” too hard: Excess force can penetrate through the vessel, cause hematoma, or injure surrounding tissue.

Sterile technique is nonnegotiable. Use an appropriate antiseptic such as chlorhexidine for skin prep with a one‑minute scrub (or institutional guideline) to reduce risk of catheter‑related bloodstream infection. The needle and catheter traverse the epidermis, dermis, hypodermis (subcutaneous tissue), and the venous tunica before entering the bloodstream—each layer carries specific infection risk if asepsis is not strictly observed.

Complications of Improper Rate or Technique

Fast or uncontrolled infusion rates can precipitate:

  • Cardiovascular overload: tachycardia, hypertension, shortness of breath, hypoxemia—can escalate to pulmonary edema and cardiac arrest (code blue).
  • Electrolyte disturbances: rapid correction of sodium can cause osmotic demyelination; too-rapid potassium can cause arrhythmias.
  • Local complications: infiltration, extravasation, phlebitis, tissue necrosis.
  • Systemic infections: catheter‑associated bloodstream infection (CABSI) from poor sterile technique or prolonged catheter dwell.
  • Air embolism: from open tubing, central line disconnection, or poor priming technique.

Professional Responsibilities and Documentation

Accurate charting is both clinical best practice and legal protection. Document:

  • Time of insertion and removal.
  • Catheter gauge and device type.
  • Vein location and laterality (e.g., “left antecubital, cephalic”).
  • Patient response and any complications (e.g., pain, swelling, infiltration grade).
  • Medication administration details: drug, dose, rate, flush details.

Know your scope of practice. Medical assistants (MAs) and other support staff must consult supervisors when in doubt. If a procedure or dose feels beyond your competence, admit it and seek support—this is professional responsibility, not weakness.

Who Should Read This

This article is designed for student nurses, nurses, anesthesia techs, veterinary techs, and dentists who administer IV therapies or are involved in clinical decision‑making about IV fluid and medication delivery. It is also a resource for educators preparing to teach IV therapy concepts.

Core IV Drip Rate Calculations and Formulas

IV rate calculations fall into two broad categories: volumetric rates (mL/hour) for infusion pumps and gravity drip rates (gtt/min) for roller clamps and non‑pump administration. The fundamental calculations translate prescribed volume/time into appropriate pump settings or drops per minute based on the tubing’s drop factor.

Essential Formulas

Purpose Formula Notes
mL per hour (infusion pump) mL/hr = Total volume (mL) ÷ Total time (hr) Used directly when programming pumps.
gtt per minute (gravity) gtt/min = (Total volume (mL) × Drop factor (gtt/mL)) ÷ Total time (min) Drop factors commonly: microdrip 60 gtt/mL; macrodrip 10, 15, or 20 gtt/mL—check the tubing package.
Time to infuse a volume Minutes = (Volume (mL) × Drop factor) ÷ gtt/min Rearrangement of gtt/min formula to solve for time.
Rate for weight-based dosing mL/hr = (Dose mg/kg/hr ÷ Concentration mg/mL) Convert units carefully; often used for vasoactive drips and chemotherapy.

Always check the tubing’s drop factor. A 60 gtt/mL set (microdrip) delivers 60 drops per mL and is frequently used for precise low-volume infusions and pediatric or geriatric patients. Macrodrip sets vary—10, 15, or 20 gtt/mL—so calculations must reflect the set in use.

IV Drip Rate Calculation Examples

Example 1 — Gravity Drip with Macrodrip Set

Order: 1,000 mL Normal Saline to be infused over 8 hours using a 20 gtt/mL tubing set. Calculate drops per minute.

  1. Total volume = 1000 mL
  2. Total time = 8 hr = 8 × 60 = 480 minutes
  3. Drop factor = 20 gtt/mL
  4. gtt/min = (1000 mL × 20 gtt/mL) ÷ 480 min = 20,000 ÷ 480 ≈ 41.67 gtt/min
  5. Round to nearest whole drop = 42 gtt/min.

Example 2 — Infusion Pump Setting

Order: 500 mL D5W over 4 hours using pump. What is the mL/hr?

  1. Total volume = 500 mL; Time = 4 hr
  2. mL/hr = 500 ÷ 4 = 125 mL/hr
  3. Program pump to 125 mL/hr.

Example 3 — Microdrip for Pediatrics

Order: 150 mL over 2 hours using microdrip (60 gtt/mL).

  1. Time = 2 hr = 120 min
  2. gtt/min = (150 × 60) ÷ 120 = 9000 ÷ 120 = 75 gtt/min

Example 4 — Weight‑Based Infusion (Vasoactive Agent)

Order: Dopamine at 5 mcg/kg/min for a 70 kg adult. Concentration prepared: 400 mg in 250 mL (i.e., 400,000 mcg/250 mL = 1600 mcg/mL). Determine mL/hr.

  1. Dose = 5 mcg/kg/min × 70 kg = 350 mcg/min
  2. Concentration = 1600 mcg/mL
  3. mL/min = 350 ÷ 1600 = 0.21875 mL/min
  4. mL/hr = 0.21875 × 60 = 13.125 mL/hr → set pump to 13.1 or 13 mL/hr per institutional rounding rules

Programming and Verifying IV Drip Rate Calculations

  • Double‑check all calculations with a second clinician when administering high‑risk medications (e.g., vasoactive drips, insulin, potassium, chemotherapy).
  • Ensure correct tubing and drop factor are used. Label tubing with date and time of insertion as per facility policy.
  • When using programmable pumps, confirm the pump clock and infusion programming (e.g., bolus limits). Observe alarm parameters.
  • Watch for resistance on flush—if present, stop and reassess catheter patency. If resistance persists, discontinue and re-site per policy.

IV Drip Rate Calculations for Medications

Certain IV medications require specific rates and dilution. Intravenous push (IVP) drugs must be delivered over recommended time frames to avoid adverse events (e.g., rapid administration of potassium or calcium can cause arrhythmias). When administering drugs through IV lines already infusing other fluids, stop or slow the primary infusion per protocol, flush before and after medication as needed, and do not apply a tourniquet on an arm with an active IV line.

IV Drip Rate Calculations for Older Adults

Elderly patients are uniquely vulnerable to IV complications. The National Center for Aging and Development (NCAD) and the National Institute on Aging (NIA) emphasize physiologic changes that alter IV therapy responses: decreased total body water, reduced renal clearance, fragile veins, and skin thinning. When teaching student nurses, nurses, anesthesia techs, veterinary techs, and dentists about geriatric IV care:

  • Prefer microdrip sets for precise low-volume administration (reduces risk of volume overload).
  • Consider lower initial infusion speeds and titrate carefully; watch for signs of cardiovascular overload—tachycardia, rising BP, respiratory distress, low oxygen saturation.
  • Use the most distal, least fragile veins first and support fragile skin with padding and securement devices to avoid skin tears.
  • Consult NIA resources for age‑specific pharmacokinetics and dosing adjustments: NIA.

Infection Prevention and Aseptic Technique

Catheter‑associated infections are preventable with strict aseptic technique and maintenance. Use chlorhexidine with a one‑minute cleanse when appropriate. Observe catheter insertion bundles and dressing protocols. For authoritative infection control guidance, review CDC recommendations: CDC catheter-infection prevention guidance.

Teaching IV Therapy: Instructor Principles and Erikson’s Psychosocial Theory

Teaching IV therapy effectively requires more than technical skills. Instructors should embody preparation, passion, and patience and apply continuous learning strategies.

Preparation, Passion, Patience

  • Preparation: Prepare lesson plans, checklists, simulation scenarios, and safety check algorithms. Provide learners with pre-reading and competency checklists.
  • Passion: Enthusiasm translates into learner engagement. Share clinical stories that emphasize consequences and successes to increase retention.
  • Patience: Allow learners to fail safely in simulation environments and debrief thoroughly to reinforce correct behaviors.

Managing Classroom Dynamics

Balance hands-on practice with didactic sessions. Use small‑group skills labs for student nurses and interdisciplinary sessions that include nurses, anesthesia techs, veterinary techs, and dentists where appropriate (e.g., sedation management, emergency access). Use skills checklists and observed structured clinical examinations (OSCEs) for assessment.

Erikson’s Theory Applied to Teaching Patients and Students

Erikson’s eight stages of psychosocial development provide a framework for tailoring communication and support during IV therapy education and patient teaching. Integrate Erikson into interactions:

  • Infancy (Trust vs. Mistrust): Build trust with caregivers; demonstrate gentle handling and consistent technique when pediatric or neonatal IV placement is required.
  • Toddler (Autonomy vs. Shame/Doubt): Encourage toddler choices (e.g., which arm to use) where safe.
  • School-age (Industry vs. Inferiority): Provide simple tasks and praise—”You watched how the IV was set up and helped hold the tourniquet.”
  • Adolescence (Identity vs. Role Confusion): Offer privacy and explanations about body image and procedure necessity.
  • Young Adulthood (Intimacy vs. Isolation): Respect independence and involve in decision-making about care.
  • Middle Adulthood (Generativity vs. Stagnation): Engage in shared decision-making, emphasizing contribution to their care.
  • Older Adulthood (Integrity vs. Despair): Validate life experience, discuss goals of care and quality of life when deciding on IV therapies.

Applying Erikson to teaching helps educators and clinicians provide age-appropriate explanations, anticipate emotional responses, and improve adherence and satisfaction. This is especially valuable for student nurses and clinicians learning to communicate during IV procedures.

Special Populations: Pediatrics, Neonates, and Veterinary Patients

Infants and neonates require microdrip sets and meticulous dose calculations. For veterinary techs, species differences (blood volume per kg, vein anatomy) change calculation baselines. Always use weight-based dosing and species-appropriate equipment. For dental practitioners administering IV sedation, coordination with anesthesia techs and nurses is essential to ensure safe infusion rates and monitoring for cardiopulmonary compromise.

IV Drip Rate Calculation Practice Problems

These practice problems are structured to reinforce calculation skills and clinical judgment. Work them as a student nurse, nurse, anesthesia tech, veterinary tech, or dentist; then check your answers. For institutional protocols or high-risk med verification always perform independent double-checks.

Problem 1

Order: 750 mL lactated Ringer’s over 6 hours via a 15 gtt/mL macrodrip set. Calculate gtt/min.

Solution:

  1. Total time = 6 hr = 360 min
  2. gtt/min = (750 × 15) ÷ 360 = 11,250 ÷ 360 = 31.25 ≈ 31 gtt/min

Problem 2

Order: 250 mL of albumin to run over 30 minutes using a pump. What is mL/hr?

Solution:

  1. Time = 0.5 hr
  2. mL/hr = 250 ÷ 0.5 = 500 mL/hr
  3. Set pump to 500 mL/hr (and ensure monitoring for IF patient is fragile—albumin can cause rapid intravascular shifts).

Problem 3

Order: Heparin infusion at 18 units/kg/hr for a 60 kg patient. The bag concentration is 25,000 units in 250 mL. Calculate mL/hr.

Solution:

  1. Dose = 18 × 60 = 1,080 units/hr
  2. Concentration = 25,000 units ÷ 250 mL = 100 units/mL
  3. mL/hr = 1,080 ÷ 100 = 10.8 mL/hr → set pump to 10.8 mL/hr

Problem 4 — Pediatric

Order: 100 mL/kg over 8 hours for a 12 kg pediatric patient using 60 gtt/mL. Calculate gtt/min.

Solution:

  1. Total volume = 100 mL/kg × 12 kg = 1,200 mL
  2. Time = 8 hr = 480 min
  3. gtt/min = (1,200 × 60) ÷ 480 = 72,000 ÷ 480 = 150 gtt/min
  4. At 150 gtt/min using microdrip, prepare safeguards—this is high; consider pump use if available.

Problem 5 — Vet Tech Scenario

Order for a canine patient: 20 mL/kg bolus for a 25 kg dog. How many mL given? If administered over 15 minutes, and tubing is 20 gtt/mL, what is gtt/min?

Solution:

  1. Volume = 20 mL/kg × 25 kg = 500 mL
  2. Time = 15 min
  3. gtt/min = (500 × 20) ÷ 15 = 10,000 ÷ 15 ≈ 667 gtt/min → Not practical by gravity; use a pump or syringe driver for controlled bolus.

Common IV Drip Rate Calculation Pitfalls

  • Failing to convert time units (hours ↔ minutes). Always convert to minutes for gtt/min calculations.
  • Using wrong drop factor. Verify tubing packaging before calculation.
  • Not accounting for medication concentration units (mg vs mcg, mEq vs mmol). Convert to consistent units before calculation.
  • Rounding incorrectly. Use institutional rounding rules; when in doubt round to clinician safety (e.g., lower rate for risky infusions unless otherwise ordered).
  • Ignoring patient factors—age, cardiac/renal function, existing IV patency, and signs of fluid overload.

Safety Checklist for IV Drip Rate Calculations

  1. Verify physician order and indication—IV therapy requires authorization.
  2. Confirm patient identity using two identifiers.
  3. Inspect the medication label and fluid type; confirm compatibility with existing infusions.
  4. Perform aseptic skin prep (chlorhexidine with one‑minute scrub according to policy).
  5. Choose appropriate vein and catheter gauge for therapy: larger gauge for rapid infusion, smaller for fragile veins.
  6. Secure catheter and label date/time. Document insertion site and catheter size.
  7. Calculate infusion rate and verify with a second clinician for high-risk meds.
  8. Monitor vital signs and the IV site regularly; document response and any issues (time, gauge, location, response).

When Things Go Wrong: Immediate Actions

If you observe signs of infiltration, extravasation, infection, or systemic intolerance (e.g., respiratory distress, chest pain, sudden hypotension), act quickly:

  • Stop the infusion immediately.
  • Leave the catheter in place if you suspect extravasation so antidote can be administered if required; if infiltration only and protocol indicates, remove per institutional guidelines.
  • Notify the responsible provider immediately—do not delay for noncritical documentation.
  • Document time, signs, interventions, and patient response in the medical record to protect both patient safety and legal accountability.

Resources and Further Reading

Authoritative resources for policy, dosing charts, and infection control:

Professional Development and Continuous Learning

For instructors and clinicians alike, ongoing education is crucial. Maintain competence through:

  • Simulation labs and skills assessments for student nurses, nurses, and techs.
  • Interprofessional education that includes anesthesia techs and dentists when IV sedation or emergency access is discussed.
  • Attending workshops and certifications offered by organizations such as PCT Institute of Healthcare and Phlebotomy Career Training.
  • Reading current literature from NIH and NLM and following CDC infection control updates.

Legal and Ethical Considerations

Documentation of IV therapy—time, gauge, location, response—is not optional; it represents legal protection and a continuity-of-care instrument. If you are unsure about a therapy or calculation, consult your supervisor immediately. Admitting limits to your knowledge and seeking help demonstrates professionalism and protects the patient.

Practice Problem Set — Self‑Test

Attempt these without peeking at answers. They simulate scenarios you may encounter as a student nurse, nurse, anesthesia tech, veterinary tech, or dentist.

  1. Order: 1,500 mL NS over 24 hours with 15 gtt/mL set. Calculate gtt/min.
  2. Order: 100 mL of drug X to infuse over 10 minutes using pump. What mL/hr?
  3. A 50 kg pediatric patient needs 20 mL/kg bolus. Calculate the bolus volume and if given over 15 minutes with 60 gtt/mL, determine gtt/min.
  4. Vasopressor order: Norepinephrine 0.05 mcg/kg/min for a 80 kg patient. Bag is prepared at 8 mg in 250 mL (8,000 mcg/250 mL = 32 mcg/mL). Calculate mL/hr.
  5. Order: 500 mL D5W over 2 hours with a 20 gtt/mL set. Calculate gtt/min.

Answers (check after completing problems):

  1. 1,500 mL over 1440 min. gtt/min = (1500 × 15) ÷ 1440 = 22,500 ÷ 1440 ≈ 15.6 → 16 gtt/min.
  2. Time = 10 min = 0.1667 hr. mL/hr = 100 ÷ 0.1667 ≈ 600 mL/hr.
  3. Volume = 20 × 50 = 1000 mL. gtt/min = (1000 × 60) ÷ 15 = 60,000 ÷ 15 = 4,000 gtt/min → not feasible by gravity, use pump.
  4. Dose = 0.05 × 80 = 4 mcg/min. Concentration = 32 mcg/mL. mL/min = 4 ÷ 32 = 0.125 mL/min. mL/hr = 0.125 × 60 = 7.5 mL/hr.
  5. Time = 120 min. gtt/min = (500 × 20) ÷ 120 = 10,000 ÷ 120 ≈ 83.3 → 83 gtt/min.

Final Tips for Accurate IV Drip Rate Calculations

  • When in doubt about whether a calculated rate is reasonable for the patient (e.g., high mL/hr for small or fragile patients), stop and consult. Safety first.
  • Label all IV tubing and bags with contents, concentration, start time, and your initials per facility policy.
  • Avoid tourniquets on arms with active IV lines. Tourniquets can alter infusion dynamics and pose infection or thrombotic risks.
  • Regularly practice manual drip calculations even when pumps are available; pumps fail and manual calculation skills are essential for emergencies.

This resource integrates clinical technique, calculation methods, geriatric considerations from NCAD and NIA, teaching methodology including Erikson’s psychosocial stages, and professional responsibilities for student nurses, nurses, anesthesia techs, veterinary techs, and dentists. Use it as a learning guide, a teaching toolkit, and a practical reference at the bedside.

Frequently Asked Questions About IV Drip Rate Calculations

What is the formula for calculating an IV drip rate?

For gravity tubing, multiply the prescribed volume in milliliters by the tubing drop factor in gtt/mL, then divide by the infusion time in minutes. For a pump, divide volume in milliliters by time in hours to obtain mL/hr.

How do you choose the correct drop factor?

Read the factor printed on the administration-set packaging. Common macrodrip factors include 10, 15, or 20 gtt/mL; microdrip tubing is commonly 60 gtt/mL. Never assume a factor from memory.

When should an IV drip-rate calculation be independently checked?

Follow facility policy and use an independent check for high-alert medications, weight-based infusions, pediatric dosing, unfamiliar concentrations, or any result that appears clinically unusual.

Should a calculated gravity rate be rounded?

Gravity rates are generally set as whole drops per minute, while pump settings may allow decimals. Apply the organization’s approved rounding rules and confirm that the final rate matches the prescription and patient context.

Clinical Safety Notice

This article is for professional education and general information. It does not replace patient-specific assessment, medication labeling, prescribing information, facility policy, supervision, or the judgment of a licensed clinician. Calculation examples and clinical details should be verified by a qualified subject-matter expert before use in practice.

Ready to Earn Your National IV Certification?

The National IV Association (NIVA) offers nationally recognized certification programs for nurses, EMTs, paramedics, and other licensed healthcare professionals. Train online, test when ready, and earn credentials that employers trust.

For foundational training in healthcare careers, visit the PCT Institute of Healthcare or explore certification options at Phlebotomy Career Training.

Enroll Now →

Categories
Blog

Infection Control and Legal Standards in IV Therapy

IV Therapy Infection Control Overview

Safe practice begins with IV therapy infection control because intravenous therapy is a cornerstone of modern medical care across disciplines — from acute care hospitals to outpatient infusion centers, veterinary clinics, dental offices, and community health settings. IV therapy enables blood collection, chemotherapy, immunosuppressant administration, vitamin therapy, fluid resuscitation, and delivery of lifesaving medications. The rapid systemic distribution of infused fluids and medications carries both therapeutic power and risk. Errors in aseptic technique, medication selection, rate delivery, or documentation can precipitate systemic infection, tissue necrosis, air embolism, fluid overload, or fatal adverse events.

By Nancy Kimmel, MSN, FNP, RN, PhD CHMM, MSN-FNP-BC

In addition, this comprehensive article synthesizes clinical technique, infection control, and the legal standards that protect patients and clinicians. It is written for student nurses, nurses, anesthesia techs, veterinary techs, and dentists, and intended as a deep resource for instructors and clinical preceptors teaching IV skills. The material integrates evidence-based infection control (including CDC and NIH guidance), physiology, pharmacology of IV solutions, patient-centered teaching considerations including Erikson’s psychosocial stages, and the professional responsibilities and legal documentation required to practice safely.

Sterile IV therapy infection-control setup with antiseptic supplies, dressing, and IV tubing
A sterile IV-therapy preparation area illustrating infection-control and catheter-care essentials.

Fundamentals of IV Therapy Infection Control

In practice, infection control in IV therapy is non-negotiable. Contamination of the catheter, hub, or insertion site can introduce microbes directly into the vascular system with rapid systemic consequences. Key principles include:

  • Hand hygiene before and after any contact with IV equipment, the access site, or the patient.
  • Use of aseptic non-touch technique (ANTT) and sterile gloves for insertion when indicated.
  • Skin antisepsis with an appropriate agent, application method, and drying time specified by current facility policy and product instructions.
  • Maintaining closed systems and minimizing hub access; scrub the hub with chlorhexidine or alcohol for the recommended contact time before any access.
  • Appropriate dressing and catheter maintenance: transparent semipermeable dressings or sterile gauze as indicated, with scheduled dressing changes per policy.

For authoritative infection control recommendations, consult the Centers for Disease Control and Prevention (CDC) and the National Institutes of Health (NIH):

Chlorhexidine: The Skin Antiseptic of Choice

For example, chlorhexidine gluconate (CHG) offers persistent antimicrobial activity and is widely recommended for IV insertion site preparation. Typical practice is a chlorhexidine application with friction for at least 30 seconds to one minute, allowing the solution to dry completely before puncture. Teach student nurses and other learners to avoid wiping away the solution prematurely; drying time maximizes efficacy.

Anatomic Considerations: Vein Selection and Site Preparation

Therefore, appropriate vein selection reduces multiple attempts and complications. Common insertion sites and considerations include:

  • Antecubital fossa veins: cephalic, basilic, and median cubital veins are often the first choices for adults. They are larger and more stable for blood draws and peripheral IVs.
  • Trace the vein for at least an inch proximally and distally to ensure continuity and patency, especially if multiple access attempts are anticipated.
  • Avoid hand veins and lower extremities (legs) unless clinically necessary — legs are associated with higher infection rates and thrombosis risk, and hand veins can be fragile and more painful. Take special precautions with diabetic patients: avoid the feet and legs if possible due to microvascular disease and neuropathy.

Layers Traversed During IV Insertion

In addition, awareness of tissue layers helps clinicians anticipate resistance and depth:

Layer Clinical Consideration
Epidermis First barrier; skin antisepsis is focused here—avoid superficial contamination.
Dermis Contains capillaries and nerve endings—pain control considerations.
Hypodermis (subcutaneous tissue) Where superficial veins reside; excessive pressure may move the vein.
Venous tunica (intima/media) Transgression into the vein yields flashback; avoid going through the vein.

IV Therapy Infection Control: Step-by-Step Insertion

In practice, consistent technique reduces risk. The following details are essential for student nurses, nurses, anesthesia techs, veterinary techs, and dentists learning or refining IV skills:

  1. Obtain physician authorization for IV therapy and verify the indication (blood collection, chemo, immunosuppressants, vitamin therapy, etc.).
  2. Confirm patient identity and allergies; obtain informed consent when required by facility policy.
  3. Assemble and check equipment: catheter size appropriate to therapy, flush solution, dressings, chlorhexidine prep, gloves, tourniquet (if needed), and sharps container.
  4. Perform hand hygiene and don gloves. Prepare the insertion site with the antiseptic method required by current policy and allow the site to dry completely.
  5. Apply the tourniquet proximal to the site (do not use a tourniquet on an arm with an existing IV line) and ask the patient to clench the fist if appropriate. If the arm already has an IV, avoid tourniquet application; gentle manual compression or gravity can assist vein distention.

Catheter Advancement and Verification

  1. Hold the skin taut to stabilize the vein. Insert the catheter with the bevel up at an angle between 15 and 28 degrees. The angle often differs by patient—lower angles for superficial veins and slightly higher angles for deeper veins.
  2. Watch for flashback within the catheter chamber or syringe; this indicates entry into the vein. Once flashback is obtained, advance the catheter a small distance, then lower the angle and advance the catheter into the vein while withdrawing the needle, or advance as your device design requires.
  3. Do not push the catheter forcefully. Going through the vein may cause infiltration or hematoma. If resistance occurs on advancement or during flush, do not force—this may indicate extraluminal placement or a kink.
  4. Secure the catheter, connect lines, flush the catheter with prescribed solution, and observe for ease of flush. Resistance on flush equals non-intravascular placement — stop and reassess. Document time, gauge, location, and patient response.

Troubleshooting Insertion

  • No flashback: withdraw slightly while maintaining direction; repositioning a few degrees can help.
  • Flashback then loss of flow: needle may have perforated through the posterior wall — withdraw slightly and re-check for blood return.
  • Resistance on flush: suspect extravasation; stop infusion and check catheter position and site for swelling, pain, or erythema.
  • Bleeding or hematoma formation: apply pressure proximal to the site, remove catheter if necessary, and document incident.

IV Solutions, Osmolarity, and Physiologic Effects

Moreover, understanding fluid types and their physiologic effects is vital to prevent harm. Solutions are categorized by tonicity relative to plasma. Normal saline (0.9% NaCl) is the most commonly used isotonic crystalloid.

Solution Type Typical Use Physiologic Effect Clinical Cautions
Isotonic (e.g., 0.9% NaCl) Volume replacement, flushes Expands intravascular volume; clinical effects depend on the patient, dose, and rate May exacerbate hypervolemia in CHF; monitor fluids
Hypertonic (e.g., 3% NaCl) Reduces cerebral edema, treats certain hyponatremias Pulls water into the vascular compartment from cells/tissues Risk of rapid osmolar shifts, fluid overload; use central access often required
Hypotonic (e.g., 0.45% NaCl) Treats dehydration (cellular) Shifts fluid out of vascular space into cells/tissues Risk of tissue edema and hypotension; avoid in increased intracranial pressure

For example, normal saline is an isotonic crystalloid commonly used in peripheral IV therapy. Its selection, volume, rate, and compatibility must be evaluated for the individual patient and treatment. Hypertonic solutions are powerful and can rapidly shift fluid into the vascular space — beneficial for edema reduction but potentially catastrophic in congestive heart failure (CHF) due to fluid overload. Hypotonic solutions shift fluid into tissues and cells and are useful for cellular dehydration; they are not appropriate for hypovolemia or cases with increased intracranial pressure.

Infusion Rates and Fragile Patients

Therefore, infusion rate must be tailored to the patient’s physiologic reserve. Rapid infusion in fragile patients (elderly, CHF, renal failure) can precipitate cardiovascular overload and respiratory distress. Signs of cardiovascular overload or impending code blue include:

  • Increased heart rate (tachycardia)
  • Elevated blood pressure
  • Shortness of breath and accessory muscle use
  • Hypoxemia (low oxygen saturation)

Monitor vulnerable patients closely during bolus administration. For high-risk therapies, consider central venous access and advanced hemodynamic monitoring.

IV Therapy Infection Control and Medication Safety

Moreover, medication errors with IV therapy are high risk. Always READ THE LABEL — do not rely on appearance alone. Common look-alike vials (e.g., saline vs. atropine vs. lidocaine) can lead to devastating outcomes if administered incorrectly. Implement the rights of medication administration: right patient, right drug, right dose, right route, right time, and right documentation.

Specific considerations:

  • Double-check high-risk medications with a second clinician when required by policy.
  • Confirm compatibility of medications when co-infusing or using multi-lumen systems; incompatible drugs can precipitate or cause in-line crystallization.
  • When drawing blood from an IV-dosed line, wait the appropriate interval after medication administration per facility policy to prevent contamination of lab results. Many institutions require the line to be flushed or for the medication to be stopped for a defined period before blood sampling; follow local protocols for dwell/flush times.
  • Never draw blood from an arm with an active IV medication infusing unless the line can be flushed and a waste volume is removed per policy — better to select another site for phlebotomy.
  • Never apply a tourniquet over an arm that has an active IV line. Tourniquets can disrupt infusion, cause infiltration, or dislodge the catheter.

IV Therapy Infection Control: Complication Recognition

As a result, early recognition is key to limiting harm. Common complications and their signs include:

Complication Signs/Symptoms Immediate Actions
Infiltration Swelling, coolness, pain at site, decreased infusion rate Stop infusion, remove catheter, elevate limb, apply cold or warm compress per policy, document
Extravasation (vesicant) Severe pain, blistering, tissue necrosis risk Stop infusion, aspirate residual drug, antidote if indicated, consult provider and plastic surgery if needed
Phlebitis Redness, warmth, pain along vein, palpable cord Stop infusion, remove catheter, apply warm compresses, document and report
Air embolism Sudden chest pain, dyspnea, hypotension, altered mental status Immediate resuscitation per ACLS, place patient in left lateral trendelenburg (if possible), call for emergency assistance
Catheter-related bloodstream infection (CRBSI) Fever, chills, erythema at site, hemodynamic instability Obtain blood cultures per protocol, remove catheter if indicated, start empiric antibiotics per provider orders
Fluid overload Dyspnea, crackles on auscultation, hypertension, edema Slow/stop infusion, administer diuretics per orders, monitor vitals and oxygenation

IV Therapy Legal Standards and Documentation

In addition, IV therapy carries significant legal accountability. Precise documentation serves as legal protection, clinical communication, and quality data. Charting must include:

  • Time of insertion or removal
  • Catheter gauge and type
  • Exact anatomical location (e.g., “left antecubital fossa, cephalic vein, 20G”)
  • Number of attempts and any complications
  • Patient response — pain, tolerance, adverse effects
  • Infusion medication/solution, rate, and volume infused
  • Education provided to the patient

Charting accurately documents adherence to the standard of care and provides a clear chronology should an adverse event occur. It is a legal safeguard for clinicians as well as a patient safety tool.

Scope of Practice and Delegation

Understanding scope of practice is essential. Different professions and jurisdictions define allowable IV-related activities. Medical assistants (MAs) and other allied health personnel must know facility policy and state regulations. If a task is beyond your scope, consult a supervisor or the licensed provider. Admitting lack of knowledge and seeking help is a professional and legally protective act — do not proceed if uncertain.

Resources for scope of practice and certification bodies include professional boards and associations. For phlebotomy-specific training and career pathways, see:

Regulatory and Accreditation Considerations

Clinicians must be familiar with national and facility-specific standards: OSHA bloodborne pathogens standard, the Joint Commission’s accreditation requirements, and Infusion Nurses Society (INS) standards of practice. In the event of bloodstream infection or sentinel events, thorough incident reporting and root cause analysis are required. Policies also dictate documentation for controlled substances, chemotherapy administration, and immunosuppressive therapy.

Education for Instructors: Preparation, Passion, Patience, and Continuous Learning

Teaching IV therapy is more than demonstrating technique — it is shaping a safe practitioner. Effective instructors cultivate preparation, passion, and patience while managing classroom dynamics and promoting continuous learning.

  • Preparation: Design objective-based sessions with hands-on simulation. Provide learners with pre-reading and competency checklists. Ensure supplies and simulators are available and functioning.
  • Passion: Demonstrate why aseptic technique and attention to detail matter — use case examples of both successes and adverse events to reinforce learning.
  • Patience: Novice learners will make mistakes. Use deliberate practice and debriefing to build confidence and reduce anxiety.
  • Managing classroom dynamics: Different learners (student nurses, anesthesia techs, veterinary techs, and dentists) bring varied backgrounds. Balance skills training with interprofessional respect and role clarity.
  • Continuous learning: Encourage trainees to use up-to-date resources (CDC, NIH, NLM, and professional societies) and to engage in periodic competency validation.

Instructors should also include legal and documentation training as core content — charting is a clinical skill that protects patients and clinicians. Use simulation to practice documentation after simulated complications so learners experience the full cycle of clinical care and legal responsibilities.

Integrating Erikson’s Psychosocial Stages into Teaching and Patient Education

Erikson’s theory of psychosocial development outlines eight stages from infancy to late adulthood. For clinicians and instructors, framing communication and education with Erikson’s stages improves patient-centered care and learner engagement. Below are practical teaching/communication strategies for each stage as applied to IV therapy education or patient interactions:

Communication by Life Stage

Erikson Stage Age Range Primary Strength Application to IV Teaching/Patient Care
Trust vs. Mistrust Infancy Hope For pediatric caregivers, emphasize consistent, soothing care. For infants, use distraction, swaddling, and topical anesthetics to reduce pain and build trust with parents.
Autonomy vs. Shame Toddler Will Offer simple choices (which arm or which toy) to empower toddlers during procedures; validate their feelings to reduce fear and resistance.
Initiative vs. Guilt Preschool Purpose Use age-appropriate explanations and play to allow initiative; praise cooperation during IV starts.
Industry vs. Inferiority School Age Competence Provide clear information and a role (e.g., help hold the bandage) to increase perceived competence and reduce anxiety.
Identity vs. Role Confusion Adolescence Fidelity Respect privacy and autonomy; include adolescents in decision-making about their care to support adherence.
Intimacy vs. Isolation Young Adult Love Build therapeutic rapport; address concerns about body image post-insertion and provide discreet care for ambulatory patients.
Generativity vs. Stagnation Middle Adult Care Engage patients in planning their care and recovery; provide education on self-care if home infusions are needed.
Integrity vs. Despair Older Adult Wisdom Respect life experience; communicate clearly about risks/benefits and tailor explanations to sensory or cognitive needs. Anticipate fragile veins and altered skin integrity in IV selection.

For example, using Erikson’s framework helps instructors tailor bedside teaching and patient education to psychosocial needs. For example, aging adults in the “Integrity vs. Despair” stage may prioritize autonomy and dignity — integrating the National Institute on Aging (NIA) recommendations regarding geriatric communication and care can improve outcomes:

  • National Institute on Aging (NIA)
  • Refer to the National Center for Aging and Development (NCAD) resources when designing geriatric-specific IV competency training and patient education (NCAD materials are invaluable for age-appropriate communication and physical assessment nuances).

IV Therapy Infection Control for Older Adults

In addition, older adults commonly have fragile skin, decreased venous elasticity, comorbid cardiac or renal disease, and altered pharmacodynamics. Nursing and clinical instructors must ensure learners understand physiological changes with aging and how to modify IV practice accordingly:

  • Vein selection: choose large, visible, and less tortuous veins—avoid dorsum of the hand if peripheral veins are fragile. Use smaller gauge catheters when clinically permissible.
  • Skin protection: use gentle adhesive removal techniques (use adhesive removers if available), and consider securement devices to minimize dressing trauma.
  • Fluid management: elderly patients often have reduced cardiac and renal reserve; avoid aggressive boluses without close monitoring for signs of overload.
  • Polypharmacy: consider drug interactions and altered elimination; consult pharmacy for dosing adjustments where needed.
  • Education: apply Erikson’s principles to affirm dignity and involve older patients in decision-making. Use large print, plain language, and allow extra time for comprehension.

Refer to geriatric resources and evidence-based guidance from the NIA and gerontology centers like NCAD for further reading:

Interprofessional Considerations: Veterinary and Dental IV Therapy

Similarly, IV therapy principles apply across species and care settings, though the practical techniques differ. Veterinary techs must integrate species-specific anatomy and behavior into site selection and restraint plans. Dentists may require IV sedation or antibiotic therapy for certain procedures; dental professionals should collaborate with anesthesia techs and nurses to ensure aseptic technique and appropriate monitoring.

Therefore, training programs serving student nurses, nurses, anesthesia techs, veterinary techs, and dentists should include interprofessional simulation scenarios to improve teamwork, communication, and shared safety culture during IV care.

IV Therapy Infection Control for Blood Collection

In practice, blood collection through IV catheters must be performed with careful technique to prevent contamination of samples and patient harm. When drawing blood from peripheral IV lines, adhere to facility policy. Generally:

  • Avoid obtaining blood from a limb with an active infusion unless clinically necessary.
  • If drawing from a line, stop any infusing medications, flush appropriately, withdraw and discard a waste volume when required, and follow timed intervals for medication clearance before sampling to prevent spurious lab results.
  • Label specimens clearly, and document that the sample was obtained from an IV line.
  • For best practice training in phlebotomy and venipuncture, educational resources are available from career training programs such as PCT Institute of Healthcare and Phlebotomy Career Training.

IV Therapy Infection Control: Quality Assurance

Moreover, ongoing surveillance for catheter-related bloodstream infections (CRBSIs), phlebitis rates, and infiltration is essential to quality improvement. Facilities should:

  • Maintain an IV therapy bundle (hand hygiene, maximal barrier precautions, CHG skin antisepsis, optimal catheter site selection, daily review of line necessity).
  • Monitor compliance metrics and provide feedback to staff.
  • Conduct root cause analyses for any sentinel events.

Nationally, organizations and professional societies provide standards and certification that support safe practice. For phlebotomy and IV-related professional standards, reference bodies such as the National Association for Phlebotomy Training Programs (NAPTP) and national testing agencies. For additional regulatory guidance and evidence-based literature, consult authoritative databases and associations:

Training Competency and Credentialing

Therefore, competency-based training ensures clinicians are safe and effective. Components of competency assessments include:

  • Knowledge assessment (indications, contraindications, infection control, fluid physiology)
  • Skill demonstration (sterile prep, insertion technique, securing devices)
  • Clinical judgment (site selection, recognizing complications)
  • Documentation and legal awareness

Credentialing requirements for different professions vary. Student nurses and nurses will typically complete institutional competency checklists and periodic revalidation. Anesthesia techs and veterinary techs often require specialty credentials. Phlebotomy personnel may seek certification through recognized organizations; refer to training partners such as PCT Institute of Healthcare and Phlebotomy Career Training for course offerings.

IV Therapy Infection Control Quick Reference

  • Always obtain physician authorization before initiating IV therapy unless institutionally defined standing orders apply.
  • Use the skin-preparation method and drying time required by current policy and product instructions.
  • Trace candidate veins for at least an inch before choosing the puncture site.
  • Avoid hands and lower extremities if possible; especially avoid lower extremity cannulation in diabetics.
  • Insert the needle bevel up at 15–28 degrees; watch for flashback and avoid forcing the catheter.
  • Resistance on flush means the catheter is not intravascular — stop and reassess.
  • Read medication labels carefully — saline, atropine, and lidocaine can be visually similar in similar vials. Use two identifiers for medications and a second clinician check for high-risk meds.
  • Do not apply a tourniquet to an arm with an IV line in place.
  • Chart immediately after procedures: time, gauge, location, number of attempts, patient response, and any complications.
  • If you are a medical assistant or in a role with limited scope, consult your supervisor when in doubt and never perform procedures beyond your authorized scope.

Resources for Continued Learning

Finally, keep current with updates from national authorities and professional organizations. Key resources include the CDC, NIH, NLM, NIA, and specialty associations that provide position statements and guidelines. Additionally, consider training partnerships and certificate programs for phlebotomy and IV therapy offered by institutions such as PCT Institute of Healthcare and Phlebotomy Career Training.

External authoritative links:

Audience-Focused Considerations

This article is targeted at student nurses, nurses, anesthesia techs, veterinary techs, and dentists who either perform or collaborate in IV therapy. Each audience must integrate technical skill, infection control, legal documentation, and patient-centered communication into their practice.

  • Student nurses: Focus on competency-based learning, simulation practice, and thorough charting as part of legal protection and safe practice.
  • Nurses: Maintain situational awareness for high-risk medications and vulnerable patients (geriatrics, pediatrics), and adhere to IV bundles to prevent infections.
  • Anesthesia techs: Prioritize sterility during procedural setups and understand central access implications for hypertonic solutions.
  • Veterinary techs: Apply species-specific techniques, restraint, and antiseptic strategies while ensuring asepsis for animals and handler safety.
  • Dentists: Coordinate with nurses and anesthesia providers when IV sedation or post-extraction IV antibiotics are used; understand emergency recognition for air embolism or anaphylaxis.

Final IV Therapy Infection Control Pearls

  • Use the antiseptic product and application time required by current policy and device instructions, and allow it to dry fully before puncture.
  • Trace veins for at least an inch; prefer antecubital fossa (cephalic, basilic, median cubital) whenever clinically appropriate.
  • Insert at 15–28 degrees with bevel up; watch for flashback and never force the catheter through the vein.
  • Isotonic solutions such as normal saline are widely used; hypertonic and hypotonic solutions have distinct physiologic effects and risks.
  • Rapid infusions in fragile patients can lead to cardiovascular overload manifesting as tachycardia, hypertension, shortness of breath, and hypoxemia — treat promptly.
  • Charting time, gauge, location, and patient response is essential legal protection for clinicians.
  • When in doubt about scope of practice, consult a supervisor; admit lack of knowledge and seek assistance — safety trumps ego.

IV Therapy Infection Control FAQ

What is the foundation of IV therapy infection control?

Hand hygiene, aseptic technique, appropriate skin antisepsis, access-point disinfection, and ongoing site assessment form the core of safe practice. Clinicians should also follow the device instructions and their facility’s current policy.

Why must antiseptic dry before IV insertion?

Allowing the antiseptic to dry supports its intended antimicrobial action and reduces the chance of carrying contaminants through the puncture site.

What should IV documentation include?

Document the date and time, device type and gauge, anatomical site, number of attempts, assessment findings, patient response, education, and any complication or escalation, subject to local policy.

Which legal standards apply to IV therapy?

Applicable requirements depend on professional scope, facility policy, state law, and the clinical setting. Clinicians should use current policies, authoritative guidance, and appropriate supervisory or legal review.

Ready to Earn Your National IV Certification?

The National IV Association (NIVA) offers nationally recognized certification programs for nurses, EMTs, paramedics, and other licensed healthcare professionals. Train online, test when ready, and earn credentials that employers trust.

For foundational training in healthcare careers, visit the PCT Institute of Healthcare or explore certification options at Phlebotomy Career Training.

Enroll Now →

Categories
Blog IV Certification

How to Become a Certified IV Instructor with NIVA

Estimated reading time: 16 minutes

Becoming a certified IV instructor requires more than knowing how to start an IV. Effective IV instructors need strong clinical knowledge, practical skills, teaching ability, an understanding of documentation and professional responsibilities, and the ability to communicate effectively with patients and learners across different age groups.

For student nurses, nurses, anesthesia techs, veterinary techs, and dentists whose scope of practice includes IV-related care or instruction, becoming an IV instructor can provide an opportunity to combine clinical expertise with education.

This guide explains the clinical competencies, teaching skills, patient-safety principles, and professional responsibilities involved in becoming a Certified IV Instructor through the National IV Association (NIVA). It also covers IV insertion, sterile technique, infusion principles, medication safety, complication management, documentation, simulation, learner development, and geriatric considerations.

Quick Answer: To become a NIVA Certified IV Instructor, candidates should confirm their current eligibility and prerequisites with NIVA, maintain appropriate clinical credentials and IV experience, develop competency in IV therapy and complication management, complete the required instructor preparation, and successfully meet NIVA’s certification requirements. Current requirements should always be verified through NIVA’s official candidate information.

Table of contents


Why Become a NIVA Certified IV Instructor?

An IV instructor combines clinical expertise with education. The role involves teaching healthcare professionals not only how to perform IV procedures, but also how to recognize complications, maintain appropriate technique, document care, and respond safely when problems occur.

For student nurses, nurses, anesthesia techs, veterinary techs, and dentists working within an appropriate scope of practice, instructor certification can support professional development and expanded educational responsibilities.

As an IV instructor, your responsibilities may include both:

  • Didactic education
  • Supervised hands-on skills training
  • Demonstration of proper IV technique
  • Assessment of learner competency
  • Teaching complication recognition
  • Reinforcing infection-prevention practices
  • Teaching appropriate documentation
  • Promoting patient-centered communication
  • Modeling professional and ethical behavior

NIVA’s instructor approach emphasizes preparation, passion, patience, clinical competency, and continuous learning.


Prerequisites and Eligibility for NIVA IV Instructor Certification

Before beginning the certification process, candidates should confirm the current NIVA eligibility requirements directly with the National IV Association.

The source material identifies several areas candidates should be prepared to address.

1. Appropriate Licensure or Certification

Candidates should have active licensure or certification appropriate to their professional scope of practice.

Examples identified in the source include:

  • Registered nurses
  • LPNs/LVNs with appropriate employer support
  • Paramedics
  • Anesthesia technicians with documented IV clinical experience
  • Licensed veterinary technicians teaching within veterinary scope
  • Dentists when IV or IV sedation training falls within their practice scope

Scope of practice varies by profession and jurisdiction, so candidates should verify that IV-related activities are permitted within their applicable requirements.

2. Clinical IV Experience

Candidates should have practical experience performing IV-related responsibilities, including:

  • IV insertion
  • IV maintenance
  • Infusion management

The source notes that 1–2 years of direct IV-related patient-care experience is commonly recommended, but candidates should verify the current NIVA criteria rather than treating this as a universal requirement.

3. Life Support Training

Candidates may also need:

  • Basic Life Support (BLS)
  • Advanced Cardiac Life Support (ACLS), when required by the institution or relevant to the therapies being taught

4. Documentation of Competency

Competency may be supported through documentation such as:

  • Skills checklists
  • Supervisor attestations
  • Recognized phlebotomy or IV therapy training

The original article also identifies PCT Institute of Healthcare and Phlebotomy Career Training as potential foundational training resources.


Core Clinical Competencies for an IV Instructor

An effective instructor must be able to demonstrate the skills they teach.

That means maintaining competency in IV therapy, understanding why each step matters, and being able to explain the reasoning behind clinical decisions to learners.


1. Understanding IV Therapy Indications and Authorization

IV therapy can be used for a range of clinical purposes, including:

  • Blood collection
  • Medication administration
  • Fluid therapy
  • Chemotherapy
  • Immunosuppressant administration
  • Vitamin therapies
  • Fluid resuscitation
  • Parenteral nutrition

However, the authority to initiate or modify IV therapy depends on the clinician’s scope of practice, applicable orders, protocols, and institutional policies.

An instructor should therefore teach learners to understand not only how IV therapy is performed, but also when they are authorized to perform it.


2. Sterile Technique and Asepsis

Because IV therapy crosses the body’s natural skin barrier and enters the vascular system, infection prevention is a fundamental component of IV education.

Instructors should model:

  • Appropriate hand hygiene
  • Proper glove use
  • Appropriate antiseptic skin preparation
  • Maintaining aseptic technique
  • Allowing the antiseptic to dry appropriately
  • Following institutional infection-control policies

The source identifies chlorhexidine as a preferred antiseptic and describes a one-minute cleanse followed by air-drying, while also noting that alternatives may be required in circumstances such as chlorhexidine allergy or certain neonatal situations.

Because antiseptic requirements can vary by patient population and institutional policy, instructors should teach learners to follow the applicable current protocol.


3. Anatomy and Vein Selection

Good IV instruction begins with anatomy.

Commonly accessible veins include:

  • Cephalic vein
  • Basilic vein
  • Median cubital vein

Instructors should teach learners to assess and trace the vein before insertion and identify a stable segment suitable for cannulation and catheter securement.

The source also cautions against routinely using the dorsum of the hand or lower extremities unless necessary, noting considerations such as mobility, infiltration risk, peripheral circulation, healing, and patient-specific contraindications.


4. IV Insertion Technique

Candidates preparing to teach IV insertion should be able to demonstrate the fundamental mechanics of catheter placement.

Key insertion principles include:

Approach:
The source describes an insertion angle of approximately 15–28 degrees with the bevel facing upward.

Flashback:
Learners should understand how to identify blood return as an indication of intraluminal placement.

Avoid overshooting:
Passing through the posterior wall can result in infiltration or extravasation. Learners should understand how to respond appropriately rather than simply continuing to advance the needle.

Flush and reassess:
After catheter advancement and securement, a gentle saline flush can help assess patency. Resistance should be treated as a reason to stop and reassess rather than forcing the flush.


5. Recognizing IV Complications

One of the most important responsibilities of an IV instructor is teaching learners to recognize complications early.

Potential complications include:

  • Infiltration
  • Extravasation
  • Phlebitis
  • Infection
  • Air embolism
  • Catheter breakage
  • Thrombosis
  • Fluid overload

Complications can have serious consequences, particularly when they are not recognized promptly.

Instructors should teach learners to recognize concerning changes such as:

  • Increased heart rate
  • Elevated or changing blood pressure
  • Shortness of breath
  • Decreased oxygen saturation

When an emergency or significant complication is suspected, learners should follow their institution’s emergency procedures, stop the infusion when appropriate, and summon assistance.


IV Complications: Recognition and Response

ComplicationCommon SignsImmediate Response
InfiltrationSwelling, coolness, pain, decreased or absent blood returnStop infusion, remove catheter, elevate limb, and follow applicable treatment protocol
ExtravasationSevere pain, blistering, potential tissue injuryStop infusion; catheter may need to remain in place for aspiration/antidote according to protocol
PhlebitisRedness, warmth, pain, palpable cordRemove catheter and follow institutional protocol
Air embolismSudden dyspnea, hypotension, chest pain, arrhythmiaClamp line and activate emergency response according to protocol
Catheter-related bloodstream infectionFever, chills, erythema, positive culturesFollow institutional evaluation and treatment procedures
Fluid overloadDyspnea, crackles, hypoxia, edema, increased JVDStop or slow infusion and follow emergency/medical orders

The appropriate response to a complication depends on the specific situation, medication or fluid involved, patient condition, and institutional protocol.


6. Documentation and Legal Responsibilities

Documentation is both a clinical responsibility and an important component of professional practice.

IV instructors should teach learners to document information such as:

  • Date and time
  • IV insertion and assessment
  • Catheter gauge and length
  • Exact insertion site
  • Number of attempts
  • Patient response
  • Pain, swelling, or other complications
  • Flush volume and solution
  • Medications administered
  • Interventions performed
  • Patient and family education
  • Instructor or supervisor involvement when applicable

For example, documenting a site as “right antecubital fossa — cephalic vein” provides considerably more information than simply documenting “right arm.”

Detailed documentation supports continuity of care and provides a clear clinical record.


IV Catheter Gauge Guide

Different catheter sizes have different common applications.

GaugeCommon UseConsiderations
14–16GTrauma resuscitation, rapid transfusionLarge-bore; rarely used outside emergency/operating settings
18GBlood products, contrast, major surgeryCommon for many adult inpatient applications
20GGeneral IV fluids and medicationsCommon adult application
22GPediatrics, older adults, difficult veinsLess trauma; slower infusion
24GInfants, neonates, very fragile veinsAppropriate for selected maintenance fluids and laboratory applications

These are general reference points from the source article; patient condition, therapy, equipment, and institutional policy should guide final selection.


Understanding IV Fluids

IV instructors should also understand the basic characteristics, applications, and risks associated with commonly used fluids.

IV FluidGeneral EffectExample UsesImportant Risks
0.9% Normal SalineIsotonicVolume resuscitation, medication deliveryHyperchloremic acidosis with large volumes
3% Hypertonic SalineDraws fluid into the intravascular spaceSelected cases of cerebral edema and hyponatremiaFluid overload and pulmonary edema
0.45% SalineHypotonic; shifts fluid toward cells/tissuesIntracellular dehydrationCan worsen cerebral edema

Instructors should emphasize that fluid selection and administration must be based on the clinical situation and applicable orders and protocols.


Infusion Rates, Pumps, and Medication Safety

IV instructors must be comfortable teaching infusion calculations and safe infusion-device use.

Gravity Infusions

Gravity infusions require calculation of drops per minute based on the tubing’s drop factor.

Common tubing calibrations include:

  • 10 gtt/mL
  • 15 gtt/mL
  • 20 gtt/mL
  • 60 gtt/mL

Infusion Pumps

Infusion pumps are generally programmed in milliliters per hour.

Instructors should emphasize verifying:

  • Physician/provider order
  • Medication label
  • Pump settings
  • Patient
  • Dose
  • Route
  • Administration time

For medications or therapies requiring calculations such as mcg/kg/min or mg/kg/hour, learners should understand how the ordered dose translates into the appropriate infusion setting.

Independent double-checks should be emphasized for high-risk medications.


Rapid Infusion Risks

Rapid infusion can be particularly concerning in patients who are medically fragile, including some:

  • Older adults
  • Patients with cardiac disease
  • Patients with compromised renal function

Potential warning signs of cardiovascular or fluid overload include:

  • Tachycardia
  • Changing blood pressure
  • Shortness of breath
  • Increased work of breathing
  • Low oxygen saturation
  • Rales
  • Jugular venous distension

When these signs occur, the source instructs learners to stop the infusion, elevate the head of the bed, administer oxygen as ordered, and activate emergency-response procedures.


Medication Labeling and the “Six Rights”

Medication safety should be integrated into IV instructor education.

Learners should verify the:

  1. Right patient
  2. Right drug
  3. Right dose
  4. Right route
  5. Right time
  6. Right documentation/reason

Particular attention should be given to medications with similar appearances, medications stored together, and high-alert medications requiring independent verification.

Instructors should also teach learners to follow facility-specific policies regarding medication timing, IV access, blood draws, and tourniquet use around active IV lines.


IV Flush Best Practices

Flush technique is another essential component of IV competency.

Instructors should teach learners:

  • Appropriate flush volumes
  • Appropriate catheter-specific technique
  • Positive-pressure or applicable clamping techniques
  • Recognition of resistance

The source gives 2–10 mL saline as an example range depending on catheter characteristics.

Resistance should never simply be overcome by force. It should prompt assessment for possible infiltration, thrombosis, malposition, or another catheter problem.


Teaching Documentation: What Should Students Record?

A standardized documentation approach can help learners develop consistent habits.

Important documentation fields include:

  • Date and time
  • Procedure
  • Exact insertion site
  • Catheter type and gauge
  • Number of attempts
  • Patient tolerance
  • Relevant vital signs
  • Flush solution and volume
  • Medications administered
  • Complications
  • Interventions
  • Patient education
  • Supervisor or instructor sign-off when required

A standardized approach also makes documentation easier to evaluate during skills training.


Scope of Practice and Professional Responsibility

An IV instructor must teach learners where their professional boundaries begin and end.

Different healthcare professionals have different scopes of practice. Institutional policies, employer requirements, and applicable laws can also affect what a learner or clinician is permitted to perform.

Learners should understand that:

Knowing when to ask for help is part of clinical competency.

Instructors should create an environment where learners are expected to recognize their limitations, seek supervision when necessary, and communicate concerns rather than attempting procedures outside their knowledge or authorization.


What Makes an Effective IV Instructor?

Clinical expertise is only one part of being an effective instructor.

NIVA’s instructor philosophy emphasizes three qualities:

Preparation

Prepare:

  • Lesson plans
  • Equipment
  • Supplies
  • Simulation scenarios
  • Skills checklists
  • Infection-control procedures

Simulation gives learners opportunities for deliberate practice before applying skills in clinical environments.

Passion

An instructor’s enthusiasm for safe, evidence-informed IV care can help engage learners.

Passion should be paired with:

  • Professionalism
  • Respect
  • Evidence-based practice
  • Continuous improvement

Patience

Clinical skills take time to develop.

Instructors may need to adapt to different learning styles, experience levels, and psychomotor abilities.

Useful instructional strategies include:

  • Breaking complex skills into smaller components
  • Demonstrating before asking learners to perform
  • Coaching learners through practice
  • Gradually reducing support
  • Providing objective feedback
  • Creating an environment where mistakes can be discussed constructively

These approaches are particularly important in hands-on clinical education.


Continuous Learning for IV Instructors

IV therapy, infection-prevention practices, technology, and clinical guidance continue to evolve.

Certified instructors should therefore maintain their knowledge through:

  • Continuing education
  • Professional reading
  • Reviewing current clinical literature
  • Professional networks
  • Ongoing skills development

The source recommends consulting authoritative resources including the CDC, NIH, and National Library of Medicine for evidence-based information.


Using Erikson’s Psychosocial Development Theory in IV Education

Patient-centered IV education also involves understanding the developmental and psychosocial needs of different age groups.

Erikson’s eight psychosocial stages provide a framework instructors can use to adapt communication and educational approaches.

Developmental StageApproximate AgeTeaching Considerations
Trust vs. MistrustInfancySoothing communication and family involvement
Autonomy vs. ShameToddlerSimple choices and distraction
Initiative vs. GuiltPreschoolSimple explanations and play-based preparation
Industry vs. InferioritySchool-agePositive reinforcement and participation
Identity vs. Role ConfusionAdolescencePrivacy, autonomy, and confidentiality
Intimacy vs. IsolationYoung adultCollaborative decision-making
Generativity vs. StagnationMiddle adultFunctional goals and life context
Integrity vs. DespairOlder adultRespect for autonomy, life experience, and goals of care

Using developmental principles can help instructors tailor communication to patients and learners across the lifespan.


Geriatric Considerations for IV Instructors

Older adults may have physiological and psychosocial characteristics that require adjustments in IV care and communication.

Vascular and Skin Changes

Older adults may have:

  • Less elastic veins
  • Increased vascular fragility
  • Thinner skin
  • Reduced subcutaneous tissue

When appropriate, smaller IV catheter gauges may help reduce trauma.

Securement should also take skin fragility into account.

Fluid Management

Changes in fluid distribution and renal function can increase the risk of both dehydration and fluid overload.

Instructors should teach learners to pay close attention to:

  • Fluid intake and output
  • Vital signs
  • Patient condition
  • Signs of fluid overload

Medication Considerations

Polypharmacy and altered pharmacokinetics can affect how older adults respond to medications.

Learners should understand the importance of monitoring for adverse effects and potential medication interactions.


Simulation and IV Skills Assessment

Hands-on simulation is an important component of competency-based instructor education.

Simulation scenarios can include:

  • IV insertion
  • Infiltration
  • Extravasation
  • Air embolism
  • Fluid overload
  • Documentation
  • Patient communication
  • Emergency response

Objective checklists and structured clinical assessments allow instructors to evaluate both technical performance and clinical decision-making.

Debriefing is equally important. Learners should have an opportunity to reflect on what happened, identify errors, and understand how they can improve.


Teaching Different Healthcare Professionals

Not every learner enters an IV course with the same clinical background.

Student Nurses

Focus on:

  • IV fundamentals
  • Clinical reasoning
  • Documentation
  • Basic pharmacology
  • Safe technique

RNs, LPNs, and LVNs

Emphasize:

  • Infusion management
  • Troubleshooting
  • Complication recognition
  • Team-based care

Anesthesia Technicians

Focus on:

  • IV access for procedural sedation
  • Medication safety
  • Infusion pumps
  • Rapid-response protocols

Veterinary Technicians

Adapt IV principles to:

  • Animal anatomy
  • Species-specific considerations
  • Sedation
  • Medication administration

Dentists

When IV sedation or IV medication administration falls within their scope, education can focus on:

  • Safe IV access
  • Medication safety
  • Airway management
  • Emergency preparedness

Tailoring instruction to the learner’s professional environment makes clinical education more relevant and practical.


Blood Draws, IV Lines, and Medication Timing

IV instructors may also need to teach learners about situations where blood collection and IV therapy overlap.

Important considerations include:

Medication Timing

Some laboratory tests require blood collection at specific intervals following medication administration.

Learners should follow institution-specific timing requirements for:

  • Peak levels
  • Drug assays
  • Other medication-related testing

Blood Collection From IV Lines

When blood is collected from an IV line, learners should follow facility protocols regarding:

  • Flushing
  • Waste/discard volume
  • Sampling
  • Post-draw flushing

This helps reduce the risk of dilution or contamination.

Tourniquets and Active IV Lines

The source specifically cautions against applying a tourniquet over an arm with an active peripheral IV because it can affect infusion dynamics, potentially displace the catheter, and introduce other risks.


Working Within Institutional Policy

An IV instructor should never teach IV procedures as though one universal protocol applies everywhere.

Learners need to understand that institutions may have specific policies governing:

  • IV insertion
  • Medication administration
  • Infusion rates
  • Documentation
  • Emergency response
  • Scope of practice
  • Blood collection
  • Consent
  • Reporting

When a learner is uncertain, the appropriate response is to consult a supervisor or follow the applicable institutional procedure.

The source also recommends closed-loop communication and SBAR — Situation, Background, Assessment, Recommendation — for escalation and handoff.


How to Prepare for NIVA IV Instructor Certification

A practical preparation process can include the following steps:

Step 1: Confirm Eligibility

Review your current professional credentials, clinical experience, and NIVA’s current instructor requirements.

Step 2: Document Your Experience

Gather applicable:

  • Clinical experience documentation
  • Skills checklists
  • Competency records
  • Supervisor attestations

Step 3: Strengthen Clinical Knowledge

Review areas such as:

  • Anatomy
  • IV insertion
  • Infusion pharmacology
  • Aseptic technique
  • Medication safety
  • Complication management

Step 4: Practice Hands-On Skills

Use simulation and supervised practice to strengthen technical competency.

Step 5: Develop Teaching Skills

Prepare lesson plans, demonstrations, scenarios, and competency assessments.

Step 6: Prepare for Assessment

Review applicable NIVA examination information and practice scenarios involving:

  • Infiltration
  • Extravasation
  • Air embolism
  • Fluid overload
  • Documentation
  • Patient communication

The original article recommends confirming eligibility and current certification requirements directly with NIVA because requirements can change.


Final Certification Preparation Checklist

Before pursuing certification, candidates can use this checklist:

  • Confirm current NIVA eligibility requirements
  • Verify professional licensure/certification
  • Compile clinical experience documentation
  • Review competency checklists
  • Complete applicable preparatory coursework
  • Practice IV insertion through simulation and supervised practice
  • Review infusion pharmacology and medication safety
  • Practice complication-response scenarios
  • Develop lesson plans
  • Build a teaching portfolio where appropriate
  • Review relevant examination information
  • Gather authoritative clinical resources
  • Continue developing teaching and clinical skills


Final Thoughts

Becoming an effective IV instructor requires the combination of clinical knowledge, technical competency, teaching ability, patient-centered communication, and professional responsibility.

An instructor must be prepared to demonstrate safe IV technique while also teaching learners how to recognize complications, understand medication and infusion safety, document appropriately, work within their scope of practice, and communicate effectively with patients and other healthcare professionals.

For prospective IV instructors, the goal is not simply to demonstrate how to perform an IV procedure. It is to develop the knowledge, judgment, communication skills, and teaching abilities needed to help other healthcare professionals perform safely and confidently.

As Nancy Kimmel writes in the original article, prospective instructors should approach the role with a commitment to lifelong learning, humility, safety, patience, and passion.


NIVA IV Instructor Certification

The National IV Association provides IV education and certification pathways, including its I.V. Instructor Certification program.

Prospective candidates should review the current NIVA program information and candidate requirements before enrolling.

Explore NIVA’s I.V. Instructor Certification →

Explore the I.V. Review Course + Certification →

Explore Immunization Course + Certification →

Frequently Asked Questions About Becoming a Certified IV Instructor

What does an IV instructor teach?

An IV instructor teaches healthcare professionals the knowledge and practical skills required for safe IV therapy, including IV insertion, sterile technique, infusion principles, medication safety, complication recognition, documentation, and patient-centered care.

Who can become a NIVA Certified IV Instructor?

The source identifies potential candidates including student nurses, nurses, anesthesia technicians, veterinary technicians, and dentists, provided their professional credentials, scope of practice, experience, and other requirements align with applicable NIVA criteria.

Candidates should verify current eligibility directly with NIVA.

How much IV experience is needed?

The source states that 1–2 years of direct IV-related patient-care experience is commonly recommended, but this should not be treated as a universal current NIVA requirement. Candidates should confirm the current eligibility criteria with NIVA.

What skills should an IV instructor have?

An IV instructor should be able to demonstrate competency in areas such as:

  • IV insertion
  • Vein selection
  • Aseptic technique
  • Infusion management
  • Medication safety
  • Complication recognition
  • Documentation
  • Patient communication
  • Clinical teaching

Why is simulation important in IV instructor training?

Simulation provides an opportunity for learners to practice clinical skills repeatedly, respond to complications, receive structured feedback, and develop confidence before applying skills in clinical environments.

Do IV instructors need to understand medication safety?

Yes. IV instruction includes medication and infusion safety, including appropriate labeling, verification, infusion calculations, pump programming, medication timing, and recognition of potential complications.

Why is patient communication important for IV instructors?

IV procedures can be stressful for patients. Effective instructors teach learners to communicate clearly, respect patient autonomy and dignity, adapt communication to developmental needs, and explain procedures appropriately.

Categories
Blog IV Certification

Recognizing and Managing IV Complications: Phlebitis, Infiltration, and More

Estimated reading time: 15 minutes

Intravenous (IV) therapy is one of the most commonly performed invasive procedures in healthcare. IV access is used for fluid resuscitation, medication administration, chemotherapy, immunosuppressant therapy, vitamin and micronutrient therapy, blood collection, and emergency access.

Because an IV catheter provides direct access to the vascular system, complications can sometimes progress quickly. Problems such as phlebitis, infiltration, extravasation, catheter-related infection, occlusion, thrombosis, air embolism, and fluid overload require prompt recognition and appropriate intervention.

For student nurses, nurses, anesthesia techs, veterinary techs, dentists, and healthcare educators who teach IV skills, understanding the warning signs of IV complications is an essential part of safe clinical practice.

This guide explains how to recognize common IV complications, understand their causes and risk factors, respond appropriately, document events, and teach IV complication prevention through clinical education and simulation.

Table of contents


What Are the Most Common IV Complications?

The most commonly encountered IV complications discussed in this guide include:

  • Phlebitis — inflammation of the vein
  • Infiltration — leakage of a non-vesicant IV solution into surrounding tissue
  • Extravasation — leakage of a vesicant medication into surrounding tissue
  • Catheter-related infection
  • Catheter occlusion or thrombosis
  • Air embolism
  • Fluid overload

Early recognition is important because some IV complications remain localized while others can produce systemic effects.

Quick Answer: If an IV site develops unexpected pain, redness, swelling, coolness, blanching, resistance to flushing, loss of blood return, or other concerning changes, stop and assess the infusion according to applicable clinical protocols. The appropriate response depends on the suspected complication, medication or solution involved, patient condition, and institutional policy.


Why IV Complication Management Matters

IV therapy can produce rapid physiological effects because fluids and medications enter the vascular system directly.

Examples of potential problems include:

  • Hypertonic solutions causing vascular irritation or fluid shifts
  • Rapid infusions contributing to cardiovascular overload in vulnerable patients
  • Breaks in aseptic technique contributing to catheter-related bloodstream infection
  • Vesicant medications causing tissue injury when they escape the vein

Maintaining appropriate technique, verifying medication and fluid labels, following applicable authorization requirements, and documenting care are therefore fundamental components of IV safety.


Understanding the Anatomy Behind IV Complications

An IV catheter passes through several layers before entering the vein.

From the skin surface toward the vascular lumen, these include:

  1. Epidermis
  2. Dermis
  3. Hypodermis/subcutaneous tissue
  4. Venous wall, including the tunica intima, media, and adventitia

Understanding these structures helps clinicians understand the physical sensations associated with insertion, recognize flashback, and understand how fluid or medication can enter surrounding tissue if the catheter is not positioned appropriately.


Choosing the Right Vein Can Help Prevent Complications

Vein selection is an important part of IV complication prevention.

For peripheral IV access, commonly used veins include:

  • Cephalic vein
  • Basilic vein
  • Median cubital vein

The antecubital fossa contains several relatively large veins that may be useful for peripheral access.

When selecting a vein, clinicians should:

  • Trace the vein before insertion
  • Identify a sufficiently straight segment
  • Avoid areas over joints when possible
  • Consider vessel quality
  • Consider the patient’s condition and history
  • Select an appropriate catheter size

The source recommends tracing the vein for at least an inch (approximately 2–3 cm) to understand its direction and continuity before cannulation.

Special Populations

Vein selection becomes particularly important in:

  • Older adults with fragile or tortuous veins
  • Pediatric patients with smaller vessels
  • Patients with diabetes
  • Patients with peripheral vascular disease
  • Patients with cardiac or renal conditions affecting fluid management

Technique should always be adapted to the individual patient’s vessel quality and clinical condition.


IV Insertion Technique and Complication Prevention

Technical precision during IV insertion can help reduce mechanical injury.

Important principles include:

Insert at the Appropriate Angle

The source describes a peripheral IV insertion angle of approximately 15–28 degrees, depending on vein depth.

Keep the Bevel Up

The needle should be inserted with the bevel facing upward.

Recognize Flashback

Blood return in the catheter hub indicates entry into the vein. Once flashback is observed, the catheter should be advanced appropriately while reducing the angle to help avoid passing through the vessel.

Avoid Transfixing the Vein

Continuing to advance after entering the vein can cause the needle or catheter to pass through the posterior wall.

Never Force a Flush

Resistance during flushing can indicate:

  • Malposition
  • Catheter occlusion
  • Placement against the vessel wall
  • Perivascular placement

If resistance occurs, stop and reassess rather than forcing the flush.


Sterile Technique and Skin Antisepsis

Aseptic technique is fundamental to preventing infection and other IV complications.

Important practices include:

  • Hand hygiene before and after the procedure
  • Appropriate antiseptic skin preparation
  • Allowing the antiseptic to dry completely
  • Appropriate gloves
  • Appropriate dressings and securement
  • Maintaining a clean field during dressing changes and line access

The source identifies chlorhexidine as the preferred skin antiseptic for most adult patients and discusses cleansing the insertion site for approximately 30 seconds to one minute, followed by complete drying.

Because antiseptic products, concentrations, application times, and patient-specific precautions can vary, clinicians should follow the applicable current institutional protocol.


Understanding IV Solutions and Their Effects

Understanding solution tonicity is another important component of IV education.

SolutionGeneral EffectClinical Considerations
0.9% Normal SalineIsotonic and closely aligned with extracellular fluidUsed for applications such as resuscitation and medication dilution; large volumes may contribute to hyperchloremic metabolic acidosis in some patients
3% Hypertonic SalineDraws water toward the vascular spaceUsed in selected situations such as severe hyponatremia and cerebral edema; requires careful administration
0.45% SalineHypotonic; shifts fluid toward cells/interstitiumUsed in selected cases of intracellular dehydration; inappropriate use can contribute to complications

Medication and fluid labels should always be carefully checked. Confusing solutions with medications such as atropine or lidocaine can result in serious medication errors.


Fluid Overload and Rapid Infusion

Infusion speed must be appropriate for the patient’s physiology.

Patients who may be particularly vulnerable to cardiovascular overload include some:

  • Older adults
  • Patients with heart failure
  • Patients with renal impairment
  • Other medically fragile patients

Potential warning signs include:

  • Tachycardia
  • Elevated blood pressure
  • Shortness of breath
  • Tachypnea
  • Low oxygen saturation
  • Jugular venous distension
  • Crackles on lung auscultation

When signs of acute overload occur, the source recommends stopping the infusion, positioning the patient upright, administering oxygen, and notifying the provider, while following applicable emergency protocols.


Phlebitis: Signs, Causes, and Management

What Is Phlebitis?

Phlebitis is inflammation of the vein wall.

It can be:

  • Chemical — associated with an irritating medication or solution
  • Mechanical — associated with catheter movement or irritation
  • Infectious — associated with infection

Common signs include:

  • Redness along the vein
  • Pain or tenderness
  • Warmth
  • Swelling
  • A palpable or tender cord
  • Possible purulent drainage when infection is involved

What Should You Do if Phlebitis Is Suspected?

The source recommends:

  1. Stop the infusion.
  2. Discontinue the catheter when phlebitis is suspected.
  3. Assess for systemic signs of infection.
  4. Establish alternative access when necessary.
  5. Obtain cultures or notify the prescriber when infection is suspected.
  6. Document the event thoroughly.

Documentation should include the time, catheter information, site, signs and symptoms, patient response, and actions taken.


Infiltration: Recognition and Management

What Is Infiltration?

Infiltration occurs when a non-vesicant IV solution leaks into the surrounding tissue.

This differs from extravasation, where a vesicant medication escapes into tissue and can cause cellular injury.

Signs of Infiltration

Watch for:

  • Coolness around the IV site
  • Blanching
  • Swelling
  • Tightness
  • Loss of blood return
  • Resistance during flushing

What Should You Do?

If infiltration is suspected:

  • Stop the infusion.
  • Clamp or remove the catheter as appropriate.
  • Elevate the affected limb.
  • Follow the applicable compress protocol.
  • Assess the affected area.
  • Document the size, appearance, symptoms, and progression.

If the solution or medication involved requires an extravasation protocol, follow that protocol rather than treating it as ordinary infiltration.


Extravasation: A More Serious Tissue Injury Risk

What Is Extravasation?

Extravasation is the leakage of a vesicant medication into surrounding tissue.

Some chemotherapy agents and concentrated vasopressors are examples of agents that can cause significant tissue injury if extravasated.

Potential findings include:

  • Severe pain
  • Blanching
  • Swelling
  • Tissue injury
  • Blistering
  • Potential necrosis

Immediate Response

When extravasation is suspected:

  1. Stop the infusion immediately.
  2. Do not automatically remove the catheter.
  3. Follow the institution’s extravasation protocol.
  4. Preserve the catheter when required for aspiration.
  5. Consult the appropriate prescribing clinician and pharmacy.
  6. Follow medication-specific antidote and compress instructions.
  7. Document the event in detail.

Documentation should include the medication, dose, time, estimated amount involved, physical findings, and interventions.


Catheter-Related Infection

IV-related infection can occur locally or involve the bloodstream.

Local Signs

  • Redness
  • Tenderness
  • Purulent drainage

Systemic Signs

  • Fever
  • Chills
  • Hypotension
  • Unexplained leukocytosis

When infection is suspected or confirmed, management should follow institutional and provider-directed protocols. This may include catheter removal, cultures, antimicrobial therapy, and infection-prevention measures.


Catheter Occlusion and Thrombosis

A catheter that becomes difficult or impossible to flush requires assessment.

Possible signs include:

  • Inability to flush
  • Reduced infusion flow
  • Swelling

Potential causes include:

  • Mechanical obstruction
  • Fibrin sheath
  • Thrombus
  • Catheter positioning problems

Key Safety Rule

Do not forcibly flush against resistance.

First assess for mechanical or positional causes. Pharmacologic treatment such as a thrombolytic may be appropriate in selected circumstances and according to applicable protocols.


Air Embolism: Rare but Serious

Air embolism occurs when air enters the venous circulation.

Potential signs include:

  • Sudden chest pain
  • Dyspnea
  • Hypotension
  • Cyanosis
  • Altered mental status
  • Cardiac arrhythmia

Prevention

Prevention includes:

  • Properly priming tubing
  • Clamping lines appropriately
  • Using occlusive dressings
  • Preventing air entry during line insertion and removal
  • Maintaining appropriate line connections

If an air embolism is suspected, follow the institution’s emergency-response protocol immediately. The source describes positioning the patient in left lateral decubitus and Trendelenburg when tolerated, administering 100% oxygen, and activating emergency response.


Phlebitis and Infiltration Assessment Scales

Standardized assessment tools can help clinicians consistently document changes at an IV site.

The source describes commonly used:

  • Phlebitis scales
  • Infiltration scales

Both use graded findings to help characterize severity.

Example Phlebitis Scale

GradeFindingsExample Action
0No symptomsContinue routine care
1Possible tenderness/slight erythemaMonitor closely
2Redness, swelling, pain along veinRemove catheter and follow protocol
3–4Palpable cord, marked erythema, possible purulenceRemove catheter; culture/treat when indicated

Standardized assessment supports clearer documentation and communication between clinicians.


IV Flushing and Blood Draws

Flushing and blood collection from IV lines require careful attention to technique and timing.

Important considerations include:

  • Use the appropriate saline and technique.
  • Follow applicable facility requirements for flushing.
  • Consider medication contamination when collecting blood from an IV line.
  • Observe required timing between medication administration and blood collection.
  • Follow policy regarding discard/waste volumes.
  • Avoid placing a tourniquet above an arm with an active IV infusion.

The timing of blood collection can affect laboratory results when medications are being administered through the line, so institution-specific policies should determine the appropriate procedure.


Medication Verification and IV Safety

Medication errors can create serious IV-related complications.

Before administering an IV medication, verify:

  • Patient
  • Medication
  • Concentration
  • Dose
  • Route
  • Time
  • Expiration date
  • Applicable order

High-risk medications may also require two-person verification according to institutional policy.

Documentation should include relevant medication information, including lot numbers and administration times when required for traceability.


IV Documentation: What Should Be Charted?

Documentation should create a clear record of both routine IV care and complications.

Important information includes:

  • Date and time
  • Catheter gauge
  • Catheter length
  • Manufacturer when required
  • Exact anatomical location
  • Number of attempts
  • Assistance provided
  • Patient response
  • Relevant vital-sign changes
  • Interventions
  • Patient/family education
  • Provider notification
  • Orders received

For students and novice clinicians, learning precise documentation is part of developing safe clinical practice.


Scope of Practice and Professional Accountability

IV skills must always be performed within the individual’s professional scope of practice.

Scope can depend on:

  • Profession
  • State regulations
  • Employer policies
  • Delegation
  • Supervision
  • Clinical setting

Medical assistants, for example, should consult supervising clinicians when IV responsibilities exceed their authorized scope.

For students and novice clinicians, supervision and progressively increased responsibility help support safe learning.


How IV Instructors Can Teach Complication Recognition

Effective IV education should combine knowledge with hands-on practice.

A strong skills program can incorporate:

Preparation

Provide:

  • Appropriate equipment
  • Simulation models
  • Documentation templates
  • Skills checklists
  • Complication scenarios

Demonstration and Return Demonstration

Instructors should demonstrate the skill and then have learners perform it while being observed.

Scenario-Based Simulation

Simulation can recreate situations such as:

  • Infiltration
  • Extravasation
  • Phlebitis
  • Fluid overload
  • Difficult access
  • Medication-related complications

Constructive Feedback

Learners need opportunities to understand:

  • What happened
  • Why it happened
  • What warning signs were present
  • What could have been done differently
  • How to respond safely next time

The source emphasizes preparation, passion, patience, individualized coaching, debriefing, and continuous learning as important instructor practices.


Applying Erikson’s Psychosocial Stages to IV Education

IV education is not only about technical skill.

Patients and learners have different developmental, emotional, and communication needs.

Erikson’s psychosocial framework can help instructors adapt communication across the lifespan.

Examples include:

  • Infants: reduce sensory distress and involve caregivers appropriately.
  • Toddlers: offer simple choices.
  • Preschool children: use play and age-appropriate explanations.
  • School-age children: encourage participation and competence.
  • Adolescents: respect privacy and autonomy.
  • Young adults: encourage collaborative decision-making.
  • Middle adults: connect care with health and family responsibilities.
  • Older adults: emphasize dignity, autonomy, life experience, and individual goals.

Using developmentally appropriate communication can make IV education more patient-centered and responsive.


Geriatric IV Complication Considerations

Older adults may have characteristics that require additional attention during IV therapy.

These can include:

  • Fragile veins
  • Thinner skin
  • Reduced cardiac reserve
  • Altered fluid distribution
  • Polypharmacy

For older patients, instructors should emphasize:

  • Appropriate catheter selection
  • Gentle securement
  • Protection of fragile skin
  • Careful fluid monitoring
  • Medication review
  • Clear and respectful communication
  • Appropriate caregiver involvement

Fluid overload may present subtly, so learners should understand the importance of monitoring the patient’s overall clinical condition rather than relying on a single measurement.


Education and Competency Assessment

A structured IV competency program can include four major components:

1. Didactic Education

Cover:

  • Anatomy
  • Infection prevention
  • IV solutions
  • Medication safety
  • Complication recognition

2. Simulation

Use task trainers and simulated complications to practice recognition and response.

3. Supervised Clinical Practice

Learners should perform procedures under appropriate supervision and receive feedback.

4. Documentation Assessment

Evaluate whether learners can accurately document:

  • Time
  • Gauge
  • Location
  • Attempts
  • Patient response
  • Complications
  • Interventions

Interprofessional IV Responsibilities

IV care often involves multiple members of a healthcare team.

The source highlights different educational considerations for:

Student nurses and new nurses:
Perform IV procedures under appropriate supervision until competency is established.

Anesthesia technicians:
Understand IV monitoring, line setup, and emergency response in procedural environments.

Veterinary technicians:
Adapt IV principles to animal anatomy and species-specific needs.

Dentists:
When IV sedation falls within scope, understand vascular access, infiltration recognition, airway management, and cardiovascular complications.

Medical assistants:
Work within defined scope and consult supervising clinicians when necessary.


Preventing IV Complications at the System Level

IV safety is not solely an individual responsibility.

Healthcare organizations can support prevention through:

  • Standardized insertion and maintenance practices
  • Appropriate skin antisepsis
  • Catheter stabilization
  • Securement systems
  • Consistent assessment
  • Staff education
  • Reporting of serious complications
  • Root-cause analysis
  • Ongoing review of current evidence

Serious events such as significant extravasation injuries or catheter-related bloodstream infections should be reviewed according to applicable organizational quality-improvement processes.


IV Safety Checklist

Before IV Insertion

  • Confirm the indication.
  • Confirm appropriate authorization when required.
  • Review relevant patient history and allergies.
  • Select an appropriate vein.
  • Select an appropriate catheter size.
  • Trace the vein.
  • Gather necessary supplies.
  • Perform hand hygiene.

During IV Insertion

  • Position the patient appropriately.
  • Apply the tourniquet correctly.
  • Avoid applying a tourniquet over an active IV.
  • Prepare the skin according to protocol.
  • Insert bevel-up at the appropriate angle.
  • Watch for flashback.
  • Advance the catheter appropriately.
  • Secure the catheter.
  • Flush gently.
  • Stop and reassess if resistance occurs.

After Insertion

  • Secure and dress the IV site.
  • Document the procedure.
  • Label the dressing when required.
  • Educate the patient about warning signs.
  • Monitor the site according to institutional policy.

Three IV Complication Scenarios to Recognize

Case 1: Fluid Overload

An older patient with congestive heart failure receives a fluid bolus and subsequently develops tachycardia, shortness of breath, and new crackles.

These findings can indicate acute cardiovascular or fluid overload and require immediate clinical reassessment and appropriate emergency response.

Case 2: Phlebitis

A patient receiving peripheral antibiotics develops redness and tenderness along the vein.

The findings are consistent with possible phlebitis. The source scenario describes catheter removal, warm compresses, documentation, and monitoring.

Case 3: Extravasation

A patient receiving a vasopressor through a peripheral IV develops sudden pain, blanching, and loss of blood return.

Extravasation should be suspected. The infusion should be stopped and the applicable extravasation protocol followed, including preserving the catheter when necessary for aspiration and seeking appropriate clinical/pharmacy support.


Final Practice Points for IV Clinicians and Educators

When teaching or performing IV therapy, remember:

  • Verify the indication and authorization as appropriate.
  • Read medication and fluid labels carefully.
  • Use appropriate aseptic technique.
  • Select veins and catheter sizes based on patient and vessel characteristics.
  • Use appropriate insertion technique and avoid forcing the catheter.
  • Never force a flush against resistance.
  • Monitor fragile patients carefully during infusions.
  • Recognize phlebitis, infiltration, extravasation, infection, and occlusion early.
  • Follow medication-specific and institution-specific complication protocols.
  • Document IV procedures and complications accurately.
  • Work within professional scope of practice.
  • Teach through demonstration, simulation, supervised practice, and constructive feedback.
  • Adapt communication to the patient’s age, condition, and individual needs.
  • Continue updating clinical knowledge using authoritative resources.

Continuing Education and Professional Development

Maintaining IV competency is an ongoing process.

Clinicians and instructors should continue reviewing current institutional policies and authoritative clinical resources, including information from organizations such as the CDC, NIH, NLM, and NIA.

Structured education and skills training can also help clinicians strengthen their knowledge of IV therapy, phlebotomy, patient safety, and complication recognition.


Conclusion

Safe IV therapy requires much more than successful catheter placement.

Clinicians must be able to recognize subtle changes at the IV site, understand how medications and fluids affect the patient, identify complications early, respond according to the applicable protocol, and document what happened accurately.

For instructors, these skills must be translated into effective education. Learners need opportunities to understand the underlying physiology, practice technical skills, recognize complications through realistic scenarios, and develop the confidence to stop and ask for help when something is not right.

Whether teaching student nurses, nurses, anesthesia techs, veterinary techs, dentists, or other healthcare professionals working within their applicable scope, the foundation remains the same:

Prepare carefully. Practice deliberately. Recognize complications early. Put patient safety first.

Frequently Asked Questions About IV Complications

What are the most common IV complications?

Common complications include phlebitis, infiltration, extravasation, catheter-related infection, catheter occlusion or thrombosis, and air embolism.

What is the difference between infiltration and extravasation?

Infiltration involves leakage of a non-vesicant IV solution into surrounding tissue. Extravasation involves leakage of a vesicant medication that can cause tissue injury.

What are the signs of phlebitis?

Common signs include redness, pain or tenderness, warmth, swelling, and a palpable cord along the vein.

What are the signs of IV infiltration?

Common signs include coolness, blanching, swelling, tightness, loss of blood return, and resistance to flushing.

What should you do if an IV does not flush?

Do not force the flush. Assess the catheter and patient for possible mechanical obstruction, malposition, infiltration, thrombosis, or another cause of resistance.

Why is extravasation more serious than infiltration?

Extravasation involves a vesicant medication that can cause significant local tissue injury, including potential necrosis.

How can IV complications be prevented?

Prevention includes appropriate vein selection, correct insertion technique, aseptic practice, appropriate catheter selection and securement, medication and solution verification, appropriate infusion rates, ongoing site assessment, and accurate documentation.

Why is documentation important after an IV complication?

Documentation creates a clinical record of the event, patient findings, interventions, response, and notifications. It also supports communication and professional accountability.

Categories
Uncategorized

Pharmacology Basics for the IV Technician: What You Must Know

Pharmacology Basics for the IV Technician: What You Must Know

Nancy Kimmel, MSN, FNP, RN, PhD CHMM, MSN-FNP-BC — National IV Association

Introduction: Why IV Pharmacology Matters for the IV Technician

Intravenous (IV) therapy is a cornerstone of modern medical care — used for blood collection, chemotherapy, immunosuppressant delivery, vitamin therapy, fluid resuscitation, and continuous medication infusions. As an IV technician, your work directly affects systemic physiology because fluids and medications introduced intravenously circulate rapidly throughout the vascular compartment. Small errors can therefore produce large, immediate consequences: systemic infections, tissue necrosis from extravasation, air embolism, fluid overload, or life‑threatening arrhythmias.

This article provides a comprehensive pharmacology foundation tailored to the IV technician, with practical clinical guidance, detailed anatomy and insertion technique, medication and fluid principles, complications and monitoring, legal/professional responsibilities, and teaching strategies for instructors. It is written for student nurses, nurses, anesthesia techs, veterinary techs, and dentists involved with IV access and management.

Scope and Audience

This content is intended for allied health personnel responsible for IV access or assisting with infusion therapy: student nurses, nurses, anesthesia techs, veterinary techs, and dentists. It is not a replacement for institutional policies or prescriber orders. Always work within your facility’s protocol and your defined scope of practice. Medical assistants and other non‑licensed personnel must consult supervisors or licensed clinicians before performing tasks outside their authorized scope. If you lack knowledge or comfort with a task, admit it and seek supervision — patient safety depends on that honesty.

Anatomy and Tissue Planes Traversed During IV Insertion

Understanding the layers the needle passes through and the venous wall structure is essential to safe cannulation and minimizing complications.

Surface Layer Description
Epidermis The outermost skin layer; barrier to microbes. Requires proper skin antisepsis prior to insertion.
Dermis Contains blood vessels, nerves, and connective tissue; local pain receptors are dense here.
Hypodermis (Subcutaneous Tissue) Fat layer with variable thickness; the needle traverses this to reach superficial veins.
Venous Tunica Vein wall layers (intima, media, adventitia). Proper needle angle and control help entry into the lumen without transfixion.

Common peripheral veins for cannulation include the cephalic, basilic, and median cubital veins within the antecubital fossa. Trace the vein for at least an inch proximally and distally to identify a straight segment for cannulation. Avoid hands and lower extremities except when necessary, and avoid lower extremities particularly in patients with diabetes or peripheral vascular disease due to increased risk of complications.

IV Insertion Technique and Asepsis: The Pharmacokinetic Gateway

IV therapy is effective because it bypasses absorption barriers — but that also removes many of the body’s protective checks. Therefore, meticulous aseptic technique is mandatory.

  • Perform a targeted assessment and obtain physician authorization for IV placement and specific therapies (e.g., chemotherapy, immunosuppressants, vitamin therapy).
  • Skin antisepsis: chlorhexidine is preferred when not contraindicated. Clean the site with 0.5%–2% chlorhexidine with appropriate alcohol concentration; allow at least 30 seconds to 1 minute of contact time per institutional policy. A one‑minute scrub is commonly taught and effective to reduce skin flora. Do not touch the site after antisepsis.
  • Needle angle: advance the catheter at a 15°–28° angle with the bevel up to enter the vein smoothly. Lower the angle as the flashback appears to thread the catheter into the lumen.
  • Flashback: a visual indicator of venous entry. Once seen, do not advance forcefully — advancing too far risks perforation and transfixion. If you feel a “give” then a sudden lack of resistance and see flashback, lower the angle and advance the catheter slightly while stabilizing the skin.
  • Do not “push too hard” — moving through the vein means the catheter or needle may transect the posterior wall causing infiltration, hematoma, or failure of the device.
  • When flushing after placement, resistance indicates the catheter is not fully intraluminal — stop, do not force a flush, and reassess line position.

Practical insertion checklist

  • Confirm order/indication and allergies; verify patient identity.
  • Gather supplies; perform hand hygiene and don gloves.
  • Apply antiseptic (chlorhexidine) and allow full contact time (≈1 minute).
  • Use appropriate gauge catheter for therapy (table below).
  • Insert bevel up at 15°–28°; watch for flashback; stabilize and advance catheter.
  • Secure catheter, label with time, gauge, and insertion site.
  • Document per institutional policy: time placed, gauge, site, patient response, and any special instructions.
Catheter Gauge Typical Use
14–16G Major trauma, rapid transfusion, surgery
18G CT contrast, blood transfusion, most adult infusions
20G General IV therapy, most medications
22–24G Pediatrics, elderly with fragile veins, routine maintenance

Pharmacology Principles for IV Administration

IV administration is distinct pharmacokinetically and pharmacodynamically from other routes. Key principles every IV technician should understand:

  • Onset and bioavailability: IV administration delivers 100% bioavailability with immediate onset of action. This makes timing and dose accuracy critical.
  • Volume of distribution: intravenous drugs distribute into vascular and extravascular compartments depending on their physicochemical properties; some stay mainly intravascular (e.g., albumin-bound drugs) while others diffuse into tissues.
  • Concentration and tonicity: the tonicity of IV fluids (isotonic, hypertonic, hypotonic) has immediate effects on intravascular volume and cellular fluid shifts.
  • Compatibility: many drugs are incompatible with specific IV fluids or other drugs when mixed; never assume compatibility — check concentration charts or pharmacy resources.
  • Label reading: always read the medication label before administration. Simple errors (e.g., saline vs. atropine vs. lidocaine) lead to catastrophic outcomes. Verify the medication, dose, route, and expiry.

Isotonic, Hypertonic, and Hypotonic Solutions

Solution Type Common Examples Physiologic Effect Clinical Use
Isotonic 0.9% NaCl (Normal Saline), Lactated Ringer’s Osmolarity approximates plasma; no net fluid shift across cell membranes. Normal blood pH ranges 7.35–7.45; isotonic fluids should not substantially alter blood pH. Volume resuscitation, maintenance fluid in many settings
Hypertonic 3% NaCl, high‑concentration dextrose solutions Pulls water into the vascular compartment from cells and interstitium via osmotic gradient. Treat cerebral edema, reduce edema. Use with caution—risk of fluid overload and hypernatremia; contraindicated in CHF without close monitoring.
Hypotonic 0.45% NaCl (half‑normal saline) Drives water out of the vascular system into the interstitial and intracellular spaces; can worsen edema. Treat intracellular dehydration, hyperosmolar states. Not appropriate for patients at risk for increased intracranial pressure or hypovolemia without careful monitoring.

Because hypertonic solutions draw fluid into the vascular space, they can precipitate circulatory overload in patients with compromised cardiac function, potentially leading to acute respiratory distress and code blue situations. Always consider patient comorbidities such as CHF before initiating hypertonic therapy.

Drug Categories Frequently Administered via IV

IV technicians will encounter a variety of medication classes. Below is a non‑exhaustive list with nursing/technical considerations.

Medication Class Examples Key IV Considerations
Analgesics Opioids (morphine), NSAIDs (ketorolac) Monitor for respiratory depression, hypotension; titrate slowly per order.
Antiemetics Ondansetron Watch ECG changes at high doses (QT prolongation).
Antibiotics Vancomycin, ceftriaxone Infusion rate matters (vancomycin red man syndrome). Follow recommended infusion times.
Vasoactive Agents Norepinephrine, dopamine, epinephrine Require close monitoring; extravasation can cause severe tissue injury—use central lines when indicated and follow extravasation protocols.
Chemotherapeutics Cisplatin, doxorubicin Vesicants vs irritants classification is essential. Specialist authorization and usually central venous access needed. Strict safety handling and disposal per oncology protocols.
Immunosuppressants Cyclosporine, tacrolimus (IV formulations require monitoring) Therapeutic drug monitoring often required. Careful labeling and infusion rates.
Anesthetics/Local Lidocaine (IV for arrhythmias or topical infiltration) Systemic toxicity (CNS, cardiac) with overdosing. Pay attention to concentration and total dose.
Anticholinergics Atropine Used for bradycardia; watch for tachycardia and anticholinergic effects.

Always be aware of look‑alike/sound‑alike drug names. The simple instruction “read the label” cannot be overstated. Distinguish saline from atropine and lidocaine visually and by checking the label and concentration before connecting to a patient. When in doubt, stop and ask. For students or medical assistants, confirm with a supervising nurse or pharmacist.

Infusion Rates, Rapid Infusion Risks, and Clinical Monitoring

Infusion rate determines the rate of pharmacologic effect and fluid redistribution. Rapid infusions in fragile patients can precipitate acute decompensation.

  • Rapid infusion risks: cardiovascular overload (manifested as sudden increase in heart rate and blood pressure, shortness of breath, hypoxia), pulmonary edema, and decompensation leading to code blue events. Monitor vital signs before, during, and after rapid infusions, especially in elderly patients or those with preexisting cardiac or renal disease.
  • Signs of fluid overload: increased jugular venous pressure, crackles on lung auscultation, peripheral edema, rising respiratory rate, desaturation. Notify licensed clinician immediately on detection.
  • When administering IV boluses or rapidly infusing large volumes, use infusion pumps when available to control rate precisely. Gravity infusions are imprecise and risk overinfusion.

Example monitoring parameters

  • Baseline vitals before administering large boluses or vasoactive drugs.
  • Continuous pulse oximetry when indicated.
  • Frequent assessment of infusion site and patient tolerance (every 1–5 minutes during acute boluses, then per policy).

Remember: if a patient develops increased heart rate, increased blood pressure, shortness of breath, or low oxygen saturation during infusion, suspect cardiovascular overload or anaphylaxis depending on context, and initiate emergency protocols while calling for immediate clinical support.

Complications: Recognition, Immediate Actions, and Prevention

Complication recognition is a critical skill for IV technicians. The window for intervention can be short.

Infiltration and Extravasation

Infiltration is leakage of non‑vesicant fluid into surrounding tissues. Extravasation is leakage of vesicant/irritant medication that can cause tissue necrosis.

  • Signs: swelling, pallor, pain, cool or blanched skin, absence of blood return, resistance on flush.
  • Immediate steps: stop infusion, disconnect tubing, aspirate residual medication from catheter if possible, elevate limb, notify clinician, and follow facility extravasation protocol which may include antidote administration.
  • Prevention: choose appropriate catheter size and site, confirm blood return before administration, use central access for vesicant drugs when indicated.

Infection and Phlebitis

  • Local infection and phlebitis: erythema, warmth, tenderness, purulent drainage. Systemic catheter-related bloodstream infections (CRBSI) may present with fever or sepsis.
  • Prevention: strict asepsis on insertion and dressing changes; chlorhexidine skin prep with appropriate contact time; avoid touching the site after antisepsis; replace dressings per policy.
  • Documentation: chart time, gauge, location, dressings applied, and patient response — these records are legal protection and continuity of care.

Air Embolism

Air introduced into the venous system can travel to the pulmonary circulation and is life‑threatening. Prevention includes priming tubing properly, clamping catheters when disconnected, and using air detection on infusion pumps or closed systems.

Resistance on Flush

If you experience resistance on flush, stop. Resistance suggests extraluminal placement or a kinked catheter. Do not force the syringe; forcing can cause catheter rupture or tissue damage. Reassess, consider removal, and notify the supervising clinician.

Blood Draws from Lines and Timing after Medication Doses

Lines that have been used to infuse medications require caution before drawing blood samples. Some medications may contaminate samples and lead to inaccurate laboratory results.

  • Follow institutional policy for drawing blood from catheterized limbs or ports. Many facilities recommend drawing from a peripheral site when the line has recently been used for medication infusion.
  • After a medication‑dosed IV infusion, allow an appropriate dwell/flush and time before drawing blood if using the same line — check pharmacy or laboratory protocol for specific recommended wait times. Some agents require conservatively waiting several minutes after a saline flush and using discard volumes before sampling; others require peripheral venipuncture only.
  • Do not apply a tourniquet on an arm that has an active IV or an infusion running without specific direction — tourniquets may distort flow and dislodge catheters or concentrate local drug exposure.

Geriatric Considerations: NCAD, NIA, and Age-Specific Pharmacology

Older adults have physiologic changes that alter pharmacokinetics and increase risk during IV therapy: decreased cardiac output, reduced renal and hepatic clearance, altered body composition (less lean mass, more adipose), and fragile skin/veins. Integrate evidence and resources from the National Center for Aging and Development (NCAD) perspective and the National Institute on Aging (NIA) for geriatric best practices.

  • Venous fragility: consider smaller gauges (22–24G), use of stabilization devices, and more gentle tourniquet application.
  • Dosing adjustments: many drugs require dose reductions or slower titration due to decreased clearance. Monitor for accumulation and adverse effects.
  • Fluid balance: elderly patients are susceptible to both dehydration and fluid overload. Tonicity selection requires consideration of cardiovascular status.
  • Skin antisepsis: allow appropriate contact time for chlorhexidine; be mindful of fragile skin when securing dressings.

Use NIA resources for geriatric assessment and medication management strategies: NIA. For aging and development educational frameworks, reference NCAD principles in individualized care planning.

Charting, Legal Documentation, and Professional Responsibility

Charting is not administrative fluff — it is legal protection and a clinical communication tool. Accurate documentation should include time of insertion or intervention, catheter gauge and device type, insertion site, any immediate complications or patient symptoms, and the patient’s response to procedure or medications. Document any patient education provided and the name and role of the person performing the procedure.

Key documentation elements:

  • Time and date of insertion or medication administration.
  • Gauge, catheter type, and insertion site with laterality (e.g., “right cephalic vein, forearm”).
  • Medication name, dose, infusion rate, and route.
  • Patient response and any adverse events.
  • Name and credentials of the person performing the procedure.

For student nurses and novice practitioners, charting thoroughly and accurately demonstrates competent practice and provides defense in legal or disciplinary proceedings. When in doubt, chart the facts and immediate supervisor notifications.

Scope of Practice, Supervision, and Ethics

Every IV technician must function within their defined scope. Medical assistants and other trainees should consult supervisors for tasks that are beyond their training.

  • Admit when you lack knowledge. Seeking supervision is an ethical duty and patient safety imperative.
  • When a physician’s authorization is required (e.g., chemotherapy, immunosuppressants), ensure appropriate orders are present before initiating therapy.
  • Never administer medication or perform procedures contraindicated by your license or facility policy.

Special Populations: Pediatrics, Oncology, and Veterinary Considerations

Pediatrics: smaller vessels and lower circulating volume demand smaller gauge catheters and precise dosing. Use appropriate dilution and infusion rates. Pediatric patients may require topical anesthetics, distraction, or sedation strategies. Always verify pediatric dose calculations independently.

Oncology: many chemotherapeutic agents are vesicants or severe irritants. Central venous access (ports, PICCs) is preferred for some agents. Strict safe handling, PPE, and waste disposal are required. Verify drug classification (vesicant vs irritant) before peripheral administration.

Veterinary techs: animal IV access requires familiarity with species‑specific anatomy and behavior. Positioning and stabilization differ, and many drugs used systemically in animals have different dosages and safety profiles. Veterinary techs should coordinate with veterinarians for dosing and access decisions.

Instructor Guidance: Preparing the Next Generation

For instructors teaching IV therapy and pharmacology, success requires preparation, passion, and patience. Managing classroom dynamics and ensuring safe skill acquisition demands a structured approach.

  • Preparation: create clear learning objectives, competency checklists, and simulation scenarios. Ensure clinical partners and preceptors understand performance expectations.
  • Passion: model professional behavior and emphasize the clinical reasoning behind steps, not just the steps themselves. Enthusiasm improves retention and instills professional pride.
  • Patience: learners acquire psychomotor skills at different rates. Provide constructive feedback, deliberate practice, and progressive complexity in scenarios.
  • Classroom dynamics: manage risk by maintaining low student-to-instructor ratios for hands‑on skills. Use simulation to replicate rare but critical complications (e.g., air embolism, extravasation). Encourage peer observation and reflection.
  • Continuous learning: stay current with guidelines from the CDC, NIH, and other authorities and integrate evidence into curricula.

Recommended institutional and national resources for instructors and clinical educators include the CDC and NIH guidance on infection prevention and medication safety: CDC, NIH, and drug information via the National Library of Medicine: NLM.

Erikson’s Psychosocial Development: Applying Adult and Pediatric Developmental Principles to Teaching and Patient Care

Erik Erikson’s eight stages of psychosocial development provide a lens to tailor communication and education strategies for diverse age groups. As an IV technician and educator, understanding these stages improves rapport, consent processes, and adherence to instructions.

Erikson Stage Clinical/Educational Application
1. Trust vs. Mistrust (infancy) Use soothing techniques, parental presence, and gentle explanations. For infants requiring IV therapy, parents’ trust is critical.
2. Autonomy vs. Shame (toddler) Offer limited choices (which arm) to support autonomy and cooperation during IV placement.
3. Initiative vs. Guilt (preschool) Provide simple, empowering explanations (“You are helping your blood find its way”) and praise.
4. Industry vs. Inferiority (school-age) Explain the process, enlist cooperation, and use distraction and rewards for compliance.
5. Identity vs. Role Confusion (adolescence) Respect privacy, ask permission, and provide clear, honest explanations about procedures and body image.
6. Intimacy vs. Isolation (young adult) Address concerns about independence and schedule coordination; provide full informed consent details.
7. Generativity vs. Stagnation (middle adult) Discuss how treatment supports life roles (work, family), and involve patients in planning their care.
8. Integrity vs. Despair (older adult) Respect life experience; explain the rationale for interventions and be sensitive to fears about decline and loss of autonomy.

Integrate Erikson’s stages into patient teaching and into mentorship strategies for student nurses, anesthesia techs, veterinary techs, and dentists who teach or supervise allied health staff. Tailor communication to developmental needs and cultural context.

Practical Medication Safety Tips for the IV Technician

  • Always perform the “five rights”: right patient, right drug, right dose, right route, right time.
  • Verify high‑risk medications and look‑alike vials with a second clinician if required by policy.
  • Use barcode scanning and smart pumps when available for additional error reduction.
  • Never assume a medication is saline simply because the bag is clear — read the label. Be vigilant for look‑alike vials (saline vs. atropine vs. lidocaine), different concentrations, and pre‑filled syringes.
  • When preparing lines for blood draws after infusion therapy, follow facility protocols for discard volumes and wait times. When in doubt, use a peripheral stick to avoid contamination of lab samples.

Education and Continuing Competency Resources

Ongoing education is essential. Several organizations provide guidelines, certification, and training resources particularly relevant to phlebotomy and IV therapy:

  • PCT Institute of Healthcare — programs and training resources for IV and allied health personnel.
  • Phlebotomy Career Training — training and certification pathways for phlebotomy and IV skills.
  • National phlebotomy and IV competency organizations and associations such as NAPTP and other national training associations provide standards and competency frameworks.
  • Federal and evidence‑based resources: CDC, NIH, NLM, and NIA.
  • Professional testing and credentialing bodies: consult national standards and exam boards such as NAPTP and related authorities for certification pathways and competency maintenance.

Documentation Table: What to Chart Immediately

Item Why It Matters
Time of cannulation or medication Provides temporal record for medication onset and line dwell time.
Catheter gauge and device Important for later troubleshooting and infusion compatibility.
Exact insertion site Tracks site complications and allows for targeted assessments.
Patient response and vitals Early documentation of adverse events informs rapid interventions and legal record.
Education provided Proof of informed consent and patient teaching.

Final Practical Reminders for Student Nurses, Nurses, Anesthesia Techs, Veterinary Techs, and Dentists

  • Always obtain and confirm physician authorization for therapies like chemotherapy and immunosuppressants.
  • Use chlorhexidine antisepsis with proper contact time — a minimum of approximately one minute is standard teaching; adhere to facility policy.
  • Insert needles bevel up at 15°–28°. Watch for flashback and do not force the catheter through the vein.
  • Recognize signs of infiltration, extravasation, infection, and air embolism; stop infusion and escalate per protocol when these occur.
  • Read labels carefully — the differential between saline, atropine, and lidocaine is critical. Double‑check medications prior to administration.
  • Do not apply tourniquets on arms with active IV lines unless specifically directed by policy; tourniquets may compromise flow and displace devices.
  • Chart thoroughly: time, gauge, location, and patient response are essential both clinically and legally.
  • Students and non‑licensed staff should consult supervisors for unfamiliar situations — admitting knowledge limits and seeking guidance protects patients and careers.

For additional professional development and certification pathways, consult training entities such as PCT Institute of Healthcare, Phlebotomy Career Training, and the national and federal resources listed above for evidence‑based protocols and updates.

Ready to Earn Your National IV Certification?

The National IV Association (NIVA) offers nationally recognized certification programs for nurses, EMTs, paramedics, and other licensed healthcare professionals. Train online, test when ready, and earn credentials that employers trust.

For foundational training in healthcare careers, visit the PCT Institute of Healthcare or explore certification options at Phlebotomy Career Training.

Enroll Now →

Categories
Uncategorized

Step-by-Step Guide to Peripheral IV Insertion: Technique, Tips, and Best Practices

Step-by-Step Guide to Peripheral IV Insertion: Technique, Tips, and Best Practices

By Nancy Kimmel, MSN, FNP, RN, PhD CHMM, MSN-FNP-BC — National IV Association

Preface: Who this guide is for

This in-depth, clinical guide is written for student nurses, nurses, anesthesia techs, veterinary techs, and dentists who perform or supervise peripheral intravenous (IV) therapy. It is also written for nurse educators and clinical instructors who teach IV insertion competency. I draw on evidence-based practice, bedside experience, and contemporary teaching strategies to provide a comprehensive, step-by-step reference that addresses technique, troubleshooting, pharmacologic considerations, patient populations (including geriatric care), documentation, legal responsibilities, and educator responsibilities.

Why IV therapy matters — brief clinical context

Intravenous therapy is central to modern healthcare. IV access is used for blood collection, chemotherapy, immunosuppressants, vitamin therapy, administration of crystalloids and colloids, antibiotics, and emergency resuscitation. Because fluids and medications delivered intravenously circulate rapidly and directly into the intravascular compartment, errors can produce systemic harm — from localized cellulitis to life-threatening air embolism or extravasation-induced tissue necrosis. Before initiating or performing IV insertion, ensure physician authorization or appropriate standing order per facility policy. Sterile technique and adherence to protocols are non-negotiable.

Anatomy and tissue layers traversed

Understanding anatomy helps the clinician select an appropriate site and anticipate potential complications. A peripheral IV cannula traverses the following layers:

  • Epidermis — the outermost protective layer of skin.
  • Dermis — contains capillaries, nerve endings, and connective tissue that affect pain and bleeding during insertion.
  • Hypodermis (subcutaneous adipose tissue) — thickness affects insertion angle and catheter length required.
  • Venous tunica — the vein’s intima, media, and adventitia form the vascular wall into which the catheter is placed.

Equipment checklist

Before any IV attempt, assemble all equipment to maintain asepsis and minimize interruptions:

  • Appropriate peripheral IV catheter (gauge selection table below)
  • Tourniquet, disposable gloves (sterile or non-sterile per facility policy), gauze
  • Antiseptic agent: chlorhexidine (perform a chlorhexidine, 1 min cleanse at the site when indicated)
  • Tape, transparent dressing, stabilization device
  • Normal saline flush (0.9% NaCl) labeled correctly, extension set or IV tubings as required
  • Sharps container, biohazard disposal bag
  • Tape measure / marker for site selection, patient identification materials, documentation tools

Catheter gauge selection

Gauge selection is driven by therapy type, vein size, and patient condition. The table below summarizes common gauges and typical uses.

Gauge Typical use Clinical notes
14–16G Rapid fluid resuscitation, trauma, blood transfusion Large bore; use only in large veins (antecubital fossa). Risk of vessel trauma.
18G Trauma, major surgery, blood products Common in ED and OR; good balance between flow rate and vessel trauma.
20G Most adult medical infusions, contrast injections Versatile; first choice for many adult medical patients.
22G Older adults, small veins, pediatrics (older children) Lower flow rates; reduces infiltration risk in fragile veins.
24–26G Pediatrics, neonates, very fragile veins Low flow; use microbore tubing. Increased risk of occlusion.

Site selection and vein mapping

Vein selection requires clinical judgment. Common peripheral sites include veins of the antecubital fossa (cephalic, basilic, median cubital) and the dorsal hand veins. General principles:

  • Prefer distal-to-proximal progression: attempt distal veins first to preserve proximal sites for future access.
  • Trace a selected vein at least an inch to ensure a straight segment for catheter placement — “trace veins for an inch.”
  • Avoid the hands and legs when possible, particularly in patients with diabetes or those at higher risk for infection and poor wound healing.
  • Avoid areas of flexion (wrist, antecubital crease) for long-dwelling catheters if possible; if necessary, secure with a stabilization device and transparent dressing.
  • Avoid limbs with compromised circulation, lymphedema, arteriovenous fistulas, or recent mastectomy on that side.

Patient preparation and informed consent

Explain the procedure using language appropriate to the patient’s developmental stage and cognitive status. For student nurses, anesthesia techs, veterinary techs, and dentists learning or refreshing skills, emphasize the importance of communication. Obtain informed consent per institutional policy; for nonverbal or cognitively impaired adults, follow surrogate decision-making protocols.

Integrating Erikson’s psychosocial stages into patient teaching

Erikson’s eight stages of psychosocial development can shape how you teach and comfort patients and students. For example:

  • Infancy (trust vs. mistrust): Use parent-centered communication and gentle touch for neonates and infants.
  • Early childhood (autonomy vs. shame): Offer simple choices (left or right arm) to increase cooperation.
  • School age (industry vs. inferiority): Provide clear explanations and encourage questions to foster mastery.
  • Adolescence (identity vs. role confusion): Respect privacy and offer involvement in decision-making.
  • Young/middle adulthood (intimacy, generativity): Address practical concerns around work and caregiving responsibilities.
  • Older adulthood (integrity vs. despair): In geriatric care, incorporate life history and autonomy; align consent with the patient’s values.

Using this framework helps instructors and clinicians tailor education to the patient’s developmental needs and improves adherence and satisfaction—essential in high-stress procedures such as IV insertion.

Sterile technique and infection prevention

Sterile technique reduces the risk of local and systemic infections. Key practices include:

  • Hand hygiene before and after any contact with the insertion site.
  • Use of chlorhexidine with a chlorhexidine, 1 min cleanse for adult patients unless contraindicated (e.g., neonates, allergy). Allow to air dry.
  • Avoid touching the cleaned site. If contamination occurs, re-cleanse and restart preparation.
  • Use sterile gloves per facility policy and consider addition of mask and drape for high-risk patients.
  • Apply transparent dressings to allow visualization of the site and change dressings per protocol or if soiled/loose.

Remember: IV therapy always requires situational awareness. Fluids and medications circulate rapidly; errors can cause systemic issues including infections, tissue necrosis, and air embolisms.

Step-by-step peripheral IV insertion technique

1. Verify order and patient identity

  • Confirm physician authorization or standing order, check indication (e.g., blood collection, chemotherapy, vitamin therapy), allergies, and relevant labs (coagulation status).
  • Confirm patient identity using two identifiers and explain the procedure.

2. Gather supplies and prepare the patient

  • Prepare equipment as listed above to maintain asepsis and avoid interruptions during the attempt.
  • Position patient comfortably with the selected limb supported and the site slightly below heart level if feasible to facilitate venous filling.
  • Apply a tourniquet proximal to the intended site. Do not use a tourniquet on an arm that already has an IV line in place.

3. Vein selection and visualization

  • Inspect and palpate veins. Warmth and gravity (dependent positioning) can improve venous prominence. Consider a warm pack for 5–10 minutes if veins are not visible.
  • Trace veins for at least one inch to ensure a straight course for catheter advancement.
  • Avoid areas with signs of infection, prior infiltration, hematoma, or venous sclerosis from repeated attempts.

4. Skin antisepsis

Perform the chlorhexidine, 1 min cleanse unless contraindicated. Use back-and-forth friction; allow to air-dry completely. Do not fan or blow on the site; this increases contamination risk.

5. Insertion angle and technique

Use an insertion angle of approximately 15–28 degrees with the bevel up. This shallow angle facilitates entry into the lumen while minimizing the risk of puncturing through the opposite wall. The steps:

  • Stabilize the vein with non-dominant hand — gently pull the skin taut below the insertion site.
  • Hold the catheter with dominant hand; insert the needle bevel up, advancing steadily.
  • Watch for flashback in the catheter hub or chamber. Flashback indicates venous entry. Maintain your angle until you see adequate blood return.
  • After flashback, advance the catheter slightly, then lower the angle and advance the catheter into the vein while retracting the needle.
  • If you feel a sudden give or “pop” and excessive blood returns, you may have passed through the vein — withdraw and apply pressure, then select a new site.

6. Securing the catheter and confirming patency

  • Connect prefilled saline flush or extension tubing. Do not force flush. Resistance on flush indicates the catheter or needle is not intravascular — stop, clamp if present, and reassess.
  • Flush gently with normal saline. Observe for patency and absence of swelling or pain. If infusion is painful or swelling occurs, suspect infiltration or extravasation and stop infusion immediately.
  • Secure catheter with adhesive stabilization and a transparent dressing to allow site visualization.

Recognizing flashback and preventing through-and-through puncture

Flashback is the visual return of blood into the catheter hub and confirms intraluminal entry. When you see flashback:

  • Do not push the catheter forcefully. Advance the catheter smoothly while withdrawing the needle.
  • If you push too hard initially, you may perforate the posterior wall and miss the lumen — the lecture notes caution: “Don’t push too hard or you’ll go through the vein.”
  • If there is no flash and you encounter resistance, withdraw slightly and re-angle or select a different site.

Infusion solutions, osmolarity, and physiologic considerations

Understanding solution characteristics is essential. Briefly:

  • Normal saline (0.9% NaCl) is isotonic. Per the clinical points to emphasize: “Normal saline (0.9% NaCl) is isotonic, matches body pH (7.35-7.45).” Be aware of facility policies and product specifics when choosing fluids.
  • Hypertonic solutions pull water into the vascular space and can reduce edema but may precipitate circulatory overload in patients with heart failure.
  • Hypotonic solutions shift fluid into the intracellular and interstitial spaces and are helpful for cellular dehydration but may worsen edema if used inappropriately.

Always read labels carefully — for example, saline vs. atropine vs. lidocaine — because medications can have significantly different vessel and systemic effects. Labeling errors can be catastrophic.

Drip rates and medication administration risks

Infusion rate must be individualized. Rapid infusion in fragile patients can precipitate cardiovascular overload resulting in signs such as increased heart rate, elevated blood pressure, shortness of breath, and hypoxemia — clinically this can escalate to a code blue. The practitioner must monitor patients receiving large-volume or rapid IV infusions, especially older adults and those with heart failure.

When administering medication via a peripheral IV:

  • Confirm medication compatibility with the IV solution and the catheter size.
  • Use appropriate dilution and infusion pumps for precise rates.
  • Observe for signs of extravasation (pain, swelling, blanching), and be ready with antidotes (e.g., phentolamine for vasoconstrictors) per protocol.

Flushing and drawing blood from IV lines

Flush technique:

  • Use a push-pause technique to create turbulent flow and reduce biofilm formation.
  • Use prefilled saline syringes when available to reduce contamination.
  • If drawing blood through an IV line, follow facility protocols regarding discard volumes and timing. For medication-dosed IVs, “wait appropriate times for medication-dosed IVs before drawing blood” to avoid sample contamination; when in doubt, consult pharmacy or lab services.

Troubleshooting common insertion and maintenance problems

Infiltration and extravasation

Signs: swelling, coolness, pain at the site, slowed or stopped infusion. Extravasation involves vesicant drugs and can cause tissue necrosis. Management:

  • Stop infusion immediately and disconnect tubing.
  • Aspirate residual drug from the catheter if possible, per protocol.
  • Elevate limb, apply warm or cold compress as indicated by the agent involved, and consult pharmacy/specialist.

Phlebitis

Signs: redness, tenderness, warmth, palpable cord along the vein. Management includes removing the catheter, applying warm compresses, and documenting. For infectious phlebitis, obtain cultures and treat per protocol.

Occlusion

Causes include thrombus, valve interference, kinking, or precipitate. Do not force flush. Assess, reposition, and consider a fibrinolytic lock per policy.

Air embolism

Although rare, air embolism is life-threatening. Prevent by ensuring all lines are clamped before disconnecting and that empty spaces in tubing are filled. If suspected, position patient in left lateral decubitus and head-down (Durant’s maneuver) and call for emergency support.

Special populations and considerations

Geriatric patients

Older adults have fragile veins, decreased skin turgor, and comorbidities that increase complication risk. Integrate guidance from geriatric authorities such as the National Center for Aging and Development (NCAD) and the National Institute on Aging (NIA) when planning IV care. Practical considerations:

  • Use smaller gauge catheters (e.g., 22G) and secure carefully to prevent dislodgement.
  • Consider stabilization devices and extra padding to protect fragile skin.
  • Perform more frequent site assessments and document findings. Use gentle cleansing agents and be mindful of chlorhexidine contraindications in certain geriatric skin conditions.

For geriatric resources, see NIA: https://www.nia.nih.gov/.

Pediatrics

Adjust technique and equipment size for children and neonates. Use distraction, parental involvement, and age-appropriate explanations. For neonates, chlorhexidine use is limited or modified and specialized microbore equipment and smaller gauges are required.

Veterinary considerations

Veterinary techs must account for species differences in vein anatomy, sedation level, and behavior. Principles of aseptic technique and catheter care are similar, but device sizes and securement strategies differ. Veterinary techs should follow local veterinary protocols and seek supervision when learning human-based techniques.

Documentation and legal/professional responsibilities

Charting is both a clinical and legal safeguard. Document:

  • Time of insertion and number of attempts
  • Catheter gauge and length
  • Exact location (include laterality and anatomic landmark)
  • Patient response to procedure and any analgesia used
  • Type and amount of flush, dressing applied, and any complications
  • Education provided and the patient’s understanding

Accurate documentation (time, gauge, location, response) provides legal protection and continuity of care.

Scope of practice and delegation

Know your scope of practice. Medical assistants (MAs) and students must consult supervisors and follow institutional policies. If a task exceeds your credentials or comfort, seek supervision and admit when you lack knowledge—this is a professional responsibility that protects patients.

Education and instructor best practices

As an educator, combine technical skill instruction with cognitive and affective learning strategies. The instructor page of any IV training curriculum should emphasize three Ps: preparation, passion, and patience.

Preparation

  • Prepare a detailed lesson plan that includes equipment lists, demonstration steps, common complications, and assessment criteria.
  • Set up simulation stations to mimic clinical reality and provide repeated deliberate practice opportunities for student nurses, nurses, anesthesia techs, veterinary techs, and dentists.

Passion

Demonstrate enthusiasm for safe practice. Students learn through role modeling; positive, authoritative teaching builds learner confidence and emphasizes the importance of patient-centered care.

Patience and classroom dynamics

Managing classroom dynamics requires patience. Tailor feedback to learner level—novices may need stepwise instruction, while advanced learners benefit from scenario-based challenges. Encourage questions and cultivate a psychologically safe learning environment where learners can admit mistakes and learn from them.

Continuous learning and competency maintenance

IV therapy skills require ongoing assessment. Encourage participation in refresher courses and use competency checklists. Recommend reputable training partners for continuing education such as PCT Institute of Healthcare and Phlebotomy Career Training for phlebotomy and peripheral IV skill development.

Teaching learners using Erikson’s framework

When instructing student nurses and other learners, adapt instructional strategies to their developmental and professional stage—applying Erikson’s stages in the classroom:

  • Encourage trust building in novices through mentorship (trust vs. mistrust).
  • Offer opportunities for autonomy with supervised practice (autonomy vs. shame).
  • Promote mastery through repetitive skills labs and summative assessment (industry vs. inferiority).
  • For adult learners (identity and generativity stages), emphasize the role of clinical competence in professional identity formation and patient advocacy.

Calculating drip rates and pump settings — practical notes

Infusion calculations must be accurate. Use volumetric infusion pumps for high-risk medications and pediatric infusions. When calculating manual drip rates, know the tubing drop factor and use the formula:

mL/hr ÷ 60 min × drop factor (gtt/mL) = gtt/min

When in doubt, use a pump. Rapid infusion can cause volume overload — monitor vulnerable patients closely and know the signs of decompensation (increased HR, BP, shortness of breath, low O2 saturation).

Communication with the interdisciplinary team

IV therapy involves interdisciplinary coordination. Inform pharmacy when initiating vesicant infusions or when medication compatibility is uncertain. Notify physicians for any unresolvable access failure, suspected complications, or patient deterioration. For student nurses and novice practitioners, escalating early is safer than attempting repeated blind attempts.

When to seek help and escalation policies

Escalate when:

  • Multiple unsuccessful attempts have occurred (follow facility policy for maximum attempts).
  • There is uncontrolled bleeding, signs of systemic infection, unexpected hypotension or hypoxia, or suspected air embolism.
  • There is uncertainty about medication compatibility, flushing procedures, or blood draw timing after medication infusion.

Documentation templates and sample charting language

Use concise, objective entries. Example:

“08:30 — Peripheral IV insertion, right median cubital vein, 20G x 1.25″, single attempt. Site prepped with chlorhexidine, 1 min cleanse; sterile gloves. Patency confirmed with 5 mL NS flush; no pain or swelling. Secured with transparent dressing. Patient tolerated procedure well. Plan: monitor q2h per IV policy. — N. Kimmel, MSN, RN”

References and additional resources

Authoritative resources for IV therapy, infection control, and geriatric care include:

Key takeaways for practice

  • Always confirm orders and patient identity before starting IV therapy.
  • Use aseptic technique and perform a chlorhexidine, 1 min cleanse when appropriate.
  • Select veins conservatively and trace veins for an inch to ensure a straight path for catheter advancement.
  • Insert the catheter at 15–28 degrees with the bevel up and watch for flashback; do not push too hard to avoid through-and-through puncture.
  • Read medication labels carefully (e.g., saline vs. atropine vs. lidocaine) and respect compatibility and timing for blood draws after medication-dosed IVs.
  • Document time, gauge, location, and patient response; documentation is legal protection.
  • Students and MAs should consult supervisors and never perform procedures beyond their scope of practice—admit when you lack knowledge.
  • Instructors: emphasize preparation, passion, patience, classroom management, and continuous learning. Use Erikson’s psychosocial stages to adapt teaching and patient education.
  • For geriatric patients, incorporate NCAD and NIA guidance — fragile veins and skin require modified technique and increased monitoring.

Appendix: Quick checklists

Pre-insertion checklist

  • Order verified and indication confirmed
  • Patient identity verified; consent obtained
  • All equipment prepared and within reach
  • Site selected and traced for at least 1 inch
  • Skin cleaned with chlorhexidine, 1 min cleanse if appropriate
  • Tourniquet applied (not on limb with existing IV)

Post-insertion checklist

  • Patency confirmed with gentle saline flush (no resistance)
  • Securement and dressing applied
  • Documentation completed (time, gauge, site, response)
  • Patient education delivered (what to report, activity restrictions)
  • Plan for monitoring and dressing changes communicated

For hands-on practice, structured curricula, and certification opportunities, consider resources such as PCT Institute of Healthcare and Phlebotomy Career Training. These platforms provide foundational and advanced training relevant to student nurses, nurses, anesthesia techs, veterinary techs, and dentists whose scope includes peripheral IV access.

Ready to Earn Your National IV Certification?

The National IV Association (NIVA) offers nationally recognized certification programs for nurses, EMTs, paramedics, and other licensed healthcare professionals. Train online, test when ready, and earn credentials that employers trust.

For foundational training in healthcare careers, visit the PCT Institute of Healthcare or explore certification options at Phlebotomy Career Training.

Enroll Now →

Categories
Uncategorized

NIVA Code of Ethics and Scope of Practice for IV Technicians

NIVA Code of Ethics and Scope of Practice for IV Technicians

By Nancy Kimmel, MSN, FNP, RN, PhD CHMM, MSN-FNP-BC

This comprehensive resource provides an in-depth, clinically focused examination of the National IV Association (NIVA) Code of Ethics and Scope of Practice for IV technicians. It is written for student nurses, nurses, anesthesia techs, veterinary techs, and dentists who perform or supervise intravenous (IV) procedures, and for educators who train them. The content synthesizes core IV clinical principles, procedural safety, professional responsibilities, and educational methods while integrating foundational psychosocial theory (Erikson) and geriatric care considerations (National Center for Aging and Development and the National Institute on Aging).

Overview: Purpose and Audience

NIVA’s Code of Ethics and Scope of Practice exists to protect patients and the public, to define the professional boundaries that maintain safe practice, and to support ongoing competency-based education. This article is designed to be a practical reference for student nurses, nurses, anesthesia techs, veterinary techs, and dentists, and for the instructors who teach them.

Why a Code of Ethics and Defined Scope Matter

IV therapy is powerful: fluids and medications delivered intravenously circulate systemically within seconds. Errors are not localized—they produce systemic effects. The misuse of IV routes can cause infections, tissue necrosis, infiltration/extravasation, air embolisms, volume overload leading to cardiopulmonary decompensation, and medication errors. An explicit Code of Ethics and a clearly defined Scope of Practice set expectations for clinical competence, patient safety, communication, documentation, and interprofessional collaboration.

The NIVA Code of Ethics: Principles and Practical Applications

The following ethical principles are central to NIVA’s Code of Ethics and must be interpreted in the context of bedside IV care, education, and interprofessional practice.

1. Respect for Patient Autonomy

Patients have the right to informed consent, to refuse IV treatments, and to receive information about risks, benefits, and alternatives. IV technicians should provide clear, age- and developmentally appropriate explanations and escalate consent issues to the supervising nurse or physician when necessary. Student nurses and trainees must be supervised while obtaining consent and performing invasive procedures.

2. Beneficence and Non-maleficence

Do good; avoid harm. For IV technicians this includes strict adherence to sterile technique (e.g., chlorhexidine skin antisepsis with a one-minute frictional scrub where indicated), careful vein selection, correct catheter selection and securement, proper labeling and checking of infusion solutions (read the label carefully—saline vs atropine vs lidocaine), and immediate response to signs of complication. Never push through resistance during insertion or during a flush; resistance frequently means you are not intravascular.

3. Competence and Scope Awareness

Stay within your authorized scope. Medical assistants and IV technicians must consult supervising nurses or physicians when any aspect of the procedure, medication administration, or patient condition exceeds their training. Admit when you lack knowledge. Chart thoroughly (time, gauge, location, patient response) for legal protection and continuity of care.

4. Confidentiality and Professional Boundaries

Maintain patient privacy and avoid dual relationships that could impair clinical judgment. In education settings, model professional boundaries for student nurses and other trainees.

5. Veracity and Accountability

Accurate documentation and truthful communication are non-negotiable. Report errors and near misses through institutional channels and participate in root cause analyses and quality improvement. Ethical practice includes advocating for patient safety and system improvements.

6. Justice and Fairness

Provide equitable IV care without discrimination. This includes allocation of limited resources (e.g., ultrasound devices) based on clinical need and ensuring vulnerable populations—older adults, pediatrics, individuals with disabilities—receive appropriate assessment and accommodations.

Scope of Practice: What IV Technicians May and May Not Do

NIVA’s Scope of Practice delineates authorized tasks, required supervision levels, and activities that must be performed by licensed clinicians.

  • Authorized tasks (typical): peripheral IV insertion, peripheral IV maintenance, dressing changes, peripheral IV discontinuation, basic troubleshooting (e.g., unclamping tubing, checking flow), saline flushes per protocol, documentation, and appropriate escalation.
  • Require direct supervision or a licensed provider: medication administration beyond flushes (depends on state/agency), blood product administration, central line insertion/management, drawing arterial blood gases, advanced troubleshooting for suspected extravasation of vesicants.
  • Prohibited unless separately credentialed: central venous catheter insertion, peripherally inserted central catheter (PICC) insertion, infusion of chemo agents or other high-risk medications without credentialing, independent changes to prescribed infusion rates or solutions.

Medical assistants (MAs) must consult supervisors and must never exceed their authorized scope. The ethical duty to “do no harm” requires immediate consultation when patient condition changes, when there is uncertainty, or when equipment or medication labels are unclear.

Clinical Foundations: Principles of Safe IV Therapy

Understanding the clinical foundations is essential for ethical, competent practice. The following sections summarize critical technical knowledge.

Indications for IV Access

Common indications include blood collection, chemotherapy, immunosuppressant infusion, vitamin therapy, fluid resuscitation, administration of parenteral medications, and emergent access for unstable patients. All IV therapy requires appropriate physician authorization or delegated provider order per institutional policy.

Vein Selection and Anatomy

Choose veins that maximize catheter longevity and minimize complications:

  • Antecubital fossa veins (cephalic, basilic, and median cubital) are common initial choices for adults. Trace a vein for an inch to ensure continuity and suitable caliber before cannulation.
  • Avoid hands and legs unless necessary. Avoid legs especially in diabetics and patients with peripheral vascular disease due to venous stasis and thrombotic risk.
  • In pediatric or geriatric patients, superficial veins on the dorsum of the hand may be used cautiously; however, elder skin fragility and venous fragility require smaller-gauge catheters and atraumatic technique.

Insertion Technique

Key technical points every student nurse, nurse, anesthesia tech, veterinary tech, and dentist who performs venipuncture must master:

  • Position the patient and site for comfort and visibility. Use appropriate lighting and a stable platform.
  • Apply a tourniquet and palpate the vein. Do not leave a tourniquet on arms that already have an IV line in situ for blood draw or other procedures—this is a safety rule.
  • Perform antisepsis with chlorhexidine (or approved alternative) and allow the frictional scrub to dry; the recommended one-minute cleanse (or manufacturer’s guidance) reduces pathogen transmission.
  • Insert the catheter at a 15–28 degree angle with the bevel up. Lower the angle as you approach the vein. Watch for flashback; flashback indicates intraluminal entry. Do not “push through”—if you push too hard you’ll go through the opposite wall of the vein and create infiltration or extravasation.
  • After insertion, stabilize the catheter, flush gently with normal saline. Resistance on flush indicates malposition or infiltration—do not force. If resistance occurs, stop and reassess.

Layers Traversed and Vascular Structure

A cannula or needle traverses the epidermis, dermis, hypodermis (subcutaneous tissue), and then the venous tunica. Understanding this layered anatomy helps explain potential complications—bleeding under the skin (hematoma), infiltration into subcutaneous layers, and vessel wall trauma.

Needle and Catheter Selection

Needle gauge selection balances flow needs against vessel trauma. Use the smallest gauge that safely delivers the ordered therapy. The table below summarizes typical gauge selection and clinical uses.

Gauge Common Uses Pros/Cons
14–16G Rapid transfusion, trauma resuscitation High flow; increased vessel trauma risk
18G Surgery, blood products Good balance of flow and safety
20–22G General IV therapy, medications, blood draws Most common for adults
22–24G Pediatrics, fragile veins, elderly Less trauma; slower infusion rates

IV Fluids: Physiology and Clinical Effects

Understanding fluid tonicity and osmotic effects is essential for safe IV therapy.

Solution Type Primary Effect Clinical Indications / Cautions
Isotonic (e.g., Normal Saline 0.9% NaCl) Stays predominantly in the vascular space Used for volume resuscitation and maintenance. Normal saline is isotonic. Note: normal plasma pH is 7.35–7.45; choose fluids mindful of acid-base status and institutional protocols.
Hypertonic Draws water into the vascular compartment from cells Used to reduce cellular edema (e.g., cerebral edema). Can precipitate volume overload—high risk for congestive heart failure (CHF) patients.
Hypotonic Pushes water out of vasculature into tissues and cells Used for intracellular dehydration. Can worsen hypotension or cause edema if used improperly.

Rapid infusion in fragile patients may precipitate cardiovascular overload, pulmonary edema, and acute decompensation—manifested by increased heart rate, elevated blood pressure, shortness of breath, and low oxygen saturation, which can escalate to a code blue situation.

Medication Considerations and Drip Rates

Drip rates and medication administration require careful calculation and monitoring. IV technicians must confirm orders, double-check medication labels (saline vs atropine vs lidocaine), and follow institutional protocols for medication admixture and administration rates.

  • Some medications are vesicants or irritants—extravasation can cause tissue necrosis. Treat vesicants per institutional policy and call for licensed provider intervention immediately for suspected extravasation.
  • Allow appropriate dwell time and flush protocols between medication-dosed IV infusions and subsequent blood draws. Institutional policies dictate specific wait times and flushing volumes; always follow the supervising clinician’s orders.

Complications of IV Therapy and Early Recognition

Early recognition and timely interventions reduce morbidity. Common complications include:

  • Infiltration/extravasation: swelling, pain, coolness at site; stop infusion and follow extravasation protocol.
  • Phlebitis: pain, erythema, warm along vein; remove catheter and treat per policy.
  • Infection/bacteremia: fever, erythema, drainage; maintain strict sterile technique to reduce risk.
  • Hematoma: bruising at site due to vessel puncture—apply pressure and monitor.
  • Air embolism: sudden respiratory distress, hypotension—prevent by eliminating air in lines and using air-elimination techniques; treat emergently.
  • Fluid overload/pulmonary edema: monitor at-risk patients (CHF, renal failure) closely for increased HR, elevated BP, shortness of breath, low O2 sat.

Documentation and Legal Protection

Comprehensive charting is essential both for patient safety and legal protection. Document the following elements consistently:

  • Time of insertion/removal
  • Gauge and catheter type
  • Exact location (e.g., “right antecubital fossa — cephalic vein”)
  • Number of attempts
  • Patient response and condition (e.g., pain, swelling)
  • Flush volumes used and response to flush (note resistance or free flow)
  • Medications administered through the line and timing
  • Education provided to patient/family and consent status

Accurate documentation protects the clinician and supports continuity of care. Student nurses should have supervised practice in documenting IV procedures until competency is demonstrated.

Interprofessional Collaboration and Communication

IV technicians, nurses, student nurses, anesthesia techs, veterinary techs, and dentists must practice clear handoffs and immediate reporting of adverse events. Use standardized communication tools (e.g., SBAR—Situation, Background, Assessment, Recommendation). When in doubt—consult. For MAs and other non-licensed staff, the expectation is timely escalation to a supervising nurse or provider.

Education and Instructor Responsibilities

Instructors who train IV technicians and student nurses must embody the principles of the Code of Ethics and adapt their teaching to diverse learners and clinical contexts. Key instructor competencies include:

Preparation

Develop structured lesson plans, simulation scenarios, and objective competency checklists. Integrate evidence-based guidelines and current infection-prevention standards. Provide learners with pre-class materials and assessment rubrics.

Passion

Model enthusiasm for patient safety and clinical excellence. Passion sustains learner engagement and fosters a culture of continuous improvement. Passionate educators inspire curiosity and adherence to best practices.

Patience

Skill acquisition for IV procedures requires repeated practice, feedback, and time. Recognize varying learner paces and provide remediation. Use deliberate practice and reflective debriefs after simulated or clinical encounters.

Managing Classroom and Clinical Dynamics

Maintain a psychologically safe learning environment. Balance didactic content, demonstration, and hands-on practice. Mitigate bullying or humiliation—these behaviors are antithetical to professional development and ethical practice.

Continuous Learning

Promote ongoing competency assessments, continuing education, and interprofessional learning. Keep curricula aligned with national guidance from agencies like the Centers for Disease Control and Prevention (CDC) and the National Institutes of Health (NIH).

Integrating Erikson’s Psychosocial Stages into IV Education and Patient Care

Erik Erikson’s eight stages of psychosocial development provide a framework to tailor communication and teaching strategies for both patients and learners. Below is an applied map of the eight stages and recommended approaches for IV technicians and instructors.

Erikson Stage Developmental Task (Brief) Application to Patient Education and Learner Teaching
Infancy: Trust vs Mistrust Establish trust through consistency and care Use calm, reassuring tones; involve caregivers. For student learners, create a safe initial practice environment.
Toddlerhood: Autonomy vs Shame Encourage independence while providing boundaries Offer small choices (which arm) when appropriate. Allow learners to try simple tasks with supervision.
Preschool: Initiative vs Guilt Foster initiative Explain procedures playfully and positively to children. For learners, encourage initiative with guided projects.
School-age: Industry vs Inferiority Develop competence Provide concrete explanations and involve school-age patients in choices. Use competency checklists for students.
Adolescence: Identity vs Role Confusion Support identity formation Respect autonomy and privacy; offer clear rationales for IV therapy. For students, support professional identity formation.
Young Adulthood: Intimacy vs Isolation Develop meaningful relationships Encourage open communication and involve partners when appropriate. Use mentorship models for early-career clinicians.
Middle Adulthood: Generativity vs Stagnation Contribute to future generations Engage experienced clinicians in teaching and quality improvement; model lifelong learning.
Late Adulthood: Integrity vs Despair Reflect on life with a sense of fulfillment For older adults receiving IV care, provide dignity, clear explanations, and involvement in decision-making. Address legacy concerns and comfort.

Using Erikson’s model helps student nurses, nurses, anesthesia techs, veterinary techs, and dentists tailor communication strategies across the lifespan. For example, older adults in the “integrity vs despair” stage may value autonomy and clear explanations—align education accordingly. Learners at different stages of professional development also respond better to approaches congruent with their psychosocial needs.

Geriatric Considerations: NCAD and NIA Guidance

IV therapy in older adults requires particular attention. The National Center for Aging and Development (NCAD) and the National Institute on Aging (NIA) emphasize comprehensive assessment and individualized care plans.

Key geriatric considerations include:

  • Fragile skin and veins: Use smaller gauge catheters (e.g., 22–24G), gentle tape removal techniques, and consider stabilization devices.
  • Polypharmacy and altered pharmacokinetics: Be mindful of medication selection and infusion rates; consult pharmacy when necessary.
  • Comorbid cardiac or renal disease: Monitor fluid status closely. Avoid aggressive hypertonic infusions in CHF patients.
  • Hydration status: Many older adults have baseline dehydration or impaired thirst perception; isotonic fluids may be preferred for volume resuscitation.
  • Cognitive impairment: Use clear, calm explanations and involve caregivers. Ensure consent criteria are satisfied and document surrogate decision-maker involvement when required.

Specialized Contexts: Veterinary and Dental IV Access

Veterinary techs and dentists performing IV procedures operate in specialized contexts but must adhere to the same ethical, sterile, and safety principles. For veterinary practice, anesthesia techs and veterinary techs should ensure species-specific anatomy and behavior are accounted for, and consult supervising veterinarians for sedated or anesthetized patients. Dentists sometimes obtain venous access for procedural sedation—this requires competency, adherence to institutional sedation policies, and immediate availability of resuscitation equipment.

Training Resources and Certification Pathways

Ongoing education and credentialing strengthen practice. Consider the following training resources and organizations to support competency development:

  • PCT Institute of Healthcare — a resource for allied health education and career development: PCT Institute of Healthcare
  • Phlebotomy Career Training — targeted programs for phlebotomy and venipuncture skills: Phlebotomy Career Training
  • National Association of Phlebotomy Training Programs (NAPTP) for program standards
  • National Testing Associates (NTA)—credentialing and testing resources: NTA
  • Evidence-based infection prevention and clinical guidance from government sources: CDC, NIH, and the National Library of Medicine

Quality Assurance, Reporting, and Continuous Improvement

Quality assurance programs should include competency verification, ongoing audits of sterile technique, monitoring of complication rates (phlebitis, infection, infiltration), and reviews of documentation completeness. When errors occur, non-punitive reporting systems encourage transparency. Participate in root cause analyses and corrective action planning.

Case Studies and Practical Scenarios

Scenario 1: Resistance on Flush

A 68-year-old patient with CHF has a newly placed peripheral IV for fluid administration. During the initial saline flush, the IV technician experiences resistance. What to do?

  • Stop flushing immediately—do not force.
  • Assess the site for swelling, tenderness, blanching (signs of infiltration), and assess for any kinks or clamped tubing.
  • Notify the supervising nurse or provider. If infiltrated or malpositioned, discontinue and re-site per policy.
  • Document findings and patient response (time, catheter gauge, location, response).

Scenario 2: Rapid Infusion Signs of Overload

A frail patient receives a bolus of isotonic saline. Shortly thereafter the patient exhibits tachycardia, dyspnea, and low O2 saturation. Actions:

  • Stop the infusion and place the patient upright if tolerated.
  • Call for immediate nursing/medical assistance; this may be evolving into pulmonary edema.
  • Administer oxygen and monitor vitals. Prepare to support airway and circulation per protocol.
  • Document the event thoroughly, including pre-event vitals, infusion type and rate, and actions taken.

Ethical Dilemmas and Decision-Making

The NIVA Code of Ethics equips IV technicians to identify and navigate ethical dilemmas. Common dilemmas include requests to perform procedures beyond scope, conflicts between patient wishes and medical orders, and balancing trainee autonomy with patient safety. Apply ethical principles—beneficence, non-maleficence, autonomy, justice—and institutional policies to guide actions. When in doubt, escalate and document the consultation.

Teaching Recommendations for Instructors

Instructors should incorporate multi-modal teaching strategies, including:

  • Didactic sessions covering anatomy, fluid physiology, medication safety, and ethics.
  • Simulation-based mastery learning with standardized checklists and deliberate practice.
  • Supervised clinical experiences with progressive responsibility for student nurses and trainees.
  • Reflective debriefs that integrate Erikson’s psychosocial stages to discuss patient communication and professionalism.
  • Assessment tools that measure skills (insertion technique, aseptic practice), knowledge (fluids and medications), and professional behaviors (communication, documentation).

Documentation Tools and Suggested Charting Language

Use clear, standardized language. Examples:

  • “08:35 — Peripheral IV inserted, right antecubital fossa (cephalic vein), 20G catheter. One attempt. Flush with 10 mL normal saline—patent, no resistance. Dressing applied. Patient tolerated procedure without complication. — N. Kimmel, RN (supervisor: Dr. Smith present)”
  • “14:10 — Assessed IV site: mild erythema, no drainage. Patient reports 2/10 discomfort. Catheter removed per protocol; site compressed, dressing applied. Notified supervising RN. Documented in EHR.”

Regulatory and Institutional Considerations

State boards of nursing, the Centers for Medicaid & Medicare Services, and institutional policies define permissible activities for IV technicians. Always confirm local regulations and institutional policies. Credentialing bodies like NAPTP and NTA provide programmatic standards and testing that support compliance and competence.

Practical Tips and Reminders for Clinicians and Students

  • Always read the medication/fluid label before connecting to the IV. Mistaking saline for another medication (e.g., atropine, lidocaine) is a preventable error.
  • Remember the insertion angle: 15–28 degrees, bevel up, monitor for flashback. Lower the angle as you enter the vein.
  • Trace a chosen vein for at least an inch to ensure adequate length and caliber.
  • Do not routinely use hands or legs for IVs unless necessary; diabetics and patients with peripheral vascular disease have higher complication rates in lower extremities.
  • Allow the antiseptic solution to dry fully—following a one-minute frictional scrub with chlorhexidine where indicated—before insertion.
  • If you meet resistance on flush, stop; reassess and escalate if necessary.
  • Document—time, gauge, location, response—every intervention accurately for legal protection and continuity of care.
  • MAs and other support staff must consult supervisors with any uncertainty and must not perform tasks beyond delegated authority.

Resources and Further Reading

Authoritative resources for continued learning and policy reference include:

Appendix: Checklists and Competency Tools

Pre-Insertion Checklist

  • Confirm order and indication for IV access.
  • Verify patient identity using two identifiers.
  • Explain procedure, obtain consent, and address questions.
  • Assemble equipment; verify expiration dates and integrity of packaging.
  • Perform hand hygiene and don appropriate PPE.
  • Palpate and select appropriate vein; avoid compromised limbs.
  • Apply antiseptic and allow to dry (one-minute scrub with chlorhexidine where indicated).

Post-Insertion Competency Checklist

  • Catheter secured and dressing applied per protocol.
  • Flush performed and patency confirmed without resistance.
  • Infusion set-up completed and checked for rate and compatibility.
  • Patient comfort assessed and education provided.
  • Documentation completed: time, gauge, location, response, supervising clinician.

Final Notes on Professionalism and Lifelong Learning

Professionalism in IV practice emerges from a synthesis of technical skill, ethical clarity, and interprofessional collaboration. Student nurses, nurses, anesthesia techs, veterinary techs, and dentists must commit to continuous learning, seek supervision when needed, and maintain meticulous documentation. The NIVA Code of Ethics and Scope of Practice are living documents: they require active engagement, regular review, and thoughtful application in real-world clinical and educational contexts.

Ready to Earn Your National IV Certification?

The National IV Association (NIVA) offers nationally recognized certification programs for nurses, EMTs, paramedics, and other licensed healthcare professionals. Train online, test when ready, and earn credentials that employers trust.

For foundational training in healthcare careers, visit the PCT Institute of Healthcare or explore certification options at Phlebotomy Career Training.

Enroll Now →

Categories
Uncategorized

IV Therapy in Pediatric Patients: A Complete Clinical Guide

IV Therapy in Pediatric Patients: A Complete Clinical Guide

By Nancy Kimmel, MSN, FNP, RN, PhD CHMM, MSN-FNP-BC

Introduction: The Critical Role of IV Therapy in Pediatrics

Intravenous (IV) therapy is a foundational clinical skill across multiple disciplines: pediatrics, emergency medicine, oncology, perioperative care, and ambulatory settings. For student nurses, nurses, anesthesia techs, veterinary techs, and dentists who may encounter pediatric patients, mastery of pediatric IV therapy is essential for safe, effective care. IV therapy in children supports blood collection, administration of chemotherapy and immunosuppressants, parenteral vitamin therapy, hydration, and urgent medication delivery. All IV orders must be authorized by a licensed physician or other prescriber as defined by institutional policy and local scope of practice.

Indications and Authorization

IV therapy indications common in pediatric practice include:

  • Blood collection for laboratory evaluation and culture.
  • Administration of chemotherapeutic agents and immunosuppressants (requires strict authorization and monitoring).
  • Vitamin and nutritional therapy, including parenteral fluids and electrolytes.
  • Fluid resuscitation, maintenance fluids, and medication delivery (antibiotics, analgesics, vasoactive drugs).

Remember: high-risk therapies such as chemotherapy and immunosuppressants require prescriber authorization, chemo-certified personnel when required, and adherence to institutional chemotherapy safety policies. Errors in IV therapy circulate rapidly and can cause systemic complications including infections, tissue necrosis from extravasation, and, in severe cases, air embolisms or systemic toxicity. Sterile technique and correct verification of medication labels are non-negotiable elements of safe practice.

Anatomy and Vein Selection for Pediatric IVs

Successful peripheral IV insertion begins with anatomic understanding and careful site selection. Pediatric vascular anatomy differs from adults in caliber, position, and accessibility. Vein selection should consider patient age, diagnosis, mobility, and planned therapy duration.

Common Peripheral Sites

  • Antecubital fossa veins: cephalic, basilic, and median cubital veins — often the most palpable and visible veins.
  • Dorsum of the hand — commonly used but should be avoided when possible in infants and toddlers if there are better alternatives.
  • Scalp veins — useful in neonates and infants where peripheral access is limited; use with caution and securement.
  • Foot veins — acceptable when upper extremity access is contraindicated, but avoid in ambulatory children unless necessary.

When selecting a vein, “trace the vein for an inch” to confirm continuity and avoid sites that are tortuous, near flexion points, or have prior infiltration or phlebitis. For patient populations such as diabetics, avoid lower extremity sites when possible due to increased risk of infection and impaired healing. For central access considerations, consult the prescriber and vascular access team.

Pediatric Considerations

In children, vein size is smaller and more collapsible; choose the smallest gauge that accommodates therapy. Use warm compresses, gentle tapping, gravity, or a mild tourniquet to enhance vein fill. In infants, the scalp or dorsum of the hand may be the most reliable. Always balance ease of access with long-term vascular preservation.

Layers Traversed During Insertion

A peripheral IV catheter traverses several tissue layers from skin to vein:

  • Epidermis
  • Dermis
  • Hypodermis (subcutaneous tissue)
  • Venous tunica (vein wall)

Understanding the tissue planes helps clinicians anticipate depth, resistance, and potential complications such as infiltration or extravasation.

Technique: Preparation, Sterile Practice, and Insertion

Proper preparation is the cornerstone of pediatric IV success. This section integrates teaching points for student nurses, nurses, anesthesia techs, veterinary techs, and dentists who may participate in IV-related care.

Preparation and Patient Engagement

  • Confirm the order and indication; verify allergies and current medications.
  • Assemble supplies: appropriate catheter size, chlorhexidine antiseptic, sterile gloves, tape, dressings, flush syringe, extension set, and tape securement devices.
  • Use distraction techniques, parent involvement, topical anesthetic (e.g., EMLA) when appropriate, and age-appropriate explanations. Erikson’s psychosocial stages can guide your communication (see Erikson integration section).

Sterile Technique and Skin Antisepsis

Sterile technique minimizes systemic complications. Use chlorhexidine for skin antisepsis when appropriate; rub for at least 1 minute per evidence-based guidance to reduce surface microbes and improve line safety. Note: in neonates and certain sensitive patients, consult institutional protocols regarding chlorhexidine use and contact precautions.

Insertion Angle and Catheter Advancement

Approach the vein at a 15–28 degree angle with the catheter bevel up. A shallow angle reduces the risk of transfixing the vein. Watch for a reliable flashback in the catheter hub or chamber; this confirms venous entry. Advance the catheter just enough to seat it in the lumen and then lower the angle and advance the plastic catheter off the needle into the vein. If you feel a sudden loss of resistance or a brisk flash then loss of flash when advancing, you may have passed through the vein—withdraw and reassess.

Do not “push too hard” during advancement; forcing the catheter increases the risk of through-and-through perforation and infiltration. After insertion, secure the catheter firmly and test with a gentle flush. Resistance on flush usually indicates the catheter is not fully intravascular or that the tip is against a vessel wall—do not infuse under high pressure.

Catheter Selection and Gauges

Select catheter gauge by therapy type and patient age:

Age/Use Suggested Gauge Comments
Neonates/Infants 24–26G Use smallest possible; consider scalp or foot veins; secure carefully.
Young children 22–24G Balance flow needs and vessel preservation.
Older children/adolescents 20–22G May permit faster infusions; consider future medication viscosity.
Rapid resuscitation (if necessary) 18–20G Use only when rapid volume replacement is clinically indicated.

Complications and Their Recognition

Complications can be local or systemic and may present rapidly in pediatric patients due to smaller circulating volume and higher metabolic demand.

Local Complications

  • Infiltration — IV fluid leaking into subcutaneous tissue; presents with swelling, coolness, and decreased flow.
  • Extravasation — leakage of vesicant medication causing tissue necrosis; requires immediate intervention and physician notification.
  • Phlebitis — inflammation of the vein with pain, redness, and warmth along the vessel.
  • Catheter occlusion — inability to flush; may be due to thrombus or catheter kinking.

Systemic Complications

  • Systemic infection (catheter-related bloodstream infection) — fever, tachycardia, hypotension.
  • Air embolism — sudden respiratory distress, hypotension, neurologic changes; risk with central lines but possible with peripheral lines if not handled properly.
  • Fluid overload/pulmonary edema — particularly in fragile patients with rapid infusion.

Rapid infusion in fragile pediatric patients can precipitate acute cardiovascular decompensation. Clinical signs include increased heart rate, elevated blood pressure, shortness of breath, and falling oxygen saturation — a potential progression to code blue if not recognized and treated emergently.

Fluids, Osmolality, and pH: Clinical Implications

Understanding fluid types and physiological effects is critical when choosing IV fluids for children. Use clear labeling and read every medication label carefully — saline, atropine, lidocaine, and other agents have different indications and risks. Wait the appropriate institutional-specified time after administering medication through an IV before drawing blood from that same line for laboratory accuracy.

Fluid Types

Fluid Classification Physiologic Effect Clinical Use / Cautions
Normal saline (0.9% NaCl) Isotonic Matches intravascular osmolality; commonly used for replacement and maintenance Common first-line fluid. (Lecture note: Normal saline (0.9% NaCl) is isotonic, matches body pH (7.35–7.45) — clinicians aim to maintain physiologic pH.)
Hypertonic solutions (e.g., 3% NaCl) Hypertonic Pulls water into the vascular space from interstitial/cellular compartments Used to treat severe hyponatremia, cerebral edema; risky in heart failure due to volume shifts.
Hypotonic solutions (e.g., 0.45% NaCl) Hypotonic Pushes fluid into cells and interstitial compartments Used cautiously for cellular dehydration; avoid in at-risk patients for cerebral edema.

Note: The classification of a fluid’s effect on body compartments (isotonic, hypertonic, hypotonic) guides the clinician’s choice in treating edema, dehydration, and electrolyte disturbances. Hypertonic solutions can reduce interstitial edema by drawing fluid into the vascular system, but in conditions such as congestive heart failure (CHF) this can precipitate volume overload. Hypotonic fluids move water into tissues and cells, which can be therapeutic in dehydration but dangerous if cerebral edema is present.

Drip Rates, Calculations, and Pediatric Fluid Management

Precise calculation of drip rates is essential in pediatrics because small volume differences are clinically important. Understand microdrip versus macrodrip systems, mL/hr, and gtt/min calculations. Microdrip sets typically deliver 60 gtt/mL; macrodrip sets vary (10, 15, 20 gtt/mL).

Maintenance Fluid Formula (4-2-1 Rule)

Use the 4-2-1 rule to estimate hourly maintenance fluid requirements for children:

  • 4 mL/kg/hr for the first 10 kg
  • 2 mL/kg/hr for the next 10 kg (10–20 kg)
  • 1 mL/kg/hr for each kg >20 kg

Example: A 15 kg child → (4 mL x 10 kg) + (2 mL x 5 kg) = 40 + 10 = 50 mL/hr maintenance.

Drip Rate Calculation Example

Parameters Values
Ordered 50 mL/hr
IV set Microdrip 60 gtt/mL
Formula gtt/min = (mL/hr × gtt/mL) ÷ 60
Calculation (50 × 60) ÷ 60 = 50 gtt/min

Document clearly and confirm pump settings. For rapid infusions, use a controlled infusion pump when available and monitor for signs of circulatory overload — tachycardia, hypertension, respiratory distress, crackles on auscultation, and decreased oxygen saturation.

Medication Safety: Reading Labels and Timing with Blood Draws

Always read medication labels out loud and confirm the “Five Rights” (right patient, right drug, right dose, right route, right time). Saline, atropine, and lidocaine are examples of agents often encountered near IV access — each has distinct indications and adverse effect profiles; be vigilant. Some medications can contaminate blood draws or alter laboratory values; institutional policies guide how long to wait after medication administration before drawing blood from the line and how much wasted volume to discard. If in doubt, draw peripheral blood or consult pharmacy or lab for guidance.

Important operational note: do not apply a tourniquet proximal to an arm that contains an active IV line. Tourniquet application on the same limb may alter infusion dynamics and risk infiltration or interstitial injection if applied improperly.

Monitoring and Documentation: Professional Responsibilities

Accurate documentation is both a patient safety measure and legal protection. Chart the following elements at minimum:

  • Time of insertion and removal
  • Catheter gauge and length
  • Site (specific location, e.g., right antecubital fossa, cephalic vein)
  • Number of attempts and personnel who performed procedure
  • Patient response and tolerance
  • Patency checks and flush records
  • Any complications and interventions implemented

For student nurses and allied personnel such as anesthesia techs, veterinary techs, and dentists involved in IV procedures, documentation demonstrates clinical reasoning and adherence to standards. Medical assistants and other support staff must consult supervisors and remain within their institutional scope of practice. If you lack knowledge or are unsure, admit it and seek assistance — this is a professional ethical responsibility that protects patients and clinicians alike.

Special Populations: Neonates, Infants, and Adolescents

Pediatric patients span a broad developmental range and require age-specific modifications in approach, equipment, and communication. From neonates to adolescents, consider growth, body composition, and psychosocial stage when planning IV therapy.

Neonates and Infants

  • Use the smallest gauge feasible; constant monitoring for infiltration and catheter stability is imperative.
  • Scalp veins can be an acceptable site in infants; secure well and protect from parental hair pulling.
  • Chlorhexidine use in neonates has special considerations—adhere to facility protocols.

Older Children and Adolescents

  • Incorporate the adolescent into decision-making; assent is developmentally appropriate along with parental consent.
  • Consider patient preferences for site and securement where possible to enhance cooperation.

Teaching, Supervision, and Erikson’s Psychosocial Stages

Teaching IV skills to student nurses and instructing caregivers or older pediatric patients requires not only technical instruction but also an understanding of human development. Erikson’s eight stages of psychosocial development can be integrated into teaching strategies to enhance patient and learner receptivity.

Erikson Stage Age Range Teaching Strategy for IV Care
Trust vs. Mistrust Infancy Establish soothing presence; involve caregiver for comfort; use gentle touch and predictable routines.
Autonomy vs. Shame/Doubt Toddler Offer simple choices (e.g., which hand) to support autonomy; use distraction and brief, clear instructions.
Initiative vs. Guilt Preschool Use play, role modeling with dolls, and praise to encourage cooperation.
Industry vs. Inferiority School Age Explain procedures in concrete terms; involve the child in preparation and allow them to “help” as appropriate.
Identity vs. Role Confusion Adolescence Respect privacy and autonomy; provide clear rationale and let adolescents ask questions and participate in decisions.

Applying psychosocial principles enhances trust and adherence. When teaching student nurses, instructors should mirror these principles with learners — foster trust, encourage autonomy and initiative, and support learners through stages of competence.

Instructor Concepts: Preparation, Passion, Patience

For educators teaching IV therapy to student nurses, nurses, anesthesia techs, veterinary techs, and dentists, core instructor attributes improve learner outcomes:

  • Preparation — have equipment and scenarios ready; pre-brief and set clear objectives.
  • Passion — model enthusiasm and clinical excellence to motivate learners.
  • Patience — allow repeated practice and provide constructive feedback.
  • Managing classroom dynamics — set safety norms, debrief after simulations, and ensure psychological safety for learners to make and learn from errors.
  • Continuous learning — update curricula with current evidence and guidelines from agencies such as the CDC and NIH.

Geriatric Considerations and Relevant Resources

Although the focus of this article is pediatric IV therapy, it is important for clinicians who care for multiple age groups to recognize geriatric differences. Elderly patients commonly have fragile, tortuous veins, thin skin, and comorbidities like CHF and renal impairment that affect fluid selection and infusion rate. The National Center for Aging and Development (NCAD) and the National Institute on Aging (NIA) provide resources to inform practice in older adults; cross-referencing geriatric guidance can inform safe care transitions and mixed-age clinical settings.

Relevant resources for evidence-based practice include:

Procedural Variations: Central Lines, PICCs, and Intraosseous Access

Not all vascular access is peripheral. In pediatrics, central venous catheters, peripherally inserted central catheters (PICCs), and intraosseous access serve specific clinical needs:

  • Central venous access — for long-term vesicant therapy, total parenteral nutrition (TPN), and hemodynamic monitoring; increased risk of systemic infection and air embolism; requires provider authorization and sterile insertion technique.
  • PICC lines — often used for medium- to long-term therapy; may be placed by trained nursing teams or interventional radiology; securement and flush protocols are essential.
  • Intraosseous (IO) access — emergency access route for rapid fluid and medication administration in life-threatening situations when peripheral access cannot be obtained.

Emergency Recognition and Response

Rapid recognition of deterioration during IV therapy is critical. Signs of fluid overload and pulmonary edema — increased heart rate, elevated blood pressure, tachypnea, shortness of breath, diminished oxygen saturation — require immediate cessation of infusion, elevation of the head of bed, administration of oxygen, and prompt notification of the provider; in severe cases, activate the emergency response system.

Quality Assurance, Infection Control, and Institutional Policies

IV therapy safety is governed by institutional policy and national guidance. Regular competency assessments, adherence to sterile technique—chlorhexidine skin antisepsis for at least 1 minute per the lecture notes—proper line maintenance, and timely catheter removal when no longer indicated reduce risk. Nursing documentation (time, gauge, location, patient response) serves as both a continuity-of-care tool and legal protection. For allied clinicians and learners, review facility-specific competency checklists and collaborate with vascular access teams.

Pediatric-Specific Communication Strategies

Communicate with children at their developmental level. For toddlers and preschoolers, use simple, concrete language; for school-age children, explain the reason and steps; for adolescents, provide privacy and detailed rationales. Caregivers are partners — involve them as appropriate to reduce anxiety and improve cooperation.

Documentation and Legal Considerations

Chart accurately. Entries should include:

  • Who performed the procedure and when.
  • How many attempts were made; document complications or interventions.
  • Catheter specifics: gauge, length, and exact anatomic site.
  • Patient tolerance and education provided to caregiver and child.

Good documentation is the frontline defense in medicolegal situations and critical for continuity of care across care teams including student nurses, nurses, anesthesia techs, veterinary techs, and dentists who may be involved per institutional policies.

Training Pathways and Resources for Clinicians

Clinicians seeking competency in IV therapy can pursue classroom and hands-on training from accredited programs. Recommended educational partners include:

  • PCT Institute of Healthcare — coursework and clinical skills training relevant to phlebotomy, IV therapy, and allied health roles.
  • Phlebotomy Career Training — focused programs for phlebotomy and vascular access fundamentals useful for student nurses and allied staff.

Interprofessional education that includes student nurses, nurses, anesthesia techs, veterinary techs, and dentists helps build a culture of safety, shared protocols, and mutual respect for scope of practice boundaries.

Simulation and Competency-Based Assessment

Simulation-based education allows repeated, risk-free practice. Create scenarios that incorporate complications such as infiltration, extravasation, air embolism, and rapid decompensation. Use objective structured clinical examination (OSCE) checklists to assess insertion technique, sterile field maintenance, labeling, and documentation. Instructors should emphasize preparation, passion, and patience when supervising learners during simulation and bedside practice.

Practical Tips and Pearls for Clinical Practice

  • Always verify the IV order is current and authorized before initiating therapy.
  • Use the smallest gauge that will safely deliver therapy; preserve future access sites.
  • Perform chlorhexidine skin prep with a one-minute scrub when indicated and per facility policy.
  • Insert at a 15–28 degree angle with bevel up; observe for flashback to confirm venous entry.
  • Avoid pushing forcefully; if resistance on flush occurs, stop and reassess for proper placement.
  • Do not use the limb with an active IV for blood pressure cuff application or proximal tourniquet use.
  • When administering vesicants or irritants, monitor closely for extravasation and have an institutional extravasation protocol available.
  • Document time, gauge, site, number of attempts, complications, and patient response — this provides legal protection and continuity of care.
  • Admit knowledge gaps and consult supervisors or vascular access specialists when needed.

Frequently Asked Questions for Learners and Clinicians

Q: How long should I scrub the skin before IV insertion?

A: Use chlorhexidine as recommended and perform a vigorous scrub for approximately 1 minute before allowing skin to air dry. Follow institutional protocol regarding antiseptic choice for neonates and patients with contraindications.

Q: When is it safe to draw blood from an IV line that has been used to administer medications?

A: Follow facility-specific policy. Some medications require waiting periods, specific waste volumes, or avoidance of line draws altogether. If uncertain, draw from a peripheral site or consult pharmacy/laboratory for guidance.

Q: What if I get resistance when I try to flush an IV?

A: Stop the flush. Assess for kinking, catheter migration, infiltration, or a thrombotic occlusion. Do not force a flush. Repositioning the limb or gentle aspiration may help; consult prescriber if occlusion cannot be resolved.

Q: What are early signs of fluid overload in children?

A: Increased respiratory rate, tachycardia, hypertension, crackles on lung auscultation, and decreasing oxygen saturation are early indicators. Stop infusion and escalate care immediately.

Key References and Resources

For clinical updates, evidence reviews, and practice guidelines consult the following:

  • CDC — infection control and vascular access guidance.
  • NIH — clinical research updates and guidelines.
  • NLM — medical literature and drug information resources.
  • NIA — resources specific to aging and geriatric considerations relevant to mixed-age practice settings.
  • NAPTP — phlebotomy training resources and standards.
  • NTA — testing and certification resources.
  • PCT Institute of Healthcare — educational programs for allied health clinicians.
  • Phlebotomy Career Training — phlebotomy and IV practice resources.

Final Practical Scenarios for Learners

Students and clinicians should rehearse scenario-based learning:

  • A febrile infant requiring blood culture and IV antibiotics — practice site selection, sterile preparation, and careful documentation.
  • An adolescent receiving outpatient chemotherapy — review authorization, central versus peripheral access decisions, vesicant safety checks, and home-care education.
  • A dehydrated toddler needing maintenance fluids — calculate maintenance rate using 4-2-1, select appropriate microdrip settings, and monitor for tolerance.
  • An infant with collapsed peripheral veins — strategize alternative access including scalp veins, intraosseous access in emergencies, and early involvement of vascular access specialists.

This clinical guide integrates technical procedure, pharmacologic awareness, psychosocial teaching strategies, and professional responsibilities. It is designed for student nurses, nurses, anesthesia techs, veterinary techs, and dentists who require a comprehensive reference for pediatric IV therapy in varied clinical contexts. For hands-on training and certification pathways, consider the PCT Institute of Healthcare and Phlebotomy Career Training resources listed above.

Ready to Earn Your National IV Certification?

The National IV Association (NIVA) offers nationally recognized certification programs for nurses, EMTs, paramedics, and other licensed healthcare professionals. Train online, test when ready, and earn credentials that employers trust.

For foundational training in healthcare careers, visit the PCT Institute of Healthcare or explore certification options at Phlebotomy Career Training.

Enroll Now →